

maxi-model
UK/US/ROW steam narrow gauge railways 1:1

Let's start at the beginning. Around 15 years ago Andrew Steele, of the now sadly defuct Garden Railway Centre outside Cheltenham, offered me a cartoon like "mini" caboose. I reckoned he wanted it off his stock list, very nice price, but I still said no. It didn't fit my supposed "no freelance" ethos. Roll forward to 5 years ago, I now have a diminuative Porter as part of the "West Well Lumber Co." roster, and a few wagons and disconnects for it to do some switching around the yard, all link and pin couplers rather than the standard knuckle type the railroad used, up till then. Some locos now have both types fitted. Got a natty match wagon, just in case, too. So, I'm thinking, well, we need a lil' caboose if we send the Porter upcountry with it's natty range extending tender. It then occurs to me perhaps I should have bought that kit off Andrew. End up getting self same direct from Ozark Miniatures, full price + shipping and UK customs duty @ 20%. Doh ! It sat unbuilt till now. The acquisition of another little diminiative loco, a 2-6-0 Mogul with a tender, arrives and the workshop goes into full swing getting the 2 locos converted battery/rc operation and given a voice. Hmm, better get that lil' bobber together. A quick and dirty build, nothing special. Oh dear, the workshop staff have got a little carried away. So here goes....
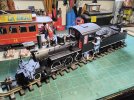 The Mogul
 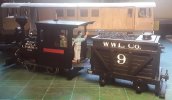 The Porter and Tender
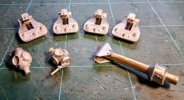
 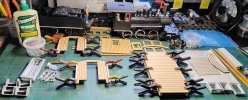 Lil' Caboose kit, laid out
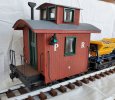
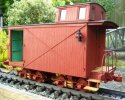
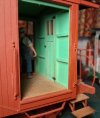
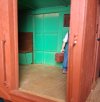
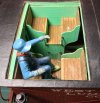
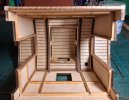
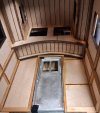
So work starts. The assembly instructions, shall we say, lack some of the finer and clearer details needed. This creates one or two hiccups. West Well's works staff have outshopped a quite few woodies over the years and are quite experienced with white metalwork too. And a few other materials. Though we never claim to be perfect.Also the maker's foundry appear to be using some very tired old molds, requiring a lot of time consuming fettling of metal. There are one or two errors found in the timber supplied too, needing fixing. Like the underframe being slightly out at one end, needing packing, otherwise the steps won't fit that end. Then there's the roof truss's execution that results in the roof line is a little bit higher than it should be. That requires an even more, undercut, curved fettling of the metal window frames that fit to the cupola bit to clear it. Glazing for windows is cut to fit and the doors are rigged to work. Oh, dear those coupler pockets are way too high, need to have a word with sub contractor Trenarren for a fix. This is taking a long time for what appeared a simple set of parts. Well, I got this far. In for a penny in for a pound. I also think, it needs a bit more functionality and "Why just a plain old bauxite paint job ?" If the D&RGW can have a fancy bobber so can we. So we decide to pattern ours after that green one that has appeared in the workshop. Using a mix of Titebond III and CA for the wood, good old screws and nuts and a bit of soldering on the metal, by the way.
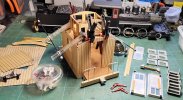 Erection work starts
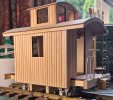
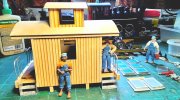 Roofing goes on
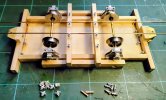
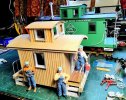 Trial fit of the ancillaries
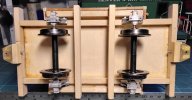
Now let's get down to the nitty gritty. A set of extra roof mount ladders and duck(ling) walks need to be fabricated. And all those supplied handrails and grabs. A bit of hacking around of the end rails is required to do the ladders. A rudimentary jig is produced to "weld" it all up reasonably staight. Metal cut is, "torch" is lit and off we go. The brake wheel needs fitting on the other side, one end for that only. 1 end down, 1 to go. A new mount for a deeper multi hight coupler is fabricated and the supplied coupler is modified to provide the more positive location this set up has nessesitated. Next the axle boxes and those 31mm (!) diameter wheelsets. I might have to find smaller, 24 mm. Ok, full size images from now on. The others have been on here in some form or other before. Just click those to enlarge.
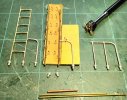
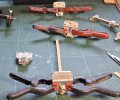
Jig for ladders, just some pins push fit into MDF. How the railings start on the right. What's left in the middle and the jig with 1.5mm brass rod, nice and shiny, pinned and ready for low temp white metal soldering with donated bits from kit's railings. On the left the finished article.
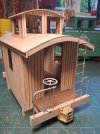
End railings tested for fit. Top restraint to be fabricated. Note that multi height coupler has replaced the one supplied and fitted. See that roof line ? Yes window frames needed to be made to fit it. Bit of filling of gaps between valences and roof end.
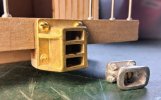
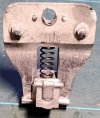
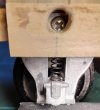
Last little bit for now. The coupler its additional slotted head screws mounts, to go with the hidden center mount bolt and extended mount block. Supplied coupler for comparison. Might have worked with the rest of the Ozark 12' waggon range, but not with Accucrsft/AMS's ragne of link and pin coupled wagons and disconnects. Certainly not with supplied 31mm dia' wheel sets. Might get some wood sealer and paint on soon.
The Mogul The Porter and Tender Lil' Caboose kit, laid outSo work starts. The assembly instructions, shall we say, lack some of the finer and clearer details needed. This creates one or two hiccups. West Well's works staff have outshopped a quite few woodies over the years and are quite experienced with white metalwork too. And a few other materials. Though we never claim to be perfect.Also the maker's foundry appear to be using some very tired old molds, requiring a lot of time consuming fettling of metal. There are one or two errors found in the timber supplied too, needing fixing. Like the underframe being slightly out at one end, needing packing, otherwise the steps won't fit that end. Then there's the roof truss's execution that results in the roof line is a little bit higher than it should be. That requires an even more, undercut, curved fettling of the metal window frames that fit to the cupola bit to clear it. Glazing for windows is cut to fit and the doors are rigged to work. Oh, dear those coupler pockets are way too high, need to have a word with sub contractor Trenarren for a fix. This is taking a long time for what appeared a simple set of parts. Well, I got this far. In for a penny in for a pound. I also think, it needs a bit more functionality and "Why just a plain old bauxite paint job ?" If the D&RGW can have a fancy bobber so can we. So we decide to pattern ours after that green one that has appeared in the workshop. Using a mix of Titebond III and CA for the wood, good old screws and nuts and a bit of soldering on the metal, by the way.
Erection work starts Roofing goes on Trial fit of the ancillariesNow let's get down to the nitty gritty. A set of extra roof mount ladders and duck(ling) walks need to be fabricated. And all those supplied handrails and grabs. A bit of hacking around of the end rails is required to do the ladders. A rudimentary jig is produced to "weld" it all up reasonably staight. Metal cut is, "torch" is lit and off we go. The brake wheel needs fitting on the other side, one end for that only. 1 end down, 1 to go. A new mount for a deeper multi hight coupler is fabricated and the supplied coupler is modified to provide the more positive location this set up has nessesitated. Next the axle boxes and those 31mm (!) diameter wheelsets. I might have to find smaller, 24 mm. Ok, full size images from now on. The others have been on here in some form or other before. Just click those to enlarge.
Jig for ladders, just some pins push fit into MDF. How the railings start on the right. What's left in the middle and the jig with 1.5mm brass rod, nice and shiny, pinned and ready for low temp white metal soldering with donated bits from kit's railings. On the left the finished article.
End railings tested for fit. Top restraint to be fabricated. Note that multi height coupler has replaced the one supplied and fitted. See that roof line ? Yes window frames needed to be made to fit it. Bit of filling of gaps between valences and roof end.
Last little bit for now. The coupler its additional slotted head screws mounts, to go with the hidden center mount bolt and extended mount block. Supplied coupler for comparison. Might have worked with the rest of the Ozark 12' waggon range, but not with Accucrsft/AMS's ragne of link and pin coupled wagons and disconnects. Certainly not with supplied 31mm dia' wheel sets. Might get some wood sealer and paint on soon.
Last edited:


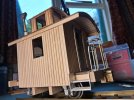
 ) Oh, and those are some nice curved grab handles in the picture, formed from 2mm brass rod in kit, now on the caboose's sides. They double up as latches to hold the removable car body onto its chassis frame. All clever stuff
  Max
Max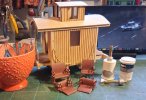

 Max.
Max.


