Building the PS Models Boxcab Loco Kit

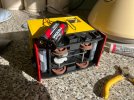
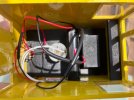
Glad you have found a solution, but personally I like the look of the exposed engine block on this particular model. It’s a shame there isn’t enough room in the cab for the third battery, or beneath the chassis, allowing the engine block to stay in place.
 
Progress has been slow due to time spent on a live steam kit build. But I managed to assemble the rear engine cover and added some more half pearls to give a simulated rivet detail then primed and painted.

Then I built the radiator which is assembled from two pieces of MDF sandwiched together. The piece which has been cut out from the centre, forms a template for the wire gauze to be cut for the radiator.

IMG_4893.jpegIMG_4887.jpeg
 
Great progress on your boxcab. The radio control looks really good too. Looking forward to seeing it finished.

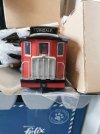
My loco is almost finished, just needs a driver (which I’ve yet to find) then the cab roof putting on. Number ot nameplates on the cab sides will improve it. I’ve also got a pair of LGB couplings to add so it can work on my layout - with 4.5v it can just pull two wagons.

I’ve learnt a few things on the way. First, don’t seal the MDF until after the build, second, glue the motor in place with epoxy, likewise the pulleys for the 4 wheel drive needed glueing too. I just pressed the axle bearings in place, they popped out while fiddling with it, so ideally they should be glued too. My cheap radio control is just forward/stop/reverse with no speed control; yes cheap, but not ideal.

IMG_8783.jpeg

I met one of my friends recently, he has offered to give me a LocoRemote r/c system that he has spare. Too late to install it in my loco, so I’ve ordered a Boxcab kit.
 
Great progress on your boxcab. The radio control looks really good too. Looking forward to seeing it finished.

My loco is almost finished, just needs a driver (which I’ve yet to find) then the cab roof putting on. Number ot nameplates on the cab sides will improve it. I’ve also got a pair of LGB couplings to add so it can work on my layout - with 4.5v it can just pull two wagons.

I’ve learnt a few things on the way. First, don’t seal the MDF until after the build, second, glue the motor in place with epoxy, likewise the pulleys for the 4 wheel drive needed glueing too. I just pressed the axle bearings in place, they popped out while fiddling with it, so ideally they should be glued too. My cheap radio control is just forward/stop/reverse with no speed control; yes cheap, but not ideal.

View attachment 360822

I met one of my friends recently, he has offered to give me a LocoRemote r/c system that he has spare. Too late to install it in my loco, so I’ve ordered a Boxcab kit.
Thank you for your kind words. The R/C receiver works well & it made sense to stick with RC Trains, as I already had the transmitter which can be used with up to 12 locos. 3 of the other channels are assigned to live steam locos which I have built from kits & installed a receiver for operating the servos.
You’ve done a great job building your loco, I like the doors to access the engine bay. I didn’t need to glue my wheels or pulleys onto the axles as they were such a tight fit on the axles. Just the roof to sort out, once the bodywork is assembled & then bend the supplied wire to form the handrails.
 
The hardest part of any coach, wagon or loco build, getting the roof to stick, stay in place and in the right position!
Yes I found that out last night when I removed the rubber bands & the plasticard sprung away from the roof supports !
I’d used some PVA on the top of the supports to give me time to manoeuvre & reposition the roof in the right position, before the glue sets…
Out with the super glue it is then & if it sets in the wrong position, so be it .
 
Substitute with thinner plasticard, say 10 thou inch, easier to form. Or thin plywood sheet. GRS sell various styrene roof profiles separately to match thier 16mm scale coach kits.
 
Back
Top Bottom