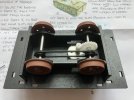
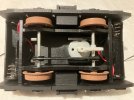
Building the PS Models Boxcab Loco Kit

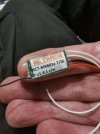
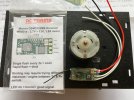
RCT-MR601 2.7V - 13V will do this.
You will need to fit a single Lipo, or three NiMH cells. *

* You can fit two, but would need to fit a booster.

PhilP.
Hello Phil.. Thank you for your advice, I will need to look into this further. Is the lipo a dedicated power source for the receiver ? Is it possible to operate a receiver from the same batteries which power the loco ? The boxcar kit uses 2 x AA cells.
 
Hello Phil.. Thank you for your advice, I will need to look into this further. Is the lipo a dedicated power source for the receiver ? Is it possible to operate a receiver from the same batteries which power the loco ? The boxcar kit uses 2 x AA cells.
The single Lipo would replace the 2x AA cells. - A Lipo cell gives 3.7V.

You can use to non-rechargeable AA batteries (2x 1.5V gives you 3V) but would need three cells if using NiMH rechargeable cells, as these are 1.2V each.

The MR601 is both receiver and speed controller on the same (tiny) board,so you connect the batteries to it, and then the motor to the output.

You may be able to get 3x AAA cells in the space where the 2x AA would normally be fitted?

PhilP.
 
The single Lipo would replace the 2x AA cells. - A Lipo cell gives 3.7V.

You can use to non-rechargeable AA batteries (2x 1.5V gives you 3V) but would need three cells if using NiMH rechargeable cells, as these are 1.2V each.

The MR601 is both receiver and speed controller on the same (tiny) board,so you connect the batteries to it, and then the motor to the output.

You may be able to get 3x AAA cells in the space where the 2x AA would normally be fitted?

PhilP.
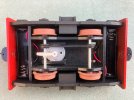
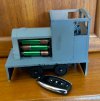
The battery holder on this loco kit is supplied as two single battery holders. They fit either end of the loco chassis, one behind each buffer. There probably would be space within the bodywork, but I’d like to stick to using the two AA non rechargeables if they will power the Rx & loco, albeit having to replace them more often which wouldn’t be a problem.
 
Sealing, painting an gluing MDF - Aways seal MDF before painting, it has a marked effect on the final finish you will achieve. MDF sealer, is a thinned down form of PVA adhesive, which is ironic all things considered. Sanding sealer can be used as an alternative. As pointed out by Rhino' the issue here is you do not want to glue things together with this stuff getting in the way of a full bond to your substrate, here it is MDF.

Solution - You can either mask the surfaces where parts actualy join/mate to each other. These areas by their nature are not on view when the model is fully built. The other is to lightly abrade the mating surfaces of parts to remove any MDF sealer coating applied there. Yes, the exposed material is required to ensure any MDF suited adhesive used can soak in to make a full and strong bond. Titebond is a good adhesive, but CA adhesive types, with an accelerator can work well with MDF. The problem with MDF is that it can delaminate if overstressed, like at bonded joints if bent out of shape.

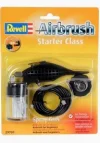
Full painting can commenced once the parts are bonded or set aside as sub assemblies. I would always reccomend spraying MDF sealer on for best base finish to paint on, although brush application can be perfectly adequate. I use an old cheap and cheerful Revell/Badger mini spray gun, see picture. They are are much handier than an air brush. This can be powered from a compressed air can if you do not have or want to stand the cost of a compressor.

The easiest way to apply paint is use your Revell gun, mixing your own paints (use emamels), or better still good old Halfords "rattle cans". I'm not a fan of brush painting but each to their own. Halfords primers and colour range are excellent, pick the right base colour primer to match you final chosen colour coats. If you are not familiar with using these painting mediums the best way is to build up the primer/paint layers is by applying light "misting" coats till you get a solid colour. You usually need two full primer coats and 2 or 3 full colour coats. Then use the same technique applying the final colour coats. Practice on some sealed scrap MDF before you srart. There is a trick with rattle cans of warming them in hand hot water before use to get a much finer and clearer even atomisation of the paint. Spray painting can be a bit of an art if you get into it so this is a good way to start.
.download.webp
Hope you have fun with your first build. Just remember if things are not going the way you want don't panic. Sit back relax and have a good cup of tea.

 
Last edited:
The battery holder on this loco kit is supplied as two single battery holders. They fit either end of the loco chassis, one behind each buffer. There probably would be space within the bodywork, but I’d like to stick to using the two AA non rechargeables if they will power the Rx & loco, albeit having to replace them more often which wouldn’t be a problem.
Rechargeable battery packs, as supplied, usually would obviate the need for a fixed size battery holder.
 
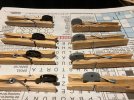
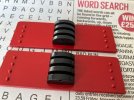
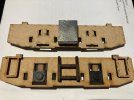
Back to the loco build, the 8 segments which form the 2 multi-height couplings are primed, then painted & are now complete. Reading the above posts, it wouldn’t seem unreasonable to scrape off some of the paint at contact points rather than relying on the strength of the paint adhesion.

IMG_4690.jpeg

IMG_4694.jpeg
 
Back
Top Bottom