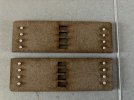
Building the PS Models Boxcab Loco Kit

I recently came across the Phil Sharples website & he offers a range of kits at budget prices aimed at the 16mm 32/45mm garden rail enthusiast.
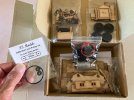
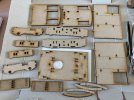
I ordered the Boxcab Loco kit & it arrived within a couple of days, full instructions are included with the kit, all that is needed is some PVA glue for the MDF parts, super glue for the 3D printed parts, some paint & a little time to assemble the kit. On first inspection, all the parts are supplied in little ziplock bags, with some nicely detailed parts. I also ordered the optional four wheel drive kit, which is not included with the loco kit.
IMG_4676.jpeg


IMG_4677.jpeg
 
One of the joys of this and many other hobbies, those artisan creators, with their imagination, skills, creativity, ingenuity and determination. Long may they prosper and proliferate. And the new technologies available now will let almost any contribute it they choose.
 
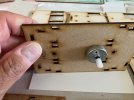
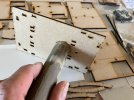
A quick glance over the assembly instructions & it’s clear this little loco could be possibly built over a couple of evenings. But that takes all the fun out of it, I’m going to take my time & enjoy the build. Some parts I will paint before assembly, to hopefully give a neater finish. Ok so the first thing I noticed was the motor unit was an extremely tight fit in the mounting hole, almost to the point of breaking the MDF, I was having to use that much force. The instructions do suggest lightly sanding parts to fit, so some fine emery & a piece of dowel was used to very slightly open up the motor mounting hole, until the motor slid into place easily.

IMG_4678.jpeg

IMG_4679.jpeg
 
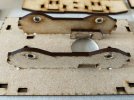
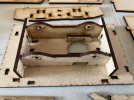
The loco can be configured to run on either 32mm or 45mm track. There is provision to mount the chassis rails at the correct spacing depending on your track gauge. My track is 45mm so the outer slots were used to glue the rails in place. The chassis rails also support the end of the motor, so if the outer slots are used, two additional pieces must be glued in place to the inner slots, as shown below. Once the bearing bushes were pressed in & chassis rails were glued in place, the end frames were added. At this point everything has fit together nicely & the tabs line up with the slots perfectly, it’s all coming together to form a fairly sturdy little unit.

IMG_4680.jpeg

IMG_4681.jpeg
 
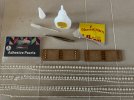
The buffer beams have outline rivet detail marked on them. I thought I would take this a step further & add some faux ‘rivet heads’ in the form of adhesive pearls available from Hobby Craft. For £3.50 you get a huge amount which should be enough for more than a few locos !

IMG_4682.jpeg

Three different sizes of pearls are supplied in the packet & the smallest size seems the perfect scale to give the impression of rivet heads. The pearls peel off the backing paper as a strip, so each one is carefully removed with a pair of tweezers & sent flying across the room never to be seen again. Another try with a spot of super glue holds each one in place.

IMG_4683.jpeg
 
Back
Top Bottom