Northsider
Modelling the Northern half of the Isle of Man

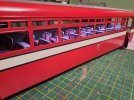
...and whilst we are on the subject of railcars, a package turned up today with drill bits and a 6BA tap which should be enough to produce a rolling chassis.
Firstly, the wheel centres were opened out to ⅛", and the crankpin bosses were drilled and tapped with a 6BA thread. Unfortunately one hole drifted southwest despite having been centre-punched accurately-see bottom right.
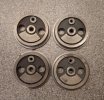 I always said that I'd take the machining of the wheels as far as I could before I ran out of equipment, or skill. This might be that point!
Anyhow, that means I have nothing to lose on the properly technical bit, creating square holes in the centre of the wheels. They need to be accurate, identical, and worked to a close tolerance.
All I have is a square needle file...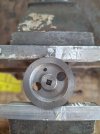
I'm quite pleased with the results, but will they be accurate enough?
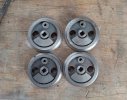
There's only one way to find out: assemble the power bogie.
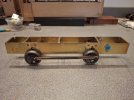
Which looks the part, but I can't find the tiny allen key that fits the retaining screws in the centre of the wheels. In all honesty I think they'll bind, as they do with the wheels slightly loose, but that's a problem for another day. But it's always good to leave the workshop on a high, so a quick trial fit is in order...
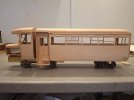
Firstly, the wheel centres were opened out to ⅛", and the crankpin bosses were drilled and tapped with a 6BA thread. Unfortunately one hole drifted southwest despite having been centre-punched accurately-see bottom right.
I always said that I'd take the machining of the wheels as far as I could before I ran out of equipment, or skill. This might be that point!Anyhow, that means I have nothing to lose on the properly technical bit, creating square holes in the centre of the wheels. They need to be accurate, identical, and worked to a close tolerance.
All I have is a square needle file...
I'm quite pleased with the results, but will they be accurate enough?
There's only one way to find out: assemble the power bogie.
Which looks the part, but I can't find the tiny allen key that fits the retaining screws in the centre of the wheels. In all honesty I think they'll bind, as they do with the wheels slightly loose, but that's a problem for another day. But it's always good to leave the workshop on a high, so a quick trial fit is in order...