maxi-model
UK/US/ROW steam narrow gauge railways 1:1

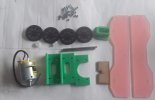
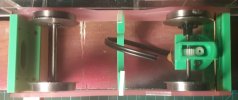
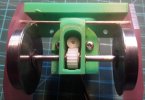
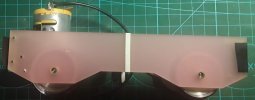
Here is a Bowaters Models 16mm Scale Conway Castle. I bought this kit around 6-7 years ago, started it and got sidetracked. I picked it up again as I was providing an "off the cuff" suggestion about mixing scales in another thread. So, what you see here is a started kit with some basic construction work done. The kit is a mix of laser cut acrylic sheet and "rough textured" 3D printed parts (the green bits). To this I have added a complete, Fosworks supplied fully wired, rc/battery/MLS sound set up. There will be certain embelishments, not supplied with the kit, that will be revealed as I go along with the build. The work will be mixed in with two other projects you may have noticed in other threads I have started recently. Things have got stalled there as other important matters intervened and now I have got those out of the way I should be able to progress on all fronts now. Fingers crossed.
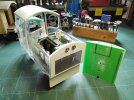
So, here is where we are starting. Basic body structure and chassis built and rc/battery/sound install layout configured. First a not in kit bit, there is diesel motor sitting in the the loco's engine bay, surrounded by the rc/sound gubbins. The "engine" started life as a 1:50 scale "generator" load for a Corgi model in their truck series. Found on Ebay, I bought 3, the other are in my WHR Vale of Ffestiniog and a WHR Service car. A little judicious chopping required. I have added the square section rod corner strengthening and an offcut of GRS plastic formed roof, kept "just in case". The supplied multi-strip acrylic job was a bit clunky to my mind. You will also notice a crude cut acrylic radiator grill supplied has been ditched and a Czech supplied etched "truck" grill has been used as a substitute. Oh, and am I the last person on earth to have discovered the joys of 3mm "glue dots" for trial assembly work ? The front end and roof's temp' location done with with them
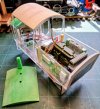
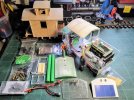
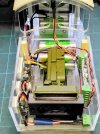
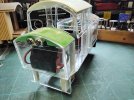
Below - 1st image from left, general view and layout of bits and bags of additional detailing bought. Front and back panels now have their directional LED light openings drilled, trial fitted with their LED's and bezels. I've done a skim fill of the 3d parts, profiling and rub back. Oh, and the "Jon's" suplied crew have showed up to sign on for the job. 2nd image, more detailed look of "engine bay" and rc/sound kit layout, bit like a real ancilary loaded one. Battery packs and wiring looms laid out to get an idea of best way to install, I have stripped the battery pack's black shrink wrap for a good reason, a lot of usable wiring length trapped there, I will replace covering with insulation tape. 3rd & 4th shots, front and back shots, with one cab side glue dotted in place to check fit. Cutting of front and rear bonnets is being done or marked up to provide ressess for LED light wiring and at rear the fuse box. Kit was supplied with a cab side panel missing each side, I'll cut some from 60 thou plasticard I have. Next will be to get those cab sides assemlies bonded in place, filled and rubbed down. This kit is going to be a bit of a slog. More to come as and when.
So, here is where we are starting. Basic body structure and chassis built and rc/battery/sound install layout configured. First a not in kit bit, there is diesel motor sitting in the the loco's engine bay, surrounded by the rc/sound gubbins. The "engine" started life as a 1:50 scale "generator" load for a Corgi model in their truck series. Found on Ebay, I bought 3, the other are in my WHR Vale of Ffestiniog and a WHR Service car. A little judicious chopping required. I have added the square section rod corner strengthening and an offcut of GRS plastic formed roof, kept "just in case". The supplied multi-strip acrylic job was a bit clunky to my mind. You will also notice a crude cut acrylic radiator grill supplied has been ditched and a Czech supplied etched "truck" grill has been used as a substitute. Oh, and am I the last person on earth to have discovered the joys of 3mm "glue dots" for trial assembly work ? The front end and roof's temp' location done with with them
Below - 1st image from left, general view and layout of bits and bags of additional detailing bought. Front and back panels now have their directional LED light openings drilled, trial fitted with their LED's and bezels. I've done a skim fill of the 3d parts, profiling and rub back. Oh, and the "Jon's" suplied crew have showed up to sign on for the job. 2nd image, more detailed look of "engine bay" and rc/sound kit layout, bit like a real ancilary loaded one. Battery packs and wiring looms laid out to get an idea of best way to install, I have stripped the battery pack's black shrink wrap for a good reason, a lot of usable wiring length trapped there, I will replace covering with insulation tape. 3rd & 4th shots, front and back shots, with one cab side glue dotted in place to check fit. Cutting of front and rear bonnets is being done or marked up to provide ressess for LED light wiring and at rear the fuse box. Kit was supplied with a cab side panel missing each side, I'll cut some from 60 thou plasticard I have. Next will be to get those cab sides assemlies bonded in place, filled and rubbed down. This kit is going to be a bit of a slog. More to come as and when.