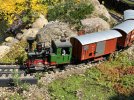
Tumble Down Falls

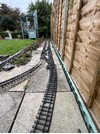
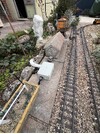
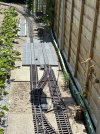
So the next step was re-wiring the four points in the crossover, again the power was run from the external junction box:
IMG_3021.jpeg

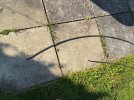
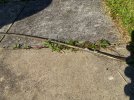
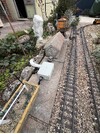
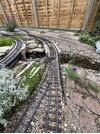
Cable initially buried, then over the bridge, and then hot glued "P" clipped to sleeters:
IMG_3022.jpeg

IMG_3023.jpeg

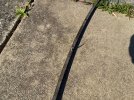
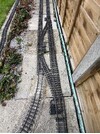
Sheathing to protect the wires out of the harness:
IMG_3024.jpeg

The last job was re-wiring the three points to the siding, the main cable connected to the external junction box remained unchanged, but new wires from the switches:
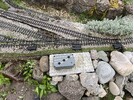
IMG_3025.jpeg

The switch box concealed in a signal box, which needed a small amount of repair:
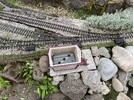
IMG_3026.jpeg

The signal box roof will require a repaint!!
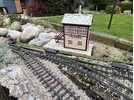
IMG_3027.jpeg
 

Attachments

  • IMG_3021.jpeg
    IMG_3021.jpeg
    708.7 KB · Views: 3
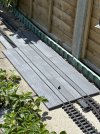
Wire ends cut to length and tinned, sleeving fitted and fitted under the ballast. Track levelled and more ballast added, and to prove it works a train was run :)

View attachment 348256

View attachment 348257

So that is the station area done, next is my crossover. All the points (and motors) have been used by me before, but this is a new configuration, and so will be the first time this configuration has been powered. No ballast to hide the wire and sheath, so will be 'P' clipped to the sleepers.

View attachment 348258

Just a point to note, all photos are taken on my phone, and no issues with orientation!!
Yeah, I think that problem has gone away ................ for the time being :nerd::nerd:
 
Somebody mentioned the sun is out, so, I thought I would make a start on the new station, using the LGB 50304 platform. When initially looking at this I found the pieces only properly fit on LGB track, so I replaced a couple of my Aristocraft tracks with LGB 1200mm track, and it goes together quite well:

IMG_3240.jpeg

IMG_3239.jpeg

Nothing fixed in place yet, off to rotisserie my chicken, I will be pinning a couple of piece in place, which hopefully will keep the track in place, but I need a test run first.

You may notice I am one centre piece and one edge piece missing, does anybody have any spare they would be will to sell!!
 
Somebody mentioned the sun is out, so, I thought I would make a start on the new station, using the LGB 50304 platform. When initially looking at this I found the pieces only properly fit on LGB track, so I replaced a couple of my Aristocraft tracks with LGB 1200mm track, and it goes together quite well:

View attachment 356798

View attachment 356799

Nothing fixed in place yet, off to rotisserie my chicken, I will be pinning a couple of piece in place, which hopefully will keep the track in place, but I need a test run first.

You may notice I am one centre piece and one edge piece missing, does anybody have any spare they would be will to sell!!
Also acts as a very good place to rail multipe wheeled vehicles.
 
A long standing issue has been the derailment of certain coaches and wagons, this is down to my poor planning, and a lack of understanding at the time.
The problem is, I have a 6 foot diameter Aristocraft curve, and this is located on a 1:30 gradient, coupled with track movement cause by floating ballast, and what is now obvious (to me) is that four corners of a rectangle on the track cannot touch at all four points, or to relate this to the railway a coach, wagon or loco will only have 3 wheels (two axle vehicle) touching the track at any one time.
LGB, Bachmann, etc, G Gauge vehicles with large flanges and short wheel bases are not an issue, however long wheel base vehicles, have the issue exacerbated, and the wheel not touching the track can have the flange slide over the top of the track, and simularly 16 mm items which have smaller flanges, can have the issue even on a short wheel base.
So I thought a check rail would be the solution, here is a Stainz traversing the problem area, without issue:

IMG_3247.jpeg

I though I would use a piece of Aristocraft track for the check rail, because with M2 screw holes in the foot, I could use screws to help locate and keep the track in place:

IMG_3251.jpeg

IMG_3252.jpeg

It soon became apparent it was not that simple to inset a functioning check rail, and a smaller test piece was bent to shape, and using pins and hot glue it was put in place. Not close enough to act correctly, so the inner flange was removed:

IMG_3253.jpeg

IMG_3254.jpeg

Even with the flange removed to the web, and fitted, pushed against the chair, it was not sufficient to "check" the wheel in place, and realised, there were only three other options:

1) To start again and get rid of the sharp curve, or remove the gradient - not really a viable solution.

2) Lift the track to fit a more accurate and better fitting check rail - though feasible, I don't think the effort meet the gain.

3) Keep adjusting the track level with ballast, and be cautious with vehicle types I buy, and live with the problem.
 
Back
Top Bottom