Greg Elmassian
Guest
now that sounds good... would you use threaded rod so the pla has something to "lock" to?
well my plan is to 3D print a central bridge and reinforce it fro underneth with 2 steel rods with some grooves or somethingnow that sounds good... would you use threaded rod so the pla has something to "lock" to?
So here's a standard gauge, easy one to build for you: 2-6-0+0-6-2. (And don't say it's not American because there were no American Garratts)yeah no i model american standard gauge

I found that when making my Mason Bogie that parts not meant to be part of the engine still enhanced the look of it so I added them, bachmann makes so excellent looking parts that are quite reasonable. Of coarse there are several rivet counters out there that will pick you apart but to me if it looked good I went with it,such as my steam valve on the starboard side of the engine is the crush-able part of a 1/8" pop stuck on a piece of 1/8" brass rod and is held in place with 1/8" cotter pins. One can use all sorts of stuff from the hobby bench to make stuff. Might not be prototypical but works for me. I'm just not into the time and expense that it takes to make a museum quality piece, and although I admire the amount of work that goes into one If I want to run it I'll build it by 10 foot rule. Look forward to your build< Billso my garden railroad is gonna be built on a pretty hilly yard so i need strong locos and i thought a garratt would be cool but i have never done any kitbashing before how should i go about bash some bachmann 4-6-0s into a garratt
Bill, that's what is known as "Rule 9" - if it looks good to you, and it is your Railway, then is IS good. Another rule is the "10' Rule" - if it looks good at 10 feet then it is fine.to me if it looked good I went with it,


Rule 11 is the LNER rule.Bill, that's what is known as "Rule 9" - if it looks good to you, and it is your Railway, then is IS good. Another rule is the "10' Rule" - if it looks good at 10 feet then it is fine.
Rivet Counters only tend to be annoying when you say something is "a model of xx prototype" 'cos someone always knows more than you about it!
i already said i was gonna build a 4-6-2+2-6-4 but i want to know how one assembles all the parts together actully here is my inspriation its capecodtraintodd's garrattSo here's a standard gauge, easy one to build for you: 2-6-0+0-6-2. (And don't say it's not American because there were no American Garratts)
By The original uploader was Bundeena2230 at English Wikipedia. - Transferred from en.wikipedia to Commons by Oxyman using CommonsHelper., CC BY-SA 3.0, File:LMS Garratt 498x.jpg - Wikimedia Commons
I thought it was rule 8Bill, that's what is known as "Rule 9" -
Well, with a couple of 4-6-0 frames like that, there are a few things to assemble.i want to know how one assembles all the parts together


ok but i gotta have space for lots of batteries and a sound systemWell, with a couple of 4-6-0 frames like that, there are a few things to assemble.
You have to suspend a flat frame between the 2 chassis to support the boiler. My Garratt seems to have a double layer of styrene sheet. The protruding bolt is the pivot to connect it to the chassis:
View attachment 293198
Mine has electrical connections between the 2 frames (small brass pads above,) so that if either is collecting juice, then both can move. (Pretty essential, as you don't want one chassis to stop while the other continues.) I suggest using cables and plugs - there pads don't work if the track isn't perfectly flat.
You'll need something like a flat piece of thick styrene with a hole attached to the chassis for the pivot to drop in to, or a hole in the top (I can't remember what they look like on top!) So now you have the 2 chassis with a flat plate suspended between them. If you want to reinforce the plate, get some 1/8" brass angle and glue it along the edges, where the original had a lip.
Those chassis have a big screw at the back for the hook that connects the tender (which you don't need) so there's a place to link the trailing truck, which looks like what Todd did. Here's what my trucks look like - I assume they were LGB spare parts. You could easily 3D print a similar one and put it behind the 4-6-0.
View attachment 293199
After that it is all cosmetic. Todd mounted his 4-6-0 boiler on the central frame - I'd be inclined to extend it a bit, but that's up to you.
On the end chassis Todd mounted the tender bodies from 4-6-0s. (P.S. I know someone with a bunch of junk 4-6-0s if you need parts.) A real Garratt had coal and water behind the cab, and a big water tank up front. I would suggest you use the tender body at the cab end, and make a box with rounded top, maybe glued on the tender body for strength. The front tank on mine is just a thin styrene sheet fitted over the top of the frame.
Now, practically speaking, you need to add some weights. The 4-6-0s used to have a great big lump of cast iron inside. One good source would be fishing weights - just take a small box, fill it with weights, and pour in some glue. Then glue it to the bottom of the tender body, or the top of the chassis.
Just be careful with glue and lead it can have unpleasant side effects and melt plastic- just take a small box, fill it with weights, and pour in some glue.
Well, the batteries will replace one set of weights, and those 4-6-0 tenders have tons of room for electronics and stuff. Plus you have a whole boiler to fill. You can even put the speaker under the stack so the sound comes from the right place.ok but i gotta have space for lots of batteries and a sound system


ok so thats how i add weightNicest block of lead that is easy to get is a "rock cod sinker", they come in 1, 2, 3, 4, and 5 pound sizes... (at least in fishing stores in the USA)
Here's some in a Lionel Atlantic:
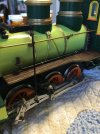
I have seen various large scale steam loco builds which used plastic plumbing pipe as core of boiler.but uh what should i use for the boiler
yeah i thinking that could work but PVC pipe might not be big enough in diameter for a medium sized garrattI have seen various large scale steam loco builds which used plastic plumbing pipe as core of boiler.