John Carmichael
Registered

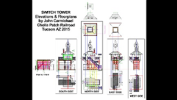
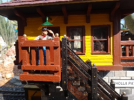
This design is a synthesis of several different Switch Tower designs that incorporates their best features. The glass cupola was fantasy addition using an interesting candle holder we had. Looks great at night with the candle lit!
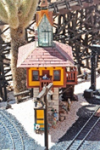
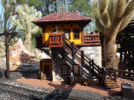
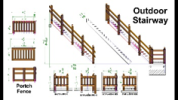
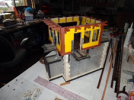
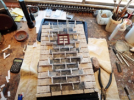
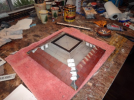
It was the first building I made using plastic Plexiglass (acrylic) pieces glued together with acrylic glue to form its strong “skeleton” core. Sanding both sides of he new shiny plastic with 100 grit palm sander before cutting will roughen the slick surface and make glue and paint adhere better. People don’t see it because it’s covered in paint, wood, or masonry. I’ll never use plywood again for core material because acrylic buildings are so easy to cut, shape, drill, and glue—and the acrylic glue dries fast. Since the plastic is fully covered, you don't need to worry about UV damage or heat warping from the sun. I placed the finished tower over the ugly electrical conduit and connection box next to the track. I dug a cavity in the sand and solidified it with diluted Titebond III glue so the building fits snugly, yet can be easily removed if needed. The outdoor stairway is also removable. The roof lifts off to change interior light bulbs. The structure has lots of lighting inside and out. Feel free to copy, use, or modify any of the images or video shorts you see here. I hope this technique helps you with your building design & construction. Good Luck! - John Carmichael
Construction Procedure
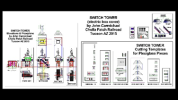
1. Make 2D CAD drawings and print them out on paper to use as cutting temples.
2. Sand acrylic sheets with150 grit palm sander for better glue and paint bonding.
3. Make full-size paper prints of parts needed. Cut out the cutting template for every piece.
4. Glue templates to sanded plastic using Elmers Glue Stick. Use small roller to flatten paper and squeeze out extra glue. Let dry.
5. Cutout acrylic pieces with Proxon 3” table saw and/or by scoring and breaking.
6. Drill needed holes, then file & sand pieces to the exact shape needed. A small Delta sander and sanding blocks work fine. A Dremel is handy.
7. Glue acrylic pieces together with medium thick acrylic glue, then tape & clamp tightly until dry.
8. Sand finished acrylic building if needed. Plastic “skeleton” is ready to paint or cover with wood or masonry fascia.
9. Draw guide lines on plastic with thin Sharpee pen before gluing wood or masonry.
10. Use blue painters tape along guide lines to make glue clean up easy.
11. For glue, use 100% pure silicone or Goop to bond non-plastics to the “skeleton”.