MOB AST 117 Control Car (1980/90s) My first plastikard build.......

DickyC

(BZB Mountain Railway)
Country flag
1: MY FIRST PLASTIKARD ADVENTURE (BACKGROUND) ... and so far I love it. but a bit of background as to why and what

As I have mentioned on here before I visited the MOB in the 1980s as a 10 year old kid, We had a 4 days Swiss railway pass and did the Jungfrau, Breinz, Interlarken etc, But we always drove from Leysin to Gstaad to pick the train up and it was the MOB that stayed in my heart as the start of these journeys. After picking up at auction an LGB GE 4/4 last year and then a selection of coaches my interest heightened in the LGB MOB stock BUT..... The big memory from the 80s was the "Panoramic Express" as one day of the four at Gstaad it arrived as our train down to Zweisimmen. The glory of the Panoramic windows across the sides/roof, open airy blue interior and its 80s space age styling.... but alas LGB never produced this, the closest being a more modern "golden pass" which was based on the RHB coaches already being produced, it just looked to slick and modern. I also picked up from a charity shop in Buxton a delightfully illustrated 80s Book by Edward W.Paget Tomlinson detailing lots of info just not on the tinternet.

Panoramic express.jpg mobas110.jpg montreux-oberland-bernois-mobder-superpanoramic-wurde-1262521.jpg 20240219_142937.jpg

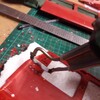
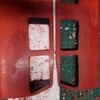
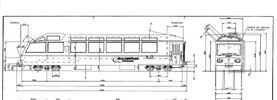
So from investigation I discovered that these "Superpanoramic express" coaches were in fact created using the frames and wheels sets of older AB 92 stock (see picture below) and that rather than pay the eye watering prices online and evilbay for a rhb panoramic coach and respray i would make my own as I have sourced online the plans and details. But with my platikard skills being NET ZERO ! I didnt really want to kill and savage one of my nice shinny well kept coaches that I had acquired with the loco so what do I use for a donkey to carry my Frankenstein creation. I scratched my head until I came across Garden Railways Scotland and Sandy offering this MOB restaurant coach for £85. The MOB never operated a coach like this, and while the original owner had made an effort to paint it and decal, it just didnt sit right.. until it dawned on my, I my first MEK inhalation overdose victim would better work out at the control car maybe and it was swiftly purchased...

AB-92-002.jpg
AB 92
20231212LGB 3 x blue  coaches.jpg
http://www.gardentrains.co.uk/
Ast-117_G001.jpg
Ast 117
 
Last edited:
2: STRIP DOWN, STRIP PAINT & TRY NOT TO MELT LGB PLASTIC


Soon after arrival it was striped down and paint striped (the first supposedly mild paint stripper I had started to take more of the LGB plastic off than I had liked but it was rescued in time) eventually using the Revell Paint remover, revealing its original Rhb restaurant car beginnings.

20240122_111510.jpg 20240122_111739.jpg 20240122_111745.jpg 20240124_141320.jpg 20240124_141333.jpg LGB_30680s.jpg

I had found some great plans online at https://www.triebzug.ch giving me the basic feel for the scale and dimensions and have blowing these upto the correctish size i could begin some butchering to get and idea of the angles required, This was never going to be an exact reproduction as im "bashing" an existing coach but i wanted it to have the feel and shape at least. !

mobast116.gif

Shaping, Drilling and "hot" knifing the tough LGB Plastic, Sanding back to straighten and then my first Plastiskard ! was cut from 2mm panel (slaters) and joined to the front to created the point of the cab using "Delux plastic magic", These small chassis panels had a little curve at the bottom so some gentle passes with the hot knife ( I use a hot knife every day with my work to cut and edge polyester fabrics) over this edge created a score that meant the PCard would bend easily to the shape of the original coach and solvented together.

I wanted to use and adapt as much of the LGB coach as I can and as the buffer looked similar to the original it was re used by cutting off the end which was now discarded and not required. Again using my trusty hard knife and sanding down. This was then glued back into the coaches original lgb lugs and joiners to create a secure point of contact. At this same time I bonded the sides to the green floor of the coach to try and create a strong platform to work from.

20240124_191137.jpg 20240128_195312.jpg 20240128_195753.jpg

20240128_200923.jpg 20240201_161945.jpg 20240201_162016.jpg
20240201_162630.jpg 20240201_165405.jpg 20240201_165905.jpg
 

Attachments

  • 20240128_200858.jpg
    20240128_200858.jpg
    233.7 KB · Views: 0
  • 20240128_195300.jpg
    20240128_195300.jpg
    241.2 KB · Views: 0
  • 90s Control car diag.jpeg
    90s Control car diag.jpeg
    195.8 KB · Views: 0
Last edited:
Oh, you are a braver man than me, Gunga Din! :eek:

Good luck!

PhilP
HAHHAHAHAHA

I would at this point like to mention that this is not so unique an idea, I came across this website a few months ago where the same type of control car had be produced, but to fit their more modern new golden pass lgb coachs. My MEK enduced madness is not singular, two of us need locking up... but he bashed an LGB Panoramic coach so thats insane as it worth its weight in GOLD.

LGB Gartenbahn - MOB GoldenPass Panoramic

GOLDEN PASS CONTROL CAR.jpg GOLDEN PASS CONTROL CAR 1.jpg GOLDEN PASS CONTROL CAR 2.jpg
 
3: CREATING THE FRONT PANEL

So I soon realised that my Plastikard cutting skills will need a lot of honing and perfection before I get anywhere near the delightful engineering perfection as witnessed on here by like of Mr Claptowte. But I work in 2d everyday as a printer using a drawing package called CorelDRAW for over 20 years now and this might come in handy. Back in 2021 I acquired a SNAPMAKER2 which has 3d, Lazer engraving and CNC abilities. I have not really played with the 3d much to be honest as the lazer (not very powerful) and the CNC have kept me busy with odd little projects and with my business. My plan was to cut the windows out on this model with this bit of kit so that it looks as smart as it can be. The first project for this would be the front.

snapmaker.jpeg
This bit of kit uses is own slicer called "Luban" which is a challenge at times, The numbers of 1.5mm CNC bits that have been destroyed while starting Luban up as it "resets and returns to origin" and is unstoppable. I have to just watch a perfectly lovely NEW bit crashes into the MDF base and PINGS off into the cabin somewhere never to be seen and £5 up the spout..

20240201_162128.jpg

To some its 80 droll, but to me its kind of simple and reminds me of those "railbuses" aka rattlebusses in the Valleys lines of South Wales and uptut north around Leeds I witnessed as a student,

20240201_174836.jpg
Coreldraw Sketch
20240201_181519.jpg
Luban workpage and settings

20240201_191052.jpg
By shear luck the first item off the plate actually looked good and fitted !
Bonded to the LGB Plastic with "plastic magic"

20240201_171223.jpg 20240201_192418.jpg 20240201_193445.jpg

Delux Plastic Putty used to shape the gaps and joins

20240201_202135.jpg 20240205_122253.jpg M1070102-kopie.jpg
Small structural supports added to back of the front panel to strengthen and help bond, Small front table created on Snapmaker to Mirror the original.

20240205_122308.jpg
This panel under the table is not bonded so that I can sort out the LED lighting later.

20240220_103550.jpg 20240220_103558.jpg

After a lot of tinkering, cutting out different light shapes and in the end having to enlarge the size of the lamp housing quite a bit this was the result. filler used to disguise my gaps and a fair bit of hand cutting for these jobies.
20240220_104553.jpg
 
Last edited:
3: CREATING THE FRONT PANEL

So I soon realised that my Plastikard cutting skills will need a lot of honing and perfection before I get anywhere near the delightful engineering perfection as witnessed on here by like of Mr Claptowte. But I work in 2d everyday as a printer using a drawing package called CorelDRAW for over 20 years now and this might come in handy. Back in 2021 I acquired a SNAPMAKER2 which has 3d, Lazer engraving and CNC abilities. I have not really played with the 3d much to be honest as the lazer (not very powerful) and the CNC have kept me busy with odd little projects and with my business. My plan was to cut the windows out on this model with this bit of kit so that it looks as smart as it can be. The first project for this would be the front.

View attachment 323952
This bit of kit uses is own slicer called "Luban" which is a challenge at times, The numbers of 1.5mm CNC bits that have been destroyed while starting Luban up as it "resets and returns to origin" and is unstoppable. I have to just watch a perfectly lovely NEW bit crashes into the MDF base and PINGS off into the cabin somewhere never to be seen and £5 up the spout..

View attachment 323953

To some its 80 droll, but to me its kind of simple and reminds me of those "railbuses" aka rattlebusses in the Valleys lines of South Wales and uptut north around Leeds I witnessed as a student,

View attachment 323954
Coreldraw Sketch
View attachment 323955
Luban workpage and settings

View attachment 323957
By shear luck the first item off the plate actually looked good and fitted !
Bonded to the LGB Plastic with "plastic magic"

View attachment 323962 View attachment 323958 View attachment 323959

Delux Plastic Putty used to shape the gaps and joins

View attachment 323963 View attachment 323964 View attachment 323965
Small structural supports added to back of the front panel to strengthen and help bond, Small front table created on Snapmaker to Mirror the original.

View attachment 323966
This panel under the table is not bonded so that I can sort out the LED lighting later.

View attachment 323967 View attachment 323968

After a lot of tinkering, cutting out different light shapes and in the end having to enlarge the size of the lamp housing quite a bit this was the result. filler used to disguise my gaps and a fair bit of hand cutting for these jobies.
View attachment 323969
Love your use of modern technology with good old home built fettling and making of parts.
 
"I have to just watch a perfectly lovely NEW bit crashes into the MDF base and PINGS off into the cabin somewhere never to be seen and £5 up the spout.."

Aliexpress has good prices on end mills if you don't mind waiting a couple of weeks.
 
"I have to just watch a perfectly lovely NEW bit crashes into the MDF base and PINGS off into the cabin somewhere never to be seen and £5 up the spout.."

Aliexpress has good prices on end mills if you don't mind waiting a couple of weeks.
Cheers, Yes I have purchased a few on Ebay but they create quite a temperature when working and the plastickard just melts with it and its all gets messy ! typically the one that doesnt create this working temp is from a real seller in a real business here in the UK (Rennie).
 
Cheers, Yes I have purchased a few on Ebay but they create quite a temperature when working and the plastickard just melts with it and its all gets messy ! typically the one that doesnt create this working temp is from a real seller in a real business here in the UK (Rennie).
I've only used them on brass. Perhaps the rotational speed has something to do with the melting?
 
I've only used them on brass. Perhaps the rotational speed has something to do with the melting?
yes, I thought so too, reduced quite a bit down from 300 to 75rpm and still did it. I had a feeling it was something to do with the "coating" that had been put onto the end.
 
Last edited:
4: PANORAMIC ROOF

Moving onto the roof, I toyed with using parts of the old curved roof as a base for the new roof so that it could be taken on/off as with the LGB coaches, But this was not going to work so decided to create a whole new roof. As the curve at each end of the coach was quite dramatic I decided to reduce this arch a little as with ends of the original MOB coach. This involved trimming down the ends, my tool of choice being the very precise and delicate tool called an "Angle grinder", yep look away precision modellers !

20240205_124715.jpg 20240205_125256.jpg 20240206_145120.jpg

My attention then turned to the roof, I need to create quite accurate window sizes and locations that mirrored the existing window on the RHB coach. To do this I set up some designs in 2d in Coreldraw and brought these into the snapmaker cnc. The Snap maker has a work area of 350mm and these panels needed to be axactly 350mm so they just fitted in, after CNCing the windows and edges I then hand cut the ends as the machine could not work to the full size required. I had to secure bits of the plasitkard while it was cutting to avoid it moving about on the workplate, this probably could have been avoided by setting proper cutting priorities.


20240206_183343.jpg 20240206_184411.jpg

I then needed to create a structure for these to sit in, I experimented with different ribs and brace sizes and ended up using all of these in the roof structure to create more strength, bonding as usualy with MEK. by much luck the size of the ribs worked out quite well. As mentioned on here before the level of micro plastics i was created did alarm me, I have read somewhere that some has collected the left over bit of plastikard and made a kind of glue with it ! has anyone else done this ? mine ended up in the Henry !

20240206_194133.jpg 20240206_200846.jpg 20240206_200854.jpg

20240206_201154.jpg 20240206_201741.jpg

I then needed to create a based for this to sit on and bridge the new roof and the old sides. this was hand cut out after marring up with the old coach and a central open area cut out of this also. A upper roof section was also cut by hand using the plastikard removed from the base. Plastic filler then used in the gaps between panels to be sanded later.

20240206_210426.jpg 20240206_210908.jpg 20240206_212531.jpg

20240206_213240.jpg 20240207_132039.jpg

I then turned back to the original LGB roof fitting for lights and roof, This moulded fitting could be used also in my new coach and would make the inside roof like really nice. The LG moulding was bodged and bonded into the roof, LGB light circuit from the old coach could then also be used. I also put some little tabs in the roof to help square against the original coach sides.

Original LGB coach inner roof panel and lenses.

20240215_125942.jpg 20240215_153441.jpg 20240215_155034.jpg

The plastikard bends a little and is quite flexible so cut up some plywood here to help stretch and form the width. I then used a heat gun to try and reshape the couple of mm required so it would be correct once cooled.

20240215_164541.jpg 20240303_193048.jpg
 
Last edited:
5: Drivers Cab Box:

In the ASTs the driver sits up in the roof above the coach with a narrow view ahead, aided by cameras. As mentioned before I wanted to use up as much of the original LGB plastic as I can to avoid the bin ! The original Restaurant car had a lovely fully fitted kitchen including the sink ! This had some lovely boxy bits of moulding and detail including lockers and door, Ideal for replicating the drivers cab. Im still searching for some 1980s pictures of the inside of these cars but I have found pictures from the second evolutions of these from the 90s and 00s (see below)

M1070100-kopie.jpg
90s Conversion
M1070177-kopie.jpg
00s Conversion

let the cutting and bonding begin

20240215_134258.jpg 20240215_134405.jpg 20240215_135237.jpg

20240215_135244.jpg 20240215_143352.jpg 20240215_150703.jpg

20240215_150832.jpg

I then set off the Snapmaker on the Grill/air vents to the side of the cab. I realise now that I didnt need to cut out the window on this size of car and could have left the half window in place. A series of lines were etched out on a piece of 1.5mm Plastikard using a Pointed CNC bit and offered up. Guidence also taken from the Bemo Model (H0m) that exists of this control car

20240215_184723.jpg 20240215_184738.jpg 20240215_191138.jpg

20240215_191147.jpg Cab grill.jpg
 
6: Drivers Upper Cab:

I cut out a section of the roof already created for the cab box to poke through, I at this point placed in an old engine driver I had inside to offer up the size. Original kitchen shelves can be seen inside still, these wont be seen from the outside but offer strength and platforms to build a false floor from.

20240215_195737.jpg

Two new CNC upper cab side panels with windows were created for the cab and solvent bonded, Driver and seat in position.

20240216_190207.jpg

A drivers screen created part by hand and from odd bits left over from other parts of the make, An LED inserted and void filled up with hot glue for later and wires fed through to the base.

20240217_193501.jpg

20240217_193526.jpg

This Control car had very poor visibility and the cameras helped. I found some picture online of some of the instruments in there and found out it had three TV screens ! These pictures look to have been taken in haste when the drivers door was open. It doesn't look like a nice please to work from if im being honest, !
mobast116cab1.jpg mobast116cab3.jpg mobast116cab2.jpg

So i made some for mine too from left over bits and experiments when making the headlight casings,

20240219_105253.jpg 20240219_110933.jpg
 
It does seem like the driver is sitting in an umpire's chair, in the toilet!

PhilP
 
7: Seats !

I needed to create new seats for the front, but for this to fully work as 3+1 across the front meant that I could not use the original restaurant car seats it came with, So the 3d printing module was set up on the Snapmaker and some designs created in tinker cad.

20240301_225209.jpg 20240302_150655.jpg

1st Design, rejected as contours not working

Gscale Coach Seat.png

20240309_160925.jpg
Final design

After a few messed up prints, tinkering and resizing (also switching back from ABS to PLA ) a successful prototype was created. I have saved the files for these and put them up online if anyone need any themselves ! (see following link). Now that I had 1 seat i could work out the sizing for three sitting together and then doubles in the back,

Printables

20240309_160855.jpg

I then experimented with People ! to see if they would fit and discovered that some were too big, some too small ! I needed a compromise... I remembered that at the Gscale shows there was a company (
Design Scan Print 3D that scans people so had a look at their website and found MALE 45 ! or Dirk as i will call him. He looked a bit "big" so was reduced a bit to fit the seat width and the 7 hour 3d print was set off ! Bingo It worked well first time... more on this HERE in the forum.

20240311_101334.jpg

TWO WEEKS LATER !!!!..... 24 sets of seats!!!! (roughly placed in as I want to see how many would fit in sensibly)

20240326_180223.jpg


As I was in a 3d headset, I did break off printing seats to try some new windscreen wipers ! too !

Printables


G scale Train Windscreen Wipers.png

20240326_180252.jpg
 
Last edited:
OK, 1 YEAR LATER.... so Thought it was about time I updated this build, Over the summer garden building shaping takes priority so this is a winter sport for me know.

8) Painting and Filling (the first attempt)

Most of build was now done so It was time to start filling the gaps properly, sanding and preparing the body for painting. Grey Halfords Primer used as usual.
The roof and cab area was also created and filled. Elements of primer scratched back for the MEK to work. I did also apply some glazing at this point which was a mistake.


20240415_103633.jpg20240415_103647.jpg20240424_100546.jpg20240424_214224.jpg

20240424_220734.jpg20240424_225413.jpg20240425_103659.jpg20240426_153646.jpg

At the other end, not that I had the roof married to the frame I realised there was need to shape the rear edge some more. Mini multi tool was applied.

20240427_210742.jpg20240427_210753.jpg

And then the rear section of roof could be build, with ribs and hand cutting the kard.


20240427_220305.jpg20240427_220503.jpg20240509_174854.jpg

20240509_174900.jpg20240509_174917.jpg

SEATS: I then started priming and painting the seats, The original LGB seats in the restaurant car were brown but too big to fit and style the new wagon, A red was chosen as the actual colour in the 80s was a mixed red/blue weave. Halfords Printer and Hobbycraft basic Acrylic red (really like this paint but colour range is limited)


20240409_175124.jpg20240415_102316.jpg
White antimacassars painted on ! had to google that name as knew it had an actual name rather then white headrest sheets,

20240503_091550.jpg20240503_091636.jpg

And then testing people, I used 3d files from Dean 3d scan and print. Design Scan Print 3D from Punch Digital – Creating Amazing Miniature Figures

20240503_092100.jpg
 
9: DISASTER ! (1st world)

Started to spray the main body with a blue sapphire navy paint, It was not the best of quality paint i discovers and took a long while to dry, the weather had turned at this point so the rain got me when I tried to dry outside so I hung up the body in my work cabin. I did post this in the daily chit chats but I cam back one morning to a mini disaster ! It unhooked itself and crashed to the hard floor and shattered !

20240513_172537.jpg20240513_172550.jpg

In a adult hissy fit I shoved it all in a box and "forgot" about it for 6 months....
 
10: LETS REBUILD

So summer, Autumn and most of Winter 2024 came and went and the cold weather past, I ended up collecting more new project locos over the winter and have so many ideas to list. Spring 2025 came about and i wanted to get a project that I had started progressed so out came the bashed up body.

Paint: I had purchased a Spray Paint that i was really happy with the colour but the paint tuned out to be rubbish and not ideal for this type of project. So everything was stripped back again, filler applied, dyed and smoothed off. Grey Halford primmer was applied. For note, The roof section of this coach is a darkish grey so I just used a primer and mid grey paint for this. Apologies for my camera on this, it takes the worst photos !

SUNP0003.JPG

I decided "TIME" was important, so I applied layers and left them to dry over days, I can be very impatient so have to hold back and wait, re sand and smooth if required and layered up again.

After applying REVELL RBR Blue I was just not happy with the colour, too light , the tests looked great but overall it was just too light as the original 80s colour was quite dark. I had at this point also applied the windows using Revell contacta clear.

SUNP0008.JPG

Some windows were cut out on the router, some by hand
20240426_151448.jpgSUNP0013.JPGSUNP0016.JPG

SUNP0009.JPGSUNP0010.JPGSUNP0011.JPG

Original LGB windows used one both sides as this shape with opening windows also appears on the actual coach


SUNP0017.JPGAst-117_G001 side.jpg

OK, So not happy with the paint colour, my skills at paining are "limited" and its not a strength for me, I have no patience and quite clumsy. I left this for a few weeks and was just not happy.. so started AGAIN... A layer of paint was stripped off, re primed and new colour applied.. This time using Rustoleum "painters" touch multi purpose NAVY blue from B&Q. This was a great match for my 90s GE 4/4 blue..


SUNP0046.JPG Stripped down GE 44 to show the colour I wanted to achieve.

Roof:

Roof vents created on 3d printer and applied to roof. glued and painted.

SUNP0019.JPGSUNP0020.JPGSUNP0021.JPGSUNP0022.JPGSUNP0029.JPG

I was not happy with the Grill in the cab, I have painted and repainted so many times it had filled up and looked awful, So a new grill was 3d printed, painted and applied to the side. This time I could add some extra detail. Doors were painted a goldish colour to match the 80s doors. Windscreen wipers applied to roof cab winder (these later melted !)


SUNP0023.JPGSUNP0030.JPGSUNP0024.JPG

I then moved back to the window glass, I HATE CLEAR GLUE ! several attempts at this for the glue to bond to the paint inside, glue that was not expected to "cloud" did, I followed advice from the forum to use "silicon" but this didnt work either. It started to look a right MESS, So again I took a step back , removed what i could and started again. but this time using HUMBROL CLEAR FIX. It has a nice tacky consistency so is easy to apply, drys really quickly and also stuck to the fresh pain inside the coach.
 
11: Graphics

So im a printer, I had been looking at cast "wrap" vinyl for a while to "wrap" locos and other wagons. it has its limits on more detailed small plastic parts and you have to be very careful with the heat gun melting the item your traying to cover (the 3d printed windscreen wipers didn't last long).

I began by creating the graphics to scale and getting the right colour. There are some large cream paint sections on the coach so I thought I would actually create these as graphics rather than paint as the MOB logo and details also could be applied at the same time. I had to recreate the panoramic express logo by scanning and redrawing from one of my books on the MOB that im collecting.

SUNP0004.JPG20250409_185032.jpg

I am recreating the AST 117 which is named after the town Chateau D Oex, the crest was found online and produced.
SUNP0032.JPG

I also created some stickers for the cab dials

SUNP0062.JPG

Applying the side graphics


20250410_121218.jpg
20250410_121223.jpg
20250410_121515.jpg

This Cast wrap vinyl is supper thin and light and with a little heat is very pliable, so you can join two separate bits of vinyl together and its nearly seamless from a distance.


20250410_130154.jpg

20250411_193638.jpg

20250411_193651.jpg

I then started on the roof front


SUNP0059.JPG

heating up the vinyl and cutting out with a scalpel.


SUNP0060.JPG


SUNP0061.JPG

CAN ANYONE SPOT THE MELTED WINDSCREEN WIPERS !!!!!

The effect of the vinyl is as good as painting, it also once heated has a painted effect to is so was quite happy.
 
Back
Top Bottom