
You are using an out of date browser. It may not display this or other websites correctly.
You should upgrade or use an alternative browser.
You should upgrade or use an alternative browser.
What happened at your workbench today?
- Thread starter Henri
- Start date


Rhinochugger
Retired Oik

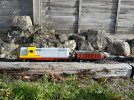
OK, the Critter is back in one piece with almost completely renewed electrics/electronics. The front light comes on when it goes forwards, and the other light comes on when it goes the other way ................ allegedly, as I have only watched the wheels go round on the bench - sharrafter try it on the track when it's dry 
I haven't fully succeeded in my mission for short, tidy wiring I know there are some skilled masters of the art on this 'ere forum, but sometimes that dexterity escapes me

Every lead, however, does have a connector .......... should I ever need to dismember it again (which of course was never the intention when I built it - fire and forget was the thinking.)
It only needs the Rx/ESC to be stuck to the back of the cab, and Ron Dennis to take his stand again.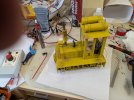
I haven't fully succeeded in my mission for short, tidy wiring
I know there are some skilled masters of the art on this 'ere forum, but sometimes that dexterity escapes me Every lead, however, does have a connector .......... should I ever need to dismember it again (which of course was never the intention when I built it - fire and forget was the thinking.)
It only needs the Rx/ESC to be stuck to the back of the cab, and Ron Dennis to take his stand again.
Last edited:



Chris Vernell
Winter is coming

You could keep boxes in each room of your palatial abode, so you’d always have them to handI am *always* running out of tie-wraps..
Vaguely considering buying by the box....
100 x 2.5mm, black nylon..
Box quantity 55,000!
Perhaps not?
PhilP.

Now, we both know that 'someone' would probably have something to say about that...You could keep boxes in each room of your palatial abode, so you’d always have them to hand

PhilP.
Chris Vernell
Winter is coming
That would be Someone with a capital S. And WMBO.Now, we both know that 'someone' would probably have something to say about that...
PhilP.
Us'ns knows our place


maxi-model
UK/US/ROW steam narrow gauge railways 1:1
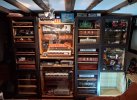
Got my 3rd IKEA Bestå display cabinet finally finished. This time glass shelves for the "set decoration" (1:18 diecasts) to sit on. Got to get some exterior lighting on it. One thing that irritates me about just about every free standing "display" cabinet available and as a result those I have bought is that they are somewhat lacking in the dust proofing dept. Bit vital given their job. So, I have come up with my own low cost, unobtrusive, mods to get things sealed but still fully functional. Two vital components, deployed to suit the situation - 10mm x 5mm d shaped, or b if you must, rubber draught excluder and the 5mm height of the bristle type. Both with their strong self adhesive strip attachments. Thumbnails below the main pic to illustrate examples of their application, doors open/closed. Click to enlarge. Rubber D shape mostly to seal where cabinet frame faces and door contact, the bristle where gaps between 2 doors meeting or a frame edge to glass is to be sealed. If you haven't tried this yourself I hope it is of interest.
Wall of 3 x IKEA Bestå and a "vintage" Niklas unit sandwiched. Former units perfect fit for Fn3 wagons and short locos.The lattter 1:20.3 J&S cars, big Geese & 16mm scale coaches. And a few other things for that matter.
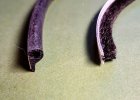
L-R The basic draught excluders used. 1st pair, door face to frame and door frame edge to edge sealing, rubber and bristle respectively. 2nd, glass door with insde frame to glass and flush to face edge sealing, bristle & rubber respectively. 3rd, 2 glass doors edge to edge sealing and flush to frame, all bristle. Hope I'm not teaching my grandmother to such eggs here.
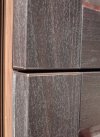
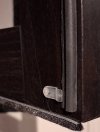
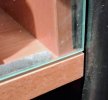
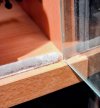
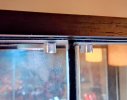
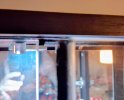
Wall of 3 x IKEA Bestå and a "vintage" Niklas unit sandwiched. Former units perfect fit for Fn3 wagons and short locos.The lattter 1:20.3 J&S cars, big Geese & 16mm scale coaches. And a few other things for that matter.
L-R The basic draught excluders used. 1st pair, door face to frame and door frame edge to edge sealing, rubber and bristle respectively. 2nd, glass door with insde frame to glass and flush to face edge sealing, bristle & rubber respectively. 3rd, 2 glass doors edge to edge sealing and flush to frame, all bristle. Hope I'm not teaching my grandmother to such eggs here.

Northsider
Modelling the Northern half of the Isle of Man
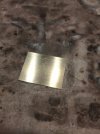
An odd-jobs afternoon in the workshop today. None of the radiators that I looked at -and a couple that I bought- were right, so I (of course... ) decided to make an insert for the wooden 'shell' that I made a while ago. First, a piece of brass shim was cut to size, and cleaned:
then heated and 'tinned' with solder.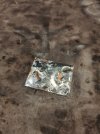
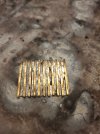
I then cut some ¹/16th brass H-section to length and took time placing it on the tinned brass. When I'd got it positioned, I applied heat and sweated the whole thing together:
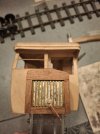
It was then assembled into the shell and test fitted to the railcar:
The wheels and coupling rods run perfectly, but only in one position -swap them around, and they can bind. I discovered this the hard way last week, stripping the brass drive gear, so after assembling it correctly, I removed each rod and wheel in turn. The chassis already has a number, 1-4, on each corner, so the corresponding con rod and wheel were marked on their rear faces to match:
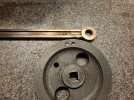
Which will make things easier when it comes apart for painting and maintenance, etc.
A piece of 3mm plate has been cut to make a pivot plate for the 'carriage' to swing on,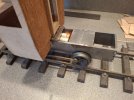 but fitting this will require a strip-down of the cab unit -one of those 'one step forward, two steps back' disadvantages of prototyping...
Finally, a bogie was fettled from a basic Brandbright item, with axle boxes turned up from hexagonal brass bar to add a little detail: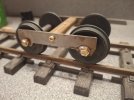
and then the whole thing was pushed together, which seemed a good point to call it a day...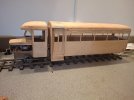
) decided to make an insert for the wooden 'shell' that I made a while ago. First, a piece of brass shim was cut to size, and cleaned:then heated and 'tinned' with solder.
I then cut some ¹/16th brass H-section to length and took time placing it on the tinned brass. When I'd got it positioned, I applied heat and sweated the whole thing together:
It was then assembled into the shell and test fitted to the railcar:
The wheels and coupling rods run perfectly, but only in one position -swap them around, and they can bind. I discovered this the hard way last week, stripping the brass drive gear
, so after assembling it correctly, I removed each rod and wheel in turn. The chassis already has a number, 1-4, on each corner, so the corresponding con rod and wheel were marked on their rear faces to match:Which will make things easier when it comes apart for painting and maintenance, etc.
A piece of 3mm plate has been cut to make a pivot plate for the 'carriage' to swing on,
but fitting this will require a strip-down of the cab unit -one of those 'one step forward, two steps back' disadvantages of prototyping...Finally, a bogie was fettled from a basic Brandbright item, with axle boxes turned up from hexagonal brass bar to add a little detail:
and then the whole thing was pushed together, which seemed a good point to call it a day...
playmofire
Registered
I was talking to Paul at P&S Models some months ago and he told me that Marklin had offered him traction tyres for a particular loco in an enormous quantity.I am *always* running out of tie-wraps..
Vaguely considering buying by the box....
100 x 2.5mm, black nylon..
Box quantity 55,000!
Perhaps not?
PhilP.
Rhinochugger
Retired Oik
Nice prototypical pot boiler under the bonnet thereAn odd-jobs afternoon in the workshop today. None of the radiators that I looked at -and a couple that I bought- were right, so I (of course...
View attachment 363250
then heated and 'tinned' with solder. View attachment 363251
I then cut some ¹/16th brass H-section to length and took time placing it on the tinned brass. When I'd got it positioned, I applied heat and sweated the whole thing together:
View attachment 363252
It was then assembled into the shell and test fitted to the railcar:
View attachment 363254
The wheels and coupling rods run perfectly, but only in one position -swap them around, and they can bind. I discovered this the hard way last week, stripping the brass drive gear
View attachment 363265
Which will make things easier when it comes apart for painting and maintenance, etc.
A piece of 3mm plate has been cut to make a pivot plate for the 'carriage' to swing on, View attachment 363255but fitting this will require a strip-down of the cab unit -one of those 'one step forward, two steps back' disadvantages of prototyping...
Finally, a bogie was fettled from a basic Brandbright item, with axle boxes turned up from hexagonal brass bar to add a little detail:View attachment 363268
and then the whole thing was pushed together, which seemed a good point to call it a day...View attachment 363269

The problem with most 'LGB' traction tyres, is all the stock is probably 30 years old.I was talking to Paul at P&S Models some months ago and he told me that Marklin had offered him traction tyres for a particular loco in an enormous quantity.

I have recently acquired 'Stainz-sized' traction tyres, printed in TPU rubber, as a 'fresh' alternative to old dried-out tyres..
Obviously, the Massoth offering is a more recent product.
PhilP.

Fezwig
Just a man in the middle of a complicated plan.
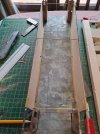
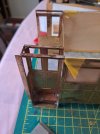
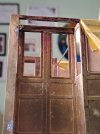
Busy with bits of 2 jobs today, first off the railcar roof, cut and drilled 4 plates to locate in the top of the doorways with a screw in each.
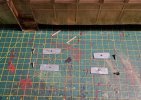
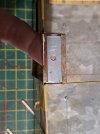
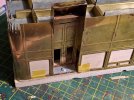
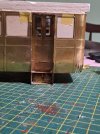
Secondly, the replacement dome arrived, so a quick clean up and a trial fit,
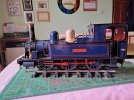
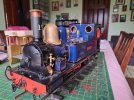
My Cale has 2 humps
Needs a bit of fine tuning and a new method of securing.
Secondly, the replacement dome arrived, so a quick clean up and a trial fit,
My Cale has 2 humps
Needs a bit of fine tuning and a new method of securing.
Northsider
Modelling the Northern half of the Isle of Man
Nice prototypical pot boiler under the bonnet there

It's the usual Como 365 motor, but unusually (for one of my builds) it's mounted vertically, as I needed the space between the frames for batteries. Unlike a locomotive, there's not much hiding space in a railcar!
maxi-model
UK/US/ROW steam narrow gauge railways 1:1
Your skills and ability to improvise leave my quite envious. Remarkable work. I can't wait to see the finished railcar in action.An odd-jobs afternoon in the workshop today. None of the radiators that I looked at -and a couple that I bought- were right, so I (of course...
View attachment 363250
then heated and 'tinned' with solder. View attachment 363251
I then cut some ¹/16th brass H-section to length and took time placing it on the tinned brass. When I'd got it positioned, I applied heat and sweated the whole thing together:
View attachment 363252
It was then assembled into the shell and test fitted to the railcar:
View attachment 363254
The wheels and coupling rods run perfectly, but only in one position -swap them around, and they can bind. I discovered this the hard way last week, stripping the brass drive gear
View attachment 363265
Which will make things easier when it comes apart for painting and maintenance, etc.
A piece of 3mm plate has been cut to make a pivot plate for the 'carriage' to swing on, View attachment 363255but fitting this will require a strip-down of the cab unit -one of those 'one step forward, two steps back' disadvantages of prototyping...
Finally, a bogie was fettled from a basic Brandbright item, with axle boxes turned up from hexagonal brass bar to add a little detail:View attachment 363268
and then the whole thing was pushed together, which seemed a good point to call it a day...View attachment 363269
Rhinochugger
Retired Oik
Caley C2XBusy with bits of 2 jobs today, first off the railcar roof, cut and drilled 4 plates to locate in the top of the doorways with a screw in each.
View attachment 363274View attachment 363275View attachment 363276View attachment 363277
Secondly, the replacement dome arrived, so a quick clean up and a trial fit,
View attachment 363278View attachment 363279
My Cale has 2 humps
Needs a bit of fine tuning and a new method of securing.
maxi-model
UK/US/ROW steam narrow gauge railways 1:1
Busy with bits of 2 jobs today, first off the railcar roof, cut and drilled 4 plates to locate in the top of the doorways with a screw in each.
View attachment 363274View attachment 363275View attachment 363276View attachment 363277
Secondly, the replacement dome arrived, so a quick clean up and a trial fit,
View attachment 363278View attachment 363279
My Cale has 2 humps
Needs a bit of fine tuning and a new method of securing.
Like Patrick your skills and dedication to the tasks in hand are remarkable Pete. Again quite envious, in a good motivational way. Another railcar to savour in the near future in its completed form. I suppose with the IoM as your chosen subject matter it comes with the territory.Busy with bits of 2 jobs today, first off the railcar roof, cut and drilled 4 plates to locate in the top of the doorways with a screw in each.
View attachment 363274View attachment 363275View attachment 363276View attachment 363277
Secondly, the replacement dome arrived, so a quick clean up and a trial fit,
View attachment 363278View attachment 363279
My Cale has 2 humps
Needs a bit of fine tuning and a new method of securing.

Was thinking about your rad last night and a very inivitive job it is, had you pre tinned the U section lightly on the base of the u section it may have made a neater job in the end. I say this not to upset you but perhaps help others that may wish copy the idea. I have certainly bunged it into the ‘if I need a rad’ single brain cell.An odd-jobs afternoon in the workshop today. None of the radiators that I looked at -and a couple that I bought- were right, so I (of course...
View attachment 363250
then heated and 'tinned' with solder. View attachment 363251
I then cut some ¹/16th brass H-section to length and took time placing it on the tinned brass. When I'd got it positioned, I applied heat and sweated the whole thing together:
View attachment 363252
It was then assembled into the shell and test fitted to the railcar:
View attachment 363254
Similar threads

- Replies
- 18
- Views
- 3K
