What happened at your workbench today?

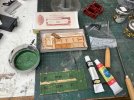
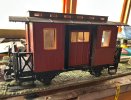
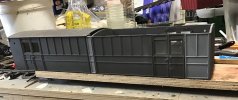
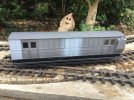
Got brave and finally decided to make a start on my TT120 kits, the brake van bodies were sprayed Halfords red undercoat the other day but the CCT kit needed a thin coat of Green so mixed that up with acrylics today using some Tamiya Acrylic filler, not loosing the very fine detail was the requirement that I think I have managed with. Will get a second probably thiner coat later.image.jpg
 
Got brave and finally decided to make a start on my TT120 kits, the brake van bodies were sprayed Halfords red undercoat the other day but the CCT kit needed a thin coat of Green so mixed that up with acrylics today using some Tamiya Acrylic filler, not loosing the very fine detail was the requirement that I think I have managed with. Will get a second probably thiner coat later.View attachment 357936
That looks like an interesjting project, all laser cut at that scale. The set given your me by my father, Xmas 1963, included a Tri-Ang TT consist that was a Bulleid BofB Pacific, 3 green Mk1 coaches, open 2nd, Buffet, Brake and a.......utility (baggage?) van. All in the correct colours. We lived just around the corner from the SR London terminal Viictoria. Yhe consist's significance was totally lost on this then, and probably still, ignorant soul. Until 20 years ago. Before he passed I apologised for my past ignorance. Max
 
That looks like an interesjting project, all laser cut at that scale. The set given your me by my father, Xmas 1963, included a Tri-Ang TT consist that was a Bulleid BofB Pacific, 3 green Mk1 coaches, open 2nd, Buffet, Brake and a.......utility (baggage?) van. All in the correct colours. We lived just around the corner from the SR London terminal Viictoria. Yhe consist's significance was totally lost on this then, and probably still, ignorant soul. Until 20 years ago. Before he passed I apologised for my past ignorance. Max
No worries, TT3 is a very long time ago the Bullied was a MN but I used mine as a WC/BofB on my West Country branch terminus. The van was classed as a Utility Van by Tri-Ang, available in Green and Maroon. All listed in the Ramsay’s guide now sadly nit produced.
 
I've started work on my latest building project, which is a bit of a challenge. Some time ago, I bought two Kippo Models resin cast kits of lineside huts, both with tiled sloping roofs, but with different frontages. The idea was to combine the kits together to make one building, a Yard Office/WC/Stores for Goudes Sidings, on the Claptowte Railway. I have several Kippo Models resin kits, and they were always good to put together and fun to modify by adding extra detail. I think these two kits must have been pretty much the end of the line before Kippo Models went over to a new range of models produced by 3D printing in plastic. The new models are a far superior product with better detail and far less work to assemble. I have one of their new lineside kits to make into a smaller yard office for Phidell Yard. I will probably assemble this kit next, so that the painting can be done in tandem.

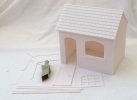
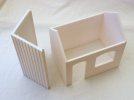
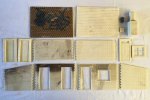
I think by the time these kits were produced, the moulds must have been coming to the end of life. There was a lot of flash to file off, but this in itself was no big deal and was quick and easy enough to do, also the resin used appears to be a bit of a dogs dinner. The kits had the merit of being cheap. The worst aspect was the tiled roofs, the moulding definition was very poor, I guess the moulds were really tired, and a lot of work was involved re-scribing the outline of the tiles. I'm not sure everyone would have bothered, but I felt it was worth it, as, when finished I should be producing what I hope may be a unique model. Everything is now cleaned up and washed. The pic shows all the parts. less two redundant end walls, where the two kits will be joined. Also not show, are the excellent 3D printed drain pipes and guttering, also from Kippo Models, purchased separately, that I used to good effect on my recent Santa's Grotto Carriage Shed build. The roof ends still need to be squared up before they can be joined together. The biggest challenge will now be to alter the brickwork joints on the front and back walls, so that they can be joined together.

dig 260624001.jpg

David
 
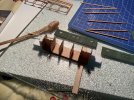
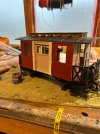
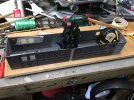
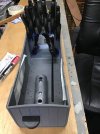
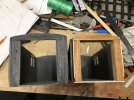
I have set up my Dining Room temporary workbench and been putting the Van together, talking about challenges TT120 kits are certainly that. The lacer cutting and design is superb no problems but getting used to such a small scale again, well let us say it is fun. Very small amounts of Gorila PVA placed with a cut cocktail stick the order of the day. Once this batch if kits built I will be back to G scale projects in the wings. Below the internal supports fitted.IMG_9288.jpeg
Now the ends and one side fitted whilst glue dries on glazing for the other side. I think the roof which must be bent quite sharpe to the sides looks like it will be fun, tis a paper print so may not be as bad as I think.
IMG_9289.jpeg
 
I've started work on my latest building project, which is a bit of a challenge. Some time ago, I bought two Kippo Models resin cast kits of lineside huts, both with tiled sloping roofs, but with different frontages. The idea was to combine the kits together to make one building, a Yard Office/WC/Stores for Goudes Sidings, on the Claptowte Railway. I have several Kippo Models resin kits, and they were always good to put together and fun to modify by adding extra detail. I think these two kits must have been pretty much the end of the line before Kippo Models went over to a new range of models produced by 3D printing in plastic. The new models are a far superior product with better detail and far less work to assemble. I have one of their new lineside kits to make into a smaller yard office for Phidell Yard. I will probably assemble this kit next, so that the painting can be done in tandem.

I think by the time these kits were produced, the moulds must have been coming to the end of life. There was a lot of flash to file off, but this in itself was no big deal and was quick and easy enough to do, also the resin used appears to be a bit of a dogs dinner. The kits had the merit of being cheap. The worst aspect was the tiled roofs, the moulding definition was very poor, I guess the moulds were really tired, and a lot of work was involved re-scribing the outline of the tiles. I'm not sure everyone would have bothered, but I felt it was worth it, as, when finished I should be producing what I hope may be a unique model. Everything is now cleaned up and washed. The pic shows all the parts. less two redundant end walls, where the two kits will be joined. Also not show, are the excellent 3D printed drain pipes and guttering, also from Kippo Models, purchased separately, that I used to good effect on my recent Santa's Grotto Carriage Shed build. The roof ends still need to be squared up before they can be joined together. The biggest challenge will now be to alter the brickwork joints on the front and back walls, so that they can be joined together.

View attachment 357974

David
The left hand building looks like it's been pre-weathered!
 
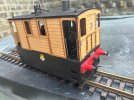
Just a few images of something I’m building whilst awaiting bits on another project. At the gauge 3 show I picked up a wooden kit for the body of a GER tram loco. Toby for the TtT bods.
Well amongst the loot I came away with from Llangollen was a playmobile 0-4-0T.
This seemed like an ideal opportunity for a quick build through uniting the two purchases.
The playmobile body has been put aside.
I’ve also dug out a Stainz boiler unit from when I built a GER Y4 tank loco.
This with a little modification will go inside the team engine to represent the actual internal gubbins etc.
Anyway some GER buffers are on order from Walsall models, so I guess it won’t be long before the model moves to completion.
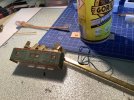
This just leaves the cowcatchers to resolve!?!?!View attachment 357413View attachment 357414
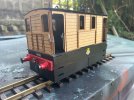
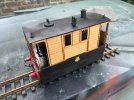
I thought I’d post some imsges of my near complete Y6 GER/LNER/BR tram engine. It awaits cow catchers and a LGB type coupling at one end.
My plan is to make the cow catch from brass wire and then use split pins as uprights all soldered together. I ll see how that goes image.jpg
image.jpgimage.jpg
 
I've started work on my latest building project, which is a bit of a challenge. Some time ago, I bought two Kippo Models resin cast kits of lineside huts, both with tiled sloping roofs, but with different frontages. The idea was to combine the kits together to make one building, a Yard Office/WC/Stores for Goudes Sidings, on the Claptowte Railway. I have several Kippo Models resin kits, and they were always good to put together and fun to modify by adding extra detail. I think these two kits must have been pretty much the end of the line before Kippo Models went over to a new range of models produced by 3D printing in plastic. The new models are a far superior product with better detail and far less work to assemble. I have one of their new lineside kits to make into a smaller yard office for Phidell Yard. I will probably assemble this kit next, so that the painting can be done in tandem.

I think by the time these kits were produced, the moulds must have been coming to the end of life. There was a lot of flash to file off, but this in itself was no big deal and was quick and easy enough to do, also the resin used appears to be a bit of a dogs dinner. The kits had the merit of being cheap. The worst aspect was the tiled roofs, the moulding definition was very poor, I guess the moulds were really tired, and a lot of work was involved re-scribing the outline of the tiles. I'm not sure everyone would have bothered, but I felt it was worth it, as, when finished I should be producing what I hope may be a unique model. Everything is now cleaned up and washed. The pic shows all the parts. less two redundant end walls, where the two kits will be joined. Also not show, are the excellent 3D printed drain pipes and guttering, also from Kippo Models, purchased separately, that I used to good effect on my recent Santa's Grotto Carriage Shed build. The roof ends still need to be squared up before they can be joined together. The biggest challenge will now be to alter the brickwork joints on the front and back walls, so that they can be joined together.

View attachment 357974

David
Interesting project. Yes, 3D printing results in every print being a perfect original, from the digital master. Not a degraded 2nd generation copy from a physical master via a mold with a finte life, that some may be tempted to exceed. So long as the print medium is right then these 3D print products are ideal in this market sector. My supplier in Birmingham 25 year ago, CMA (still going), only used polyurethane resin, of the correct type for purpose. More flexible for say a moving loco that's going to get bumped around, more rigid and slightly brittle when fine detail and textures are needed to be captured on a static model. These were vacuum molded to eliminate air bubbles, hence the molds were sealed allowing detail on the reverse of moldings. Finally, dependent on the complexity of the master, under cuts, etc', a strict life of maximum 50 units was placed on their use before replacement. Coincidentally GRS used the same supplier as myself for some of their 16mm locos, L&B and more and rolling stock W&U, WHR and a few others, and lot of the G3 items they made/make. Swift Sixteen do too. All quality stuff. Max
 
The Isle of man had 2 Empress vans for luggage when they needed a 3rd they looked around the yard ! Now with there previous experience of making the pairs coaches using 2 x 4 wheelers onto bogie chassis. It seemed only logical and cheaper to do the same with an E van or two!
The question I have should they be a Double E ? Big E but that’s the nickname for an American aircraft carrier ! or something else !
 

Attachments

  • IMG_2168.jpeg
    IMG_2168.jpeg
    507 KB · Views: 33
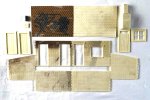
Some progress on the new build. The joints on the front and rear walls have been altered so thet the brick courses mesh together. All the corner joints have been cleaned up so that they mesh nicely. The two roofs have been glued together. They will require some form of backing, on the underside, to reinforce the joint, the top of the join will need a fair bit of work filling and filing to blend in the tile lines. Pleased with how the project is going so far, still a lot of work to do.

dig 260629001.jpg

David
 
Double E progress if the Isle of Man railway was to put to E vans together pairs fashion the guard would need to evenly distribute the luggage and a 2 Ft door ( the gap between green end 3 sets of end beading would be to narrow so removed 4 end panels resulting in 4Ft 4 inch instead !
 

Attachments

  • IMG_2173.jpeg
    IMG_2173.jpeg
    830.4 KB · Views: 27
  • IMG_2172.jpeg
    IMG_2172.jpeg
    364.1 KB · Views: 17
  • IMG_2170.jpeg
    IMG_2170.jpeg
    759.3 KB · Views: 16
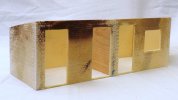
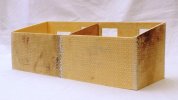
A bit more progress on the new build. The sides have been glued together, the protruding bricks on the corner joints have been filed flush, and gaps filled, sanded and brick courses re-scribed. A 3.0mm plywood dividing was has been glued in at the mid point, to provide additional structural strength.

dig 260702002.JPG

dig 260702003.JPG

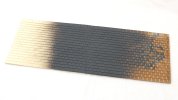
The two lengths of roof have been glued together with a butt joint which has been reinforced on the underside with a piece of 3mm plywood. The area of the join was then carved, filed and sanded to get the lines of tiles to match up as closely as possible. I then sprayed the area of the join with grey plastic primer to see how it looked. There were some areas that I was not happy with, that needed a bit more filling and sanding. When this was done, another coat of primer was sprayed on the area, to check the result. It's not perfect, but it's probably as good as it's going to get. Overall I'm satisfied. Having shortened the building slightly, with the need to join them, and with originally an overhang at each end, the combined roof is too long and will require shortening, also a notch needs to be cut out of the bottom edge, to accommodate the chimney stack that will be glued to the rear wall of the office section. Once that is done, I will prime the whole roof, ready for painting.

dig 260702005.JPG

David
 
I mentioned, in the Coffee Lounge, that I had one of the new 3D printed plastic building kits by Kippo Models. Although bought some time ago, it is only now that I have got around to unpacking it. A slight hiccup, the drainpipes were missing, but replacements are already on the way. Theoretically, it should be my last planned building to be constructed for the Claptowte Railway, but you know what they say about model railways. It is destined to be the loco crew room at Phidell Yard.

In the Coffee Lounge Phil Partridge (PhilP) asked how thick the walls were, having unpacked it, I can now answer that. The shell of the building is a one piece print, with walls perfectly straight and a consistent 5mm thickness. The corners are perfectly square. A very robust structure and much lighter than previous resin cast models. The roof is also a one piece print, with a minimum thickness of 5mm and areas of 6.5mm. All in all, the finished building should be pretty much bombproof. The only finishing required is to attend to the points on the finials and the instruction sheet shows you how to do that.

I shall make a start on applying spray primer, where required, and paint this building in tandem with the resin cast building I'm currently working on.

dig 260703001.JPG

dig 260703003.JPG

David
 
Interesting to see your impressions of a 3D printed kit when building David. Yes, these prints are lighter, replacing solid resin mouldings with walls being "hollow" but for a fine laticework separating inner and out wall "skins". And reduced assembly requirement too. I have 16mm scale kit, awaiting a build 5 years now, representing WHR's Glaslyn panoramic ended Pullman car. It is mostly MDF construction, but the substancial 180° curved end superstructure is 3D printed. All well and good till you realise that this print is "hollow" from its base, the maker said saves material, fair enough. Its surfaces are just inner and outer prints with that integral laticework to separate and support the structure's elements. I was surprised the maker did not provide at least a 1/4" solid base footing to allow a proper mechanical fix to the car's floor/frame. As this is a highly stressed area to my mind it shows an element of poor design that makers should think through before going to market. I've thought of "packing" with 2 pack filler to provide a solid medium to screw into. Mind you it was still early days 5 years ago, for this revolutionary model making medium. Things can only get better. Max
P.S. I'll pop a picture on later to illustrate.
 
Back
Top Bottom