Piko 2-10-2 Class 95 Ref. 37230 conversion to Battery Power.

dunnyrail

DOGS, Garden Railways, Steam Trains, Jive Dancing,
Staff member
GSC Moderator
25 Oct 2009
26,164
4,989
75
St.Neots Cambridgeshire UK
Best answers
0
Country flag
Many Thanks Jon this is all really helpful.

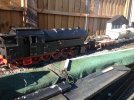
I'm still debating where to apply the razor saw to my Bubikopf - cab or side tanks? - to house the batteries, see separate thread Piko BR 64 Bubikopf.

When it come to re-assembly, there are three screws with big red washers to attach the chassis to the motor blocks on both Piko locos. But I fear I didn't record how tight they all were and now can't remember! Perhaps all three tight then back off half a turn or all tight and back off the main pivot a whole turn? What would you say?
Will look at your 64 then answer the first part in an edit to this post. If I am able.

Edit having read your piece on the 64 again I am in difficulty trying to advise. I would like to see some pictures of the inside of the 64 before commenting. However you do talk about removing the weight and holding stanchions. On relooking at the 95 I could have removed the top of the weight to the depth of the Stanchions mounting a long thin battery pack on top of the space created. I wonder if a similar process coild be appled to the 64? Without any pictures I am just guessing here.

As for the screws, on the 95 they are to allow the chassisi to pivot so some slack is very necessary. Also again on the 95 there are springs that keep things all in place with the centre one having 2 washwes one above the pivit point one below with the spring below that. If your 64 pivots in a y way I would do so that these is a fair bit of play, doing full tight then loosening may not be the best practice as you may damage the plastic inside where the screw screws. I would have thought that a piece of 20 thou plasticard would give a good final resting point if you offer a piece, screw up then withdrawing the plasticard after.
 
Last edited:

WKDOR

Registered
26 Oct 2009
775
6
Welsh Marches
Best answers
0
Country flag
All good stuff Jon thank you. Yes it was very inconsiderate to hi-jack your thread and then ask you for advice without providing the necessary pix:

DSCF5087.JPGDSCF5089.JPGDSCF5090.JPGDSCF5099.JPG


To the uninitiated it looks pretty similar.
 

dunnyrail

DOGS, Garden Railways, Steam Trains, Jive Dancing,
Staff member
GSC Moderator
25 Oct 2009
26,164
4,989
75
St.Neots Cambridgeshire UK
Best answers
0
Country flag
All good stuff Jon thank you. Yes it was very inconsiderate to hi-jack your thread and then ask you for advice without providing the necessary pix:

View attachment 244415View attachment 244416View attachment 244417View attachment 244418


To the uninitiated it looks pretty similar.
So it looks very much to me like the front and rear pivot from the Central Screw. All should thus NOT be too tight but enough to ensure that things do not fall out. My 20 thou theory looks sound. I would imagine that also cutting the weight from the top lengthwise to leave say 5-10 mm above the screws should leave a goodly space for Batteries to sitbon top. Yes there may be some weight loss but you could put some in the Tanks possibly a product Called Liquid Lead?

Liquid Lead Shot (500gm)

This could be built into custom Plasticard Boxes to fit the soace that you may have left,mthatbis if you are not planning to use the Tanks for more Batteries,

PS do not worry about hijacking my thread, we all do it!
 

JimmyB

Now retired - trains and fishing
23 Feb 2018
6,946
921
69
Weston-super-Mare
www.tumble-down-falls.co.uk
Best answers
0
Country flag
Liquid lead, that is what i have just used to increas the weight of my Otto, held in place with casting resin.
 
  • Like
Reactions: 1 user

Rhinochugger

Retired Oik
27 Oct 2009
36,710
4,240
North West Norfolk
Best answers
0
Country flag
So it looks very much to me like the front and rear pivot from the Central Screw. All should thus NOT be too tight but enough to ensure that things do not fall out. My 20 thou theory looks sound. I would imagine that also cutting the weight from the top lengthwise to leave say 5-10 mm above the screws should leave a goodly space for Batteries to sitbon top. Yes there may be some weight loss but you could put some in the Tanks possibly a product Called Liquid Lead?

Liquid Lead Shot (500gm)

This could be built into custom Plasticard Boxes to fit the soace that you may have left,mthatbis if you are not planning to use the Tanks for more Batteries,

PS do not worry about hijacking my thread, we all do it!
Wouldn't worry about losing the weight if you're going to fill the space with batteries :nerd::nerd::nerd:
 

WKDOR

Registered
26 Oct 2009
775
6
Welsh Marches
Best answers
0
Country flag
Thank you all. I'll do some more measurements on the possibility of stowing batteries above half the weight and making up the weight difference in the side tanks, sounds a good approach..

Jon, comparing your 2-10-2 pix with my 2-6-2 ones I detect one (probably significant) difference in the positioning of the springs.

Both have three connection pivot points. From the front, I have springs located on Front and Rear but not Centre/Main. You have yours on Front and Centre/Main but not Rear.

Despite all precautions I do remember one spring jumping out at me - so is it possible I have parked it in the wrong place?

All the best

Mike
 

Rhinochugger

Retired Oik
27 Oct 2009
36,710
4,240
North West Norfolk
Best answers
0
Country flag
Despite all precautions I do remember one spring jumping out at me

:giggle::giggle:

I recently tried a conversion of an old IP chassis to sprung axle boxes. Now the nice, kind, sensible people at Slaters put a healthy handful of springs in the pack, and you could fire them off at will in all directions and still have enough to do the job :emo::emo::emo:
 

dunnyrail

DOGS, Garden Railways, Steam Trains, Jive Dancing,
Staff member
GSC Moderator
25 Oct 2009
26,164
4,989
75
St.Neots Cambridgeshire UK
Best answers
0
Country flag
Thank you all. I'll do some more measurements on the possibility of stowing batteries above half the weight and making up the weight difference in the side tanks, sounds a good approach..

Jon, comparing your 2-10-2 pix with my 2-6-2 ones I detect one (probably significant) difference in the positioning of the springs.

Both have three connection pivot points. From the front, I have springs located on Front and Rear but not Centre/Main. You have yours on Front and Centre/Main but not Rear.

Despite all precautions I do remember one spring jumping out at me - so is it possible I have parked it in the wrong place?

All the best

Mike
the 95 just 2 Springs front and centre. The rear mounting has a rounded top to allow front and rear oscillations rather than just side to side. No spring with that screw. I think you will have placed them corrct on the 65 as there is a spigot on the centre one.

The 95 breakdown in the manual is worse than helpless in that regard, erroneously showing a black blob where springs may be and for the rear mounting where a spring cannot be fitted!
 
Last edited:

WKDOR

Registered
26 Oct 2009
775
6
Welsh Marches
Best answers
0
Country flag
Many Thanks again Jon.

Aah! the manual I had completely forgotten. Yes the 64 breakdown page also shows two black blobs for the Forward and Rear connection springs. But of distinctly different sizes with the bigger one at the Rear as per my photo. So yes mine probably are round the right way. Hey Ho.
 

dunnyrail

DOGS, Garden Railways, Steam Trains, Jive Dancing,
Staff member
GSC Moderator
25 Oct 2009
26,164
4,989
75
St.Neots Cambridgeshire UK
Best answers
0
Country flag
Returning to the 95 I have had a little bit of bad luck with getting this rolling. First I trashed the Reciever and Speed Controller by wiring them up wrong. My silly mistake, I was in too much if a hurry to get the thing working before I went out! Lesson learnt and to be forgotten again. Then when I got then new Reciever and Speed Controller things did not quite work as expected, high speed one way hardly anything the other. An Email to Steve at Fosworks suggested that the Cobra Setup could be a little out. Sure enough reading the instructions part that I have never taken note of revealed all and sorted that issue. Then it kept loosing signal, a rebind sorted that out so all is well now. Needless to say this was my 13th Battery Conversion!

Pics and rest of the notes to be added on an update to this post. Strange goings on with iPads!

What a taradiddle, my iPad 3 is getting near unusable on the net now. Not able tomupdate it any more as Apple apear to have ceased updates to older Models. Grrrr. Anyhow managed to get in so here is the rest of the update.

In spite of the 95 being a big loco stuffing all the gear is was still a trial. In part my own fault as I wanted to use the Opening Smokebox Door for the On/Off and Charging Sockets plus a Fosworks Loom that makes wiring up so easy. My foul up was with the wires between the Reciever and the Cobra Speed Controller. My sily mistake! I suppose that I could have elongated a couple of the Loom Wires to use that space behind the Weight in front of the cab, useful tip if any one else has a go at the 95 for Battery Power. In the second Pic you can see how I have mounted the Battery Pac saddle bag like either side of the Loco with the connecting wire coming forwards. It was all just about the right length! Also you can see an old Garden Solar Light used as a Speaker Enclosure. Good call Phil to save them for such purposes.
image.jpegimage.jpeg
So having resolved my idiotic wiring foul ups it was time for some testing. She ran it all round my line and only had a little problem on a R1 in the Shed in an area that it was originally never intended to use Locomotives. Things change but with a litle wiggle of the rail 95 managed to get through the curve the next trip.

It really is a mild manered Locomotive and ahunting is a pleasure as had been the case with all of my Battery Coversions, that lack of link via dirty rail is a thing if the past now and running is a real pleasure sans Track Power.image.jpegimage.jpegimage.jpeg
That final picture shows it running over a Peco R1 Curve in the Shed with no worries. Just the detail to return back in place now and the buffers need attention as they are a little to high. But she is allready to take her place on this Wednesday and Fridays Timetable Running Days.

She certainly is a big lump of Plastic!
 

Attachments

  • image.jpeg
    image.jpeg
    585.6 KB · Views: 0
Last edited:
  • Like
Reactions: 1 users

dunnyrail

DOGS, Garden Railways, Steam Trains, Jive Dancing,
Staff member
GSC Moderator
25 Oct 2009
26,164
4,989
75
St.Neots Cambridgeshire UK
Best answers
0
Country flag
80120A4E-9EB2-4DB2-859C-D39E86ECD71C.jpegHaving seen Nodrod’s big Swiss Train on the today bit of the Forum I decided to see what I could do with my Piko Battery 2-10-2. I was pleased to see that it could pull 12 Coaches round the 4ft Rad Curved Incline (Ramp to the Germans) with mostly 1:40 Grade but a punishing final 2 yards at 1:30.

 
  • Like
Reactions: 2 users

dunnyrail

DOGS, Garden Railways, Steam Trains, Jive Dancing,
Staff member
GSC Moderator
25 Oct 2009
26,164
4,989
75
St.Neots Cambridgeshire UK
Best answers
0
Country flag
There are a couple of long Handrails in this beast that have kept being displaced as I move the Loco about. In the end the spigots finally gave up the ghost so a more serious solution was required. In one of my Bits Boxes I found some small turned metal Handrail Knobs. These were Hafix’d into the holes that were opened out a tadge with a small drill in a Pin vice. Steel Wire of small section placed in and again more Hafix to hold in place. Hopefully these new Handrails will be more robust.60CDD097-9B73-46AC-A91B-558D03CB5AE6.jpeg
Small s-lodge of Hafix will be lost when the beast is finally weathered.
 

dunnyrail

DOGS, Garden Railways, Steam Trains, Jive Dancing,
Staff member
GSC Moderator
25 Oct 2009
26,164
4,989
75
St.Neots Cambridgeshire UK
Best answers
0
Country flag
I recently had a bit of a problem with this Loco. The Fuse went belly up, now as this is a wire one it resulted in a pull apart of the Loco resulting in a few issues with my installation. Firstly that the Fuse was inaccessible but also that the Batteries had been held in place with Jaffa Tape, both not ideal in a Battery Conversion. So first up was to resolve the Battery Holding, on a couple of my other conversions I had used Butyl Pond Liner to hold the Battery in place by using Screws and a thin cut length of the Liner. This worked well in those conversions so this beastie got the same treatment while it was in bits. I thought I had taken pics of this, perhaps on another device. If I find them will add them to the post.

I am also aware that there have been others pulling apart Piko Steam Locomotives so here are a couple of Pictures showing the relevant hiding places for the varying screws. Note that I now mark them with a felt tip, memory not being what it used to be always handy if I need to pull it apart again.
Front Screw Hidy Location.
D8074EAE-AB41-4E89-BAE3-D412D826F0D0.jpeg
Ones to the rear, 8 in all. That makes 9 in total.
99E1AE73-7FA0-4FED-88B8-04C9BE56F091.jpeg
So it was then onto making the fuse accessible, fortunately there is a Toolbox on one side of the Loco so the wires were unsoldererd from the Fuse only and extended so that they would pop out of a hole in the Side Tank. This hole was made by cutting out WITHIN the area of that Tool Box as seen below. You can see that I have allowed plenty of wire to enable a change of fuse should one be required in the future.
B73E41A8-95A7-40C2-A484-75A09A73DE8C.jpeg
Before I stuffed it all back the Loco was switched on and duly made noises so that proved to me that all was well with the new wiring. All stuffed back in the Side Tanks and Tool Box but back in place - no glue! As you can see the mod is pretty well invisible but a much needed one.
B6CB8B7F-BF57-4093-9C69-572B8FA41C15.jpeg
How did I Fuse the thing out in the first place, well I think I may have plugged the Charger in whilst the Power was on to the Smart Charger, a complete no no as the instructions say. Another lesson learnt.
 

dunnyrail

DOGS, Garden Railways, Steam Trains, Jive Dancing,
Staff member
GSC Moderator
25 Oct 2009
26,164
4,989
75
St.Neots Cambridgeshire UK
Best answers
0
Country flag
Had a bit of a disaster at yesterdays running day, this is a big beast and is a bit touchy on dodgy track. She did a nosedive after an unexpected derailment onto a concrete paving slab from around 30 inches high. Here is the damage.3280C0E2-5B2B-4906-BAAF-4113460A7C7E.jpeg
Not an easy fix and had a similar disaster with the same part the other side when doing the conversion. Fortunately that had all the bits so a glue up job sorted it and tge repair is still going strong. This time with the missing bits a super glue and UV glue job as shown only lasted 40 feet.
7066E7F1-2BF3-4041-A56D-D7A6BF062789.jpeg
So I will need to fabricate a new part as this is not a simple replacement like LGB may be as you can see the part is not a push or screw fit.
 

Paul M

Registered
25 Oct 2016
11,875
1,696
60
Royston
Best answers
0
Country flag
I know it looks bad, but it does show how robust these LGB locos are
 

dunnyrail

DOGS, Garden Railways, Steam Trains, Jive Dancing,
Staff member
GSC Moderator
25 Oct 2009
26,164
4,989
75
St.Neots Cambridgeshire UK
Best answers
0
Country flag
I know it looks bad, but it does show how robust these LGB locos are
Indeed it does, as this is a Piko one they are pretty robust as well.

But onwards with the issues arrising. Both the pumps at the front end came off but these were easily popped back into position. A flag holder on thenfront has gone missing and the two small handrails at the front of the tanks are lost broken. Plus a buffer is missing as well, had a good search in the undergrowth where it occurred and not found.
EB491949-00C9-41B3-85C4-8F016CD41F8B.jpeg
Still they are cosmetic issues, the most worrying was the broken Eccentric Crank. A look at previous pics will show this has a sort of pressed in open holed pin. This was forced out carefully as I did not want to damage the Eccentric Rod that it is attached to. Then a new Eccentric Crank was made out of flexible bendy 60 thou plasticard. The square hole of the Main Pin was created by drilling 3.5mm then filing out in short bits till the square hole fitted the Main Pin. Another hole was then drilled into the other end for the Eccentric Crank Pin to take a 10ba screw. This hole was tapped and a screw inserted with the slot at the rear and a nut to give rotating clearance from there a couple of washers either side and 2 nuts lock nutted completed that part of the work. Fitting the Eccentric Rod required a couple of washers as the thing moved round on testing. All appears ok now on test runs. Phew.
7A356AD9-6495-45F2-BD72-4B150DF0E1AC.jpeg
I will paint things up after completing making up the other cosmetic damage. This could have been so much worse and it has tempted me to relay the track near the bridge that had a big dip and dodgy curbe that I believe to be the cause of this incident.
 

tac foley

Registered
11 Apr 2017
4,263
1,008
78
Near Huntingdon, UK
Best answers
0
Country flag
Not sure that Piko has yet reached the dizzy heights of spares availability enjoyed by LGB owners.....one way to try though.................
 

Paul M

Registered
25 Oct 2016
11,875
1,696
60
Royston
Best answers
0
Country flag
Indeed it does, as this is a Piko one they are pretty robust as well.
Sorry I miss read you thread. Fortunately it didn't end up like the chap's at Peterborough last year. I think it was a total write off
 

dunnyrail

DOGS, Garden Railways, Steam Trains, Jive Dancing,
Staff member
GSC Moderator
25 Oct 2009
26,164
4,989
75
St.Neots Cambridgeshire UK
Best answers
0
Country flag
Not sure that Piko has yet reached the dizzy heights of spares availability enjoyed by LGB owners.....one way to try though.................
If you look at the picture on Post #32 you can see the way that all the gear is held together by what looks to be push in pins that are somehow splayed out. The Return Crank - Eccentric Rod - Expansion Link are indeed 1 spare part as shown on the Piko parts list. But the big but is how would you get the pin out that fits in the Expansion Die-Block? Probably by gentle brute force as I had to with the pin as described in post #36.
 

Ralphmp

Registered
6 Jan 2010
1,640
228
72
Herts
Country
England
Best answers
0
Country flag
If you look at the picture on Post #32 you can see the way that all the gear is held together by what looks to be push in pins that are somehow splayed out. The Return Crank - Eccentric Rod - Expansion Link are indeed 1 spare part as shown on the Piko parts list. But the big but is how would you get the pin out that fits in the Expansion Die-Block? Probably by gentle brute force as I had to with the pin as described in post #36.
Are they mini versions of what I believe are called roll pins? I had to dismantle my mum’s Stannah stair lift some years ago and the ”track” was held together with these pins which, once I realised what they were (!) simply tapped out. The pins typically have a chamfered end so inserting them is relatively easy using either a press of some kind or an appropriate punch.