Goods shed

Chris Vernell

Tortoise
24 Oct 2009
9,036
1,813
77
Nepean, ON
Country
Canada
Best answers
0
Country flag
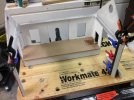
After a false start, I have started work on my Thorley Miniatures goods shed.
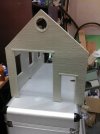
20210713_174917.jpg
I had these walls together, but botched the CA joint, so I broke it apart, cleaned up the mating surfaces, applied CA more carefully and ...
20210713_174930.jpg
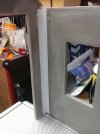
... reinforced the butt joint with styrene angle and 5-minute epoxy. I shall do the same at the three other corners. I shall apply 1/2" alumin(i)um angle along each wall to keep the resin straight, having learned from my engine shed (from another maker) how resin walls can bend -- the engine shed will also be getting the alumin(i)um treatment.
20210713_174956.jpg
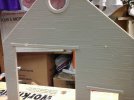
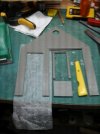
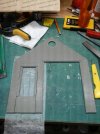
I moved the small door at the other end so it will be level with the loading dock inside and outside the shed. The shed kit comes as an empty shell: I shall build an interior loading floor from styrene I have to hand, along with a dock outside that will have a crane.
20210713_175028.jpg
I was worried about how this door-moving would go, but the resin proved easy to cut with the groover/styrene cutter (the yellow-handled device) and straight edge, followed by razor saws. The section of wall that was above the door is now below it: It doesn't matter that the brick courses don't line up as the exterior loading dock will hide this bit of wall.
I should put in a good word for Thorley's kit: The parts are well moulded and have remarkably little flash, and a spot of kitbashing is good for the soul :angel:.
 
Last edited:
  • Like
Reactions: 1 users

Martino

Photography, The GWR, Aviation, Travel, Cars.
24 Oct 2009
3,748
380
71
Jasper, Georgia. USA
www.facebook.com
Best answers
0
Country flag
I’ve done a number of the Thorley Miniatures buildings and I’ve been impressed with all of them. The signal box and engine shed have stood up to our Northwest Florida weather remarkably well. The station building has been out for a year and did suffer a bit from the heat and direct sun. I have remedied that during the annual ’spruce up’ by adding some metal strengthening along the bottom edges of the longer walls that get the sun. I’m also going to reinforce some of the inside corners as, because it’s such a large building, lifting it can put stress on the joints.
Overall I’ve been very impressed and Ian Thorley is great at customer service - very attentive. Can‘t wait for future 16mm building kits.
I’ll be interested to follow your goods shed build.
 

Gizzy

A gentleman, a scholar, and a railway modeller....
26 Oct 2009
36,136
2,273
63
Cambridgeshire
www.gscalecentral.net
Best answers
0
Country flag
I've a couple of Thorley Signal Boxes.

Some of the windows were broken, so I emailed them and they supplied replacements very quickly.

Very pleased with mine....

thumbnail_20210215_161634.jpg
 
  • Like
Reactions: 1 user

Chris Vernell

Tortoise
24 Oct 2009
9,036
1,813
77
Nepean, ON
Country
Canada
Best answers
0
Country flag
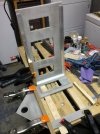
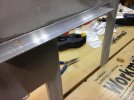
Epoxying aluminum angle to the resin walls in an attempt to keep them straight.
20210717_113358.jpg20210717_113430.jpg
Epoxy takes 24 hours to cure, the label says, so slowly slowly
 
  • Like
Reactions: 1 user

ge_rik

British narrow gauge (esp. Southwold and W&LLR)
24 Oct 2009
10,701
1,244
Cheshire
www.riksrailway.blogspot.com
Best answers
0
Country flag
The quality of moulding looks excellent. No evidence of air bubbles that I can detect and the brickwork looks very sharp.

Rik
 

Chris Vernell

Tortoise
24 Oct 2009
9,036
1,813
77
Nepean, ON
Country
Canada
Best answers
0
Country flag
Having assembled two corners of the goods shed (post #4 above), I started to create a loading platform for the interior of the goods shed from 1/8" styrene, periodically offering it up to the loading-door wall to make sure it would fit between the shed ends ...
... and then I dropped the other wall/end assembly, which promptly came cleanly apart at the reinforced corner joint when it hit the floor :oops:. So much for CA and 5-minute epoxy. The aluminum reinforcing angle along the bottom of the long wall also came loose at one end. I shall apply a fresh daub of slow-cure epoxy and clamp it for a couple of days.
I coloured the air a delicate shade of blue :swear:, then turned aside and marked out a stairwell at one end of the platform floor. Now I had clearly marked the well's edges, but I managed to cut it 3/8" too wide on one side :rolleyes:. Easily fixed: I cut a 3/8" wide piece from the offcut and glued it in place. It will be hard to see once the building is complete.
Actually, even the corner dissolution isn't a disaster: I shall reassemble the loose end section to the loading-door wall, thus creating a U of one wall and two ends into which I shall fit the loading platform, which will help keep the structure straight and square. The other long wall will go into place after I have done the interior work.
Yours truly,
A. Klutz.
 

Martino

Photography, The GWR, Aviation, Travel, Cars.
24 Oct 2009
3,748
380
71
Jasper, Georgia. USA
www.facebook.com
Best answers
0
Country flag
Chris,
I too had a few problems with using epoxy to bind the ali and the resin (on my station building) I ended up drilling small holes and using nuts and bolts. I disguised the bolts on the outside, so they don’t show, but found the bolted joint better than the glue.
 

JimmyB

Now retired - trains and fishing
23 Feb 2018
6,946
921
69
Weston-super-Mare
www.tumble-down-falls.co.uk
Best answers
0
Country flag
Chris aluminium is notorious for bonding, and normally requires specialist glue for a permanent bond. As for the wall, Garden Rail mag recommends P38 2 part car body epoxy filler.
 

Chris Vernell

Tortoise
24 Oct 2009
9,036
1,813
77
Nepean, ON
Country
Canada
Best answers
0
Country flag
Chris,
I too had a few problems with using epoxy to bind the ali and the resin (on my station building) I ended up drilling small holes and using nuts and bolts. I disguised the bolts on the outside, so they don’t show, but found the bolted joint better than the glue.
Good advice: I have indeed been thinking of using nuts and bolts.
 

dunnyrail

DOGS, Garden Railways, Steam Trains, Jive Dancing,
Staff member
GSC Moderator
25 Oct 2009
26,163
4,989
75
St.Neots Cambridgeshire UK
Best answers
0
Country flag
Best thing for additional securing corners on external buildings after glueing is Silicone from a tube applied with a gun. Look for external grades. What you could have done to get your corners correct would have been to glue the sides with the ally to keep things square held in place with mini clamps if you have them, a piece of ally L top and bottom would have allowed you to put Silicone between the ally then when all dried remove the ally and apply silicone to the remaining bit. I have some of these L shaped white thingamybobs that I bought at a show for making good corners or square joins, seen on another project I am building but nicely shows the principle. Oh and the other ones in the tool draw as well.
E9FF521D-F6F6-426F-9D9C-3A4468519A95.jpeg
 

Chris Vernell

Tortoise
24 Oct 2009
9,036
1,813
77
Nepean, ON
Country
Canada
Best answers
0
Country flag
... I have some of these L shaped white thingamybobs that I bought at a show for making good corners or square joins, seen on another project I am building but nicely shows the principle. Oh and the other ones in the tool draw as well.
View attachment 287851
I have corner thingamabobs, but none that small. I do, however, possess many of those small rainbow clamps. "What do you need that many for?" She asks before purloining them for Her own purposes. :rolleyes:
 
  • Like
Reactions: 1 users

Paul M

Registered
25 Oct 2016
11,875
1,696
60
Royston
Best answers
0
Country flag
I have corner thingamabobs, but none that small. I do, however, possess many of those small rainbow clamps. "What do you need that many for?" She asks before purloining them for Her own purposes. :rolleyes:
Get your own back, nick her clothes pegs
 

Chris Vernell

Tortoise
24 Oct 2009
9,036
1,813
77
Nepean, ON
Country
Canada
Best answers
0
Country flag
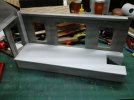
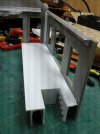
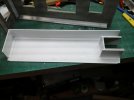
Cut and assembled the loading platform:
20210719_175800.jpg
That 1/8" styrene had been sitting around for years. Yes, the other end wall fits properly.
20210719_175813.jpg
The stair stringers came as a second set for the coaling stage, where I chose not to use them. The treads will also come from that kit, suitably shortened; I won't use the risers.

20210719_175836.jpg
I will install more supports underneath before attaching the platform to the shed walls.
 
  • Like
Reactions: 1 user

Chris Vernell

Tortoise
24 Oct 2009
9,036
1,813
77
Nepean, ON
Country
Canada
Best answers
0
Country flag
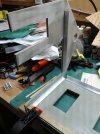
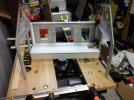
Started work on bolting the aluminum angle to the goods shed walls. Mr Dremel at work.
The brass bolts are half-inch 0-80 and should be unobtrusive under a coat or two of paint.
20210807_122750.jpg20210807_122806.jpg
10 or 14 more to go, depending on whether I use 4 or 6 on the long walls.

P.S. I decided to use 6 bolts on the long walls, which means I am 7 washers short; I need 32, I had 25. Never was no good at a rhythm tick. Ah well, an excuse to order More Stuff online >:).
 
Last edited:
  • Like
Reactions: 1 user

Chris Vernell

Tortoise
24 Oct 2009
9,036
1,813
77
Nepean, ON
Country
Canada
Best answers
0
Country flag
With the loco shed braced, I turned back to the goods shed:

20210823_161627.jpg
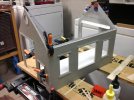
I CA'd the loading platform to the left-hand end wall and side wall, then CA'd the right-hand end wall in place before reinforcing the corner with styrene angle and epoxy.
Yes, the platform has "stone" facing even though the shed is brick: The stone is what I had to hand.
The end walls have a vertical bow, which I hope will vanish when I put the other side wall in place.

20210823_161651.jpg
Exterior view. I wonder whether I should fill in the bottom of the windows, which are very close to platform level, or apply safety bars or some such.

20210823_161745.jpg
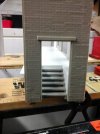
The stairwell.
I shall paint the interior before attaching the remaining wall.
 

Chris Vernell

Tortoise
24 Oct 2009
9,036
1,813
77
Nepean, ON
Country
Canada
Best answers
0
Country flag
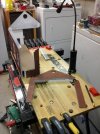
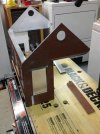
Here is the goods shed resting in pieces: Mr. Klutz knocked it off the Workmate t'other day after painting the brickwork :oops:.
The fourth wall had not been attached.

20210906_141420.jpg20210906_141623.jpg
Repairs will be undertaken when Klutz's hands stop shaking :worried: and he's had a think :think:
 

Chris Vernell

Tortoise
24 Oct 2009
9,036
1,813
77
Nepean, ON
Country
Canada
Best answers
0
Country flag
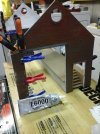
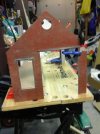
The goods shed end walls are restored. I found a forgotten tube of E6000 industrial adhesive that had given me good results on other projects, so I have hopes it will work equally well here.

20210907_161203.jpg20210907_161220.jpg

I used black styrene left over from the hopper wagon builds to fish the wall pieces together ...

20210907_161329.jpg
and a length of ABS 3/8" angle to straighten a bowed wall piece as well as reinforce the joint.
I shall wait a day or three for the glue to cure before a bit more interior painting, and then fix the fourth wall in place.