What happened at your workbench today?

Northsider

Modelling the Northern half of the Isle of Man
3 May 2012
2,329
565
Hertfordshire
Best answers
0
Country flag
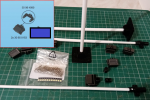
I brought home a scroll saw for the workshop, having sourced some 3-inch pinned blades for it from www.workshopheaven.com.

And a satisfyingly rectangular box has arrived with two kits for these:
1606853886341.png
IoMR bolster wagons, a short production run by a fellow member of the IOM 15mil Group. A Winter Project! :clap:
 

-bbbb

Registered
21 Dec 2017
589
129
Idaho
Best answers
0
Country flag
I brought home a scroll saw for the workshop, having sourced some 3-inch pinned blades for it from www.workshopheaven.com.

And a satisfyingly rectangular box has arrived with two kits for these:
View attachment 276948
IoMR bolster wagons, a short production run by a fellow member of the IOM 15mil Group. A Winter Project! :clap:
Scroll saws seem to be useful for plastic welding:
The same principle makes it somewhat difficult to cut larger pieces of plastic. I was cutting plastic train parts only to find them re-melted together.
 

Northsider

Modelling the Northern half of the Isle of Man
3 May 2012
2,329
565
Hertfordshire
Best answers
0
Country flag
Scroll saws seem to be useful for plastic welding:
The same principle makes it somewhat difficult to cut larger pieces of plastic. I was cutting plastic train parts only to find them re-melted together.
I've had this when cutting acrylic; applying masking tape along the cut line usually prevents it.
 

dunnyrail

DOGS, Garden Railways, Steam Trains, Jive Dancing,
Staff member
GSC Moderator
25 Oct 2009
26,076
4,976
75
St.Neots Cambridgeshire UK
Best answers
0
Country flag
This was Monday actually but still irrelevant! I have been thinking about a small panel for the electrics in my loft and looking in my Switch compartment, the shambles was and is a pain. There are lots of different types and sizes of switches in stock as seen below all jumbled in one compartment. So I decided to do mini compartments for each type as shown under construction making them from offcuts if Plasticard.
791D0138-B9FC-413F-9D99-6B87D47F52EB.jpeg
Having done this the switches were placed in mini boxes by type, so now no more buying switches when I already have some in stocl! I know that I could have put them in smaller bins but these are all full of other stuff! Plus there is no wall space for a new set of smaller ones. There were a couple of switches that were still wired up that did not fit and these are in another jumbled compartment but eventually I may sort this one out as well.
948B68FC-E1AA-4DAE-816F-273449946D4B.jpeg
 
  • Like
Reactions: 1 user

casey jones snr

Registered
20 Apr 2010
11,888
7,463
73
Charnwood Forest Railway. Rothley. Leics.
Country
England
Best answers
0
Country flag
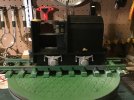
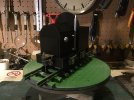
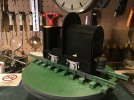
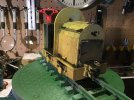
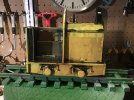
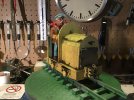
Today I’ve been busy adding detail parts to my first 3D printed locomotive:-
BB7F75F4-26BF-433B-B140-A7D59DA37F14.jpeg958F9008-0266-4027-A23B-FAA20D34C98E.jpeg7FFBE71A-9565-4F19-A793-6367297D9DF0.jpeg

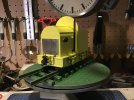
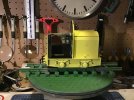
I then undercoated the locomotive and set it aside to dry. Once dry I applied Halfords Machine yellow:-
78CEFA2B-F494-4202-B74D-98C3D4E3BB01.jpeg3013489C-AF1B-40F1-927D-A5C7F2373C0C.jpeg
3013489C-AF1B-40F1-927D-A5C7F2373C0C.jpeg

Once the yellow paint has dried I will set about weathering the locomotive.
 

Madman

Registered
25 Oct 2009
17,068
2,935
Pennsylvania, USA
Best answers
0
Country flag
This was Monday actually but still irrelevant! I have been thinking about a small panel for the electrics in my loft and looking in my Switch compartment, the shambles was and is a pain. There are lots of different types and sizes of switches in stock as seen below all jumbled in one compartment. So I decided to do mini compartments for each type as shown under construction making them from offcuts if Plasticard.
View attachment 277009
Having done this the switches were placed in mini boxes by type, so now no more buying switches when I already have some in stocl! I know that I could have put them in smaller bins but these are all full of other stuff! Plus there is no wall space for a new set of smaller ones. There were a couple of switches that were still wired up that did not fit and these are in another jumbled compartment but eventually I may sort this one out as well.
View attachment 277008
Holly toggle switch, Batman !
 

The Shed

Citizen of the Republic of the North East.
8 Mar 2020
1,064
238
Darlington, County Durham.
Country
England
Best answers
0
This was Monday actually but still irrelevant! I have been thinking about a small panel for the electrics in my loft and looking in my Switch compartment, the shambles was and is a pain. There are lots of different types and sizes of switches in stock as seen below all jumbled in one compartment. So I decided to do mini compartments for each type as shown under construction making them from offcuts if Plasticard.
View attachment 277009
Having done this the switches were placed in mini boxes by type, so now no more buying switches when I already have some in stocl! I know that I could have put them in smaller bins but these are all full of other stuff! Plus there is no wall space for a new set of smaller ones. There were a couple of switches that were still wired up that did not fit and these are in another jumbled compartment but eventually I may sort this one out as well.
View attachment 277008


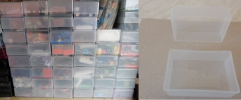
For my storage solution I used these..
Storage Boxes.png

From this Seller, two sizes available....
 

The Shed

Citizen of the Republic of the North East.
8 Mar 2020
1,064
238
Darlington, County Durham.
Country
England
Best answers
0
Pondering and 3D printing items for Floodlights, Signals and Ground Signals.....

Floodlights.png

Signal idea.png
 

dunnyrail

DOGS, Garden Railways, Steam Trains, Jive Dancing,
Staff member
GSC Moderator
25 Oct 2009
26,076
4,976
75
St.Neots Cambridgeshire UK
Best answers
0
Country flag
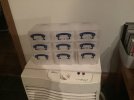
I use some of them in varying sizes but find a stack of them not a lot of use. Your memo has reminded me of this little stack of Really Useful Boxes that have been hidden behind my Vertical Drill since I set up my workshop in 2012. Now moved out to find somewhere more noticeable to put it and fill it with carp. The small ines are somewhat similar in size to your Credit Card sized ones.
B25032D1-101C-499D-9BD1-4CC82C0902C3.jpeg
 

musket the dog

Registered
31 Oct 2009
787
143
Leicester
nlrr.webs.com
Best answers
0
If you can't find anything to put in those really useful boxes, there's always plan B :)

No 1 (6).jpg
 
  • Like
Reactions: 1 user

dunnyrail

DOGS, Garden Railways, Steam Trains, Jive Dancing,
Staff member
GSC Moderator
25 Oct 2009
26,076
4,976
75
St.Neots Cambridgeshire UK
Best answers
0
Country flag

musket the dog

Registered
31 Oct 2009
787
143
Leicester
nlrr.webs.com
Best answers
0
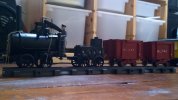
Now that really is an interesting Train. Can see how the Opens have been made I think, but the Loco and Tender deserves some more detail please?
I'll try my best, it was built quite a while ago now. I did have a build thread back in the day, but the pages don't appear to be loading at the moment.

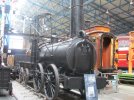
It all started after seeing the Agenoria displayed at the NRM, I think a little over 10 years ago now. It was my first serious, planned out attempt at a scratch build. So it was a little basic, but hopefully I ended up with something a little reminiscent of the prototype.

Agenoria Forum.jpg

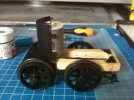
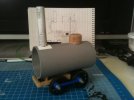
The base of the build was one of those cheap 3v motor/worm drive combos. The shaft for the driven gear just so happens to fit exactly into a set of LGB wheels. A wooden chassis was built into the gear box and the axles supported in acrylic bearings made on my school's laser cutter. An off cut of waste pipe was used for a boiler, the dome is the end of an old broom and the boiler front is a disc of MDF sanded into a round.

NLLR No1 (4).jpg Boiler (1).jpg 21-09-12 (1).jpg

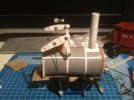
The foot plate is another laser cut piece of MDF, planked with coffee stirrers. Other than the pen barrel for the funnel, plasticard was used for everything else. Rivet detail was embossed from the rear of the strips using the point of a compass. I had to ditch the 4 wheel drive as I couldn't get the drive wheels to stop slipping on the axle. The cylinders are a piece of plasticard tube with a disc on each end. a hole was drilled into the top one and another tube inserted to support the piston rod.

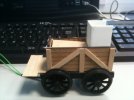
The tender is pretty similar, the chassis is square wooden section, with laser cut sides. There's a single AA battery in the tender to power it, accessed by a removable coal load. The whole thing is controlled by a DPDT switch mounted between the tender chassis rails.

No 1 s2 (3).jpg No 1 s2 (5).jpg

The drive rods are all quite slack and I've had to tweak it a lot to get it to run consistently. It did manage a full lap of the line a Mbiff's last open day though, it just took a veeerryy long time. I've been studying it a bit lately, thinking about how I could improve it and add some more detail. At the moment though I'm tempted to leave it as it is, to have to compare back to :)

 
  • Like
Reactions: 1 user

musket the dog

Registered
31 Oct 2009
787
143
Leicester
nlrr.webs.com
Best answers
0
Duplicated post :oops:
 

dunnyrail

DOGS, Garden Railways, Steam Trains, Jive Dancing,
Staff member
GSC Moderator
25 Oct 2009
26,076
4,976
75
St.Neots Cambridgeshire UK
Best answers
0
Country flag
I'll try my best, it was built quite a while ago now. I did have a build thread back in the day, but the pages don't appear to be loading at the moment.

It all started after seeing the Agenoria displayed at the NRM, I think a little over 10 years ago now. It was my first serious, planned out attempt at a scratch build. So it was a little basic, but hopefully I ended up with something a little reminiscent of the prototype.

View attachment 277055

The base of the build was one of those cheap 3v motor/worm drive combos. The shaft for the driven gear just so happens to fit exactly into a set of LGB wheels. A wooden chassis was built into the gear box and the axles supported in acrylic bearings made on my school's laser cutter. An off cut of waste pipe was used for a boiler, the dome is the end of an old broom and the boiler front is a disc of MDF sanded into a round.

View attachment 277057 View attachment 277056 View attachment 277054

The foot plate is another laser cut piece of MDF, planked with coffee stirrers. Other than the pen barrel for the funnel, plasticard was used for everything else. Rivet detail was embossed from the rear of the strips using the point of a compass. I had to ditch the 4 wheel drive as I couldn't get the drive wheels to stop slipping on the axle. The cylinders are a piece of plasticard tube with a disc on each end. a hole was drilled into the top one and another tube inserted to support the piston rod.

The tender is pretty similar, the chassis is square wooden section, with laser cut sides. There's a single AA battery in the tender to power it, accessed by a removable coal load. The whole thing is controlled by a DPDT switch mounted between the tender chassis rails.

View attachment 277058 View attachment 277059

The drive rods are all quite slack and I've had to tweak it a lot to get it to run consistently. It did manage a full lap of the line a Mbiff's last open day though, it just took a veeerryy long time. I've been studying it a bit lately, thinking about how I could improve it and add some more detail. At the moment though I'm tempted to leave it as it is, to have to compare back to :)
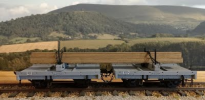
Many thanks for the information, building something like that is not for the faint hearted. Getting it to even work is a job well done. It is also very nice to see one of those beasts running, something rarely seen except perhaps at Beamish where I have been amased at all the wandering and poping up and down bits of rods etc.
 

JimmyB

Now retired - trains and fishing
23 Feb 2018
6,891
910
69
Weston-super-Mare
www.tumble-down-falls.co.uk
Best answers
0
Country flag
Not just today, but since last weekend I have been glueing coal on to my 10-wheeler tender. The plastic fake coal looked so unrealistic I decided I need to add something that looked the part, deciding not to "flood" with PVA solution I went for individual pieces stuck down with superglue, obviously the occasional bonded fingers occurredIMG_0979.jpg:
 

dunnyrail

DOGS, Garden Railways, Steam Trains, Jive Dancing,
Staff member
GSC Moderator
25 Oct 2009
26,076
4,976
75
St.Neots Cambridgeshire UK
Best answers
0
Country flag
Very nice however your loco will always need to be stood under the coaling station with a full load of coal like that, there should be at least some kind of a dip towards the Tender Exit and possibly only a little either side of the Coal Flats at the front. Sorry Jimmy, hate to be the bearer of bad news after excessive Super Glue and finger sticking chores. I get that this is what you see on Shed Pictures and sometime at Stations with overflowing loads of coal.

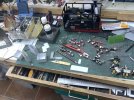
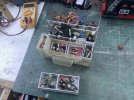
In my workshop been busy track clamping and building a control panel plus wiring and testing it.
 
Last edited:

JimmyB

Now retired - trains and fishing
23 Feb 2018
6,891
910
69
Weston-super-Mare
www.tumble-down-falls.co.uk
Best answers
0
Country flag
Very nice however your loco will always need to be stood under the coaling station with a full load of coal like that, there should be at least some kind of a dip towards the Tender Exit and possibly only a little either side of the Coal Flats at the front. Sorry Jimmy, hate to be the bearer of bad news after excessive Super Glue and finger sticking chores. I get that this is what you see on Shed Pictures and sometime at Stations with overflowing loads of coal.

In my workshop been busy track clamping and building a control panel plus wiring and testing it.
Jon it is what it is, and works on my railway :):)
 

dunnyrail

DOGS, Garden Railways, Steam Trains, Jive Dancing,
Staff member
GSC Moderator
25 Oct 2009
26,076
4,976
75
St.Neots Cambridgeshire UK
Best answers
0
Country flag