Melbournesparks
Registered
Or, in this case, overhead power.
A new traction system for the tramway has been on the cards for a while now. Until this point I've been using conventional straight DC fed via overhead wire, with a maximum voltage of 12v. It worked, but all the inherent problems of straight DC were present, and I really wanted a more robust and flexible system for working outside.
A list of requirements were drawn up:
*independent control of more than one tram at once
*independent lighting
*potential for special function controls
*reliable operation in dirty conditions
*low unit cost
*minimum specialist hardware
The conventional solution, to the first three points at least, is a DCC system. It was an option I looked into, but it falls flat on the last three points, especially cost. The thing that killed it was the need for a a specialist power supply, as well as the DCC equipment that needed to be fitted to each piece of rollingstock.
Instead I decided to go for a radio control system, using the same deltang/RCS equipment I was already using for battery powered rollingstock. Only in this case the radio receiver and motor controller would get power straight from the overhead wire. Of course it wasn't going to be quite that simple, since some ancillary equipment is needed to ensure a clean, reliable DC supply to the motor controller.

Rhb ABE1 34 was picked for the test installation. It has plenty of space inside, and on the old traction system its operation was rather limited by the low voltage and maximum current on the controller.

Here's the main electrical equipment assembled ready to be fitted. Power from the overhead (anywhere between 12 and 40v, DC or AC) is fed to a bridge rectifier (top right), then to two voltage regulators. The top one supplies 6vDC for lighting, and the bottom one supplies 12vDC for traction, to the radio receiver and motor controller (green PCB at the bottom).
In order to provide a reliable power supply on dirty track, there are four 47000uf traction capacitors connected in parallel with the traction voltage regulator. They are charged via a 5 ohm current limiting resistor, otherwise the inrush current on those big capacitors is something nasty! There is also a low voltage cutout for the radio in the form of a relay, which drops out when the capacitors discharge below about 5v. There's a few diodes in series with the relay coil to set the cut in/cut out voltage. There's probably better ways to do this, but I'm not much of an electronics person unfortunately.

Here's the other side of the electrical equipment board, and the traction capacitors under the big birdsnest of lighting wires. The entire car needed a full rewire, which was a fun job! Though not so bad once I worked out what all the wires did.
To keep costs down, virtually all the ancillary electrical equipment is salvaged, including all the wire, resistors, relays and diodes. The voltage regulators cost $2 each on ebay.

Reassembled for testing. Because this thing is so awkward to dismantle, the opportunity was taken to replace the headlights with LED's, and paint the inside of the passenger cabin. The big headlights are 10mm warm white LED's with the lenses cut to a new shape. The headlights are automatically switched for direction by the motor controller. The blue light in the toilet is from the indicator LED's on the voltage regulators, I probably need to desolder those!
Everything seemed to be in order with power applied on the bench, all the lights came on and the motors responded to control inputs.

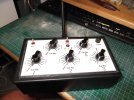
Time for a real world test! The overhead voltage was increased to 31v DC, which is the most my bench power supply will provide. The difference was immediately apparent, operation is much smoother and consistent than on straight DC. The higher overhead voltage seems to make a huge difference in burning through the crud, try as I might it was nearly impossible to become insulated, save for places where the wheels are physically separated from the rails by leaves or something. Even then, the capacitors hold enough charge to keep the radio on and power the motors for a short time, so it's possible just to move forward a bit until contact is restored and the lights come back on.
Performance seems to be in every way satisfactory, especially with regard to reliability in dirty outside conditions. It's easy to sometimes get caught up in the technical minutiae of fixing some technical problem or other, and forget how much fun it is just to be able to operate without having to worry about stuff.
Work is now proceeding on fitting out the rest of the fleet. Some of the smaller rollingstock is going to provide some interesting challenges in finding space to install the electrical equipment, but that's all part of the fun.
A new traction system for the tramway has been on the cards for a while now. Until this point I've been using conventional straight DC fed via overhead wire, with a maximum voltage of 12v. It worked, but all the inherent problems of straight DC were present, and I really wanted a more robust and flexible system for working outside.
A list of requirements were drawn up:
*independent control of more than one tram at once
*independent lighting
*potential for special function controls
*reliable operation in dirty conditions
*low unit cost
*minimum specialist hardware
The conventional solution, to the first three points at least, is a DCC system. It was an option I looked into, but it falls flat on the last three points, especially cost. The thing that killed it was the need for a a specialist power supply, as well as the DCC equipment that needed to be fitted to each piece of rollingstock.
Instead I decided to go for a radio control system, using the same deltang/RCS equipment I was already using for battery powered rollingstock. Only in this case the radio receiver and motor controller would get power straight from the overhead wire. Of course it wasn't going to be quite that simple, since some ancillary equipment is needed to ensure a clean, reliable DC supply to the motor controller.
Rhb ABE1 34 was picked for the test installation. It has plenty of space inside, and on the old traction system its operation was rather limited by the low voltage and maximum current on the controller.
Here's the main electrical equipment assembled ready to be fitted. Power from the overhead (anywhere between 12 and 40v, DC or AC) is fed to a bridge rectifier (top right), then to two voltage regulators. The top one supplies 6vDC for lighting, and the bottom one supplies 12vDC for traction, to the radio receiver and motor controller (green PCB at the bottom).
In order to provide a reliable power supply on dirty track, there are four 47000uf traction capacitors connected in parallel with the traction voltage regulator. They are charged via a 5 ohm current limiting resistor, otherwise the inrush current on those big capacitors is something nasty! There is also a low voltage cutout for the radio in the form of a relay, which drops out when the capacitors discharge below about 5v. There's a few diodes in series with the relay coil to set the cut in/cut out voltage. There's probably better ways to do this, but I'm not much of an electronics person unfortunately.
Here's the other side of the electrical equipment board, and the traction capacitors under the big birdsnest of lighting wires. The entire car needed a full rewire, which was a fun job! Though not so bad once I worked out what all the wires did.
To keep costs down, virtually all the ancillary electrical equipment is salvaged, including all the wire, resistors, relays and diodes. The voltage regulators cost $2 each on ebay.
Reassembled for testing. Because this thing is so awkward to dismantle, the opportunity was taken to replace the headlights with LED's, and paint the inside of the passenger cabin. The big headlights are 10mm warm white LED's with the lenses cut to a new shape. The headlights are automatically switched for direction by the motor controller. The blue light in the toilet is from the indicator LED's on the voltage regulators, I probably need to desolder those!
Everything seemed to be in order with power applied on the bench, all the lights came on and the motors responded to control inputs.
Time for a real world test! The overhead voltage was increased to 31v DC, which is the most my bench power supply will provide. The difference was immediately apparent, operation is much smoother and consistent than on straight DC. The higher overhead voltage seems to make a huge difference in burning through the crud, try as I might it was nearly impossible to become insulated, save for places where the wheels are physically separated from the rails by leaves or something. Even then, the capacitors hold enough charge to keep the radio on and power the motors for a short time, so it's possible just to move forward a bit until contact is restored and the lights come back on.
Performance seems to be in every way satisfactory, especially with regard to reliability in dirty outside conditions. It's easy to sometimes get caught up in the technical minutiae of fixing some technical problem or other, and forget how much fun it is just to be able to operate without having to worry about stuff.
Work is now proceeding on fitting out the rest of the fleet. Some of the smaller rollingstock is going to provide some interesting challenges in finding space to install the electrical equipment, but that's all part of the fun.