You are using an out of date browser. It may not display this or other websites correctly.
You should upgrade or use an alternative browser.
You should upgrade or use an alternative browser.
Piko BR 64 Review and Upgrade
- Thread starter P A D
- Start date
P A D
Registered
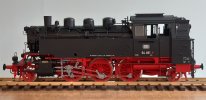
Here are some before and after shots, as requested by JimmyB. Here's the model as it comes, minus the separately included details to b4 fitted by the owner (upper platform grab rails, piston tail rods, handwheels on steam domes and rear ladders. I'd already repainted the front pony wheel in this view.
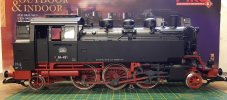
After fitting of the included detail parts plus modification.
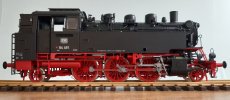
T'other side before.
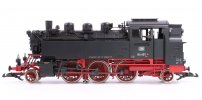
And after.
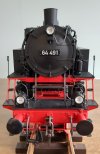
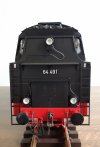
The front end before.
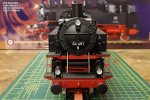
And after.
The rear end before.
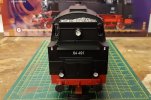
And after.
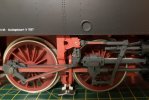
The valve gear before.
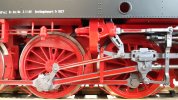
And after.
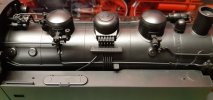
The boiler and tank tops before.
And after.
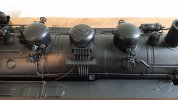
The right front side before.
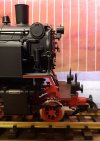
And after.
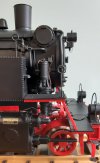
The left front side before.
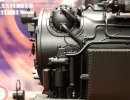
And after.
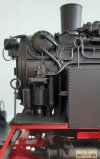
Cheers,
Peter

After fitting of the included detail parts plus modification.

T'other side before.

And after.

The front end before.

And after.

The rear end before.

And after.

The valve gear before.

And after.

The boiler and tank tops before.

And after.

The right front side before.

And after.

The left front side before.

And after.

Cheers,
Peter
Last edited:
P A D
Registered
Many thanks Jimmy.
Here are some views after weathering.
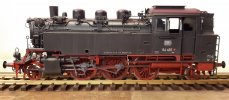
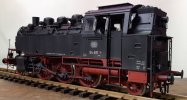
Unfortunately the weathering has picked up the less than perfect joint on the extension to the buffer stocks.
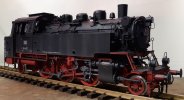
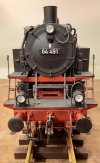
Here's a front end view after adding the overhead warning flash above the the numberplate and disguising a little better the printed original lower down. I think the buffer beam rivets should be larger but I'll live with them now.
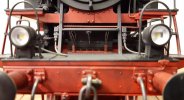
In this lower view, the oil pipes and funnels and the smokebox drain pipe can be seen. The chain on the cap is some twisted copper wire, but it main have been possible to find some suitable fine chain in this scale. The feed pipe on the compressor looping back to the air tanks is only push fit, as it has to be removed when the boiler is taken off.
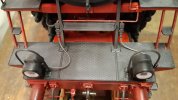
Somebody needs to get rid of all that slack on the footplate at the back of the bunker, but I doubt if Dr. Wilfer will get his hands dirty.
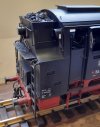
I'm always a bit apprehensive when it comes to weathering a pristine model, but I thinks it has turned out OK.
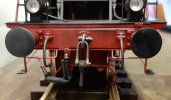
The printed signage is very nicely done by Piko, but I've ordered some etched replacements for the DB, BD, Bw, number and works plates from Beckert Modelbau in Germany. I got the plates for the 1:35 BR 86 from them and they are very accommodating. As the scale of this model varies slightly depending on where you measure, I've measured the various plates and Beckert will make them the same size so they cover the originals. They make them from scratch and it takes 3-4 weeks, but they are top quality. I'll give them an overspray with some dilute black (dirty thinners) so they don't stand out too much on the weathered model before attaching them. Pictures will follow.
Cheers,
Peter
Here are some views after weathering.


Unfortunately the weathering has picked up the less than perfect joint on the extension to the buffer stocks.

Here's a front end view after adding the overhead warning flash above the the numberplate and disguising a little better the printed original lower down. I think the buffer beam rivets should be larger but I'll live with them now.

In this lower view, the oil pipes and funnels and the smokebox drain pipe can be seen. The chain on the cap is some twisted copper wire, but it main have been possible to find some suitable fine chain in this scale. The feed pipe on the compressor looping back to the air tanks is only push fit, as it has to be removed when the boiler is taken off.


Somebody needs to get rid of all that slack on the footplate at the back of the bunker, but I doubt if Dr. Wilfer will get his hands dirty.

I'm always a bit apprehensive when it comes to weathering a pristine model, but I thinks it has turned out OK.

The printed signage is very nicely done by Piko, but I've ordered some etched replacements for the DB, BD, Bw, number and works plates from Beckert Modelbau in Germany. I got the plates for the 1:35 BR 86 from them and they are very accommodating. As the scale of this model varies slightly depending on where you measure, I've measured the various plates and Beckert will make them the same size so they cover the originals. They make them from scratch and it takes 3-4 weeks, but they are top quality. I'll give them an overspray with some dilute black (dirty thinners) so they don't stand out too much on the weathered model before attaching them. Pictures will follow.
Cheers,
Peter
P A D
Registered
That's pretty much it. On the chassis I brush on a very dilute mix of Humbrol black 85 and gloss varnish. Just dirty thinners really. This can run into nooks and crannies and picks out the details more in the rec areas. I blow dry with a hair dryer then brush over with a damp brush (thinners only) to clear some of the black off. I then overspray the chassis with a light whisk of the dirty thinners. Up top I first sprayed on light coats of a very dilute "dark earth " mix of Humbrol Matt enamels. I then went in very close at low pressure and a fine spray pattern down each line of vertical rivets. Some of this mix was also sprayed on the cylinders and chassis. The tank cab and bunker sides were also given clean with a damp brush using vertical strokes only. That's pretty much it apart from some dry brushing with very diluted metal coat on the checker plate areas to try to emulate the wearing of the paint by the cold hoppers worn by the engine men. It's not state of the art and others do it much better than I can, but I'm satisfied with it.The end result certainly comes to life with your subtle weathering job. I imagine it was a mix of light spray effect and dry brushing? Be good to hear your methods.
Last edited:
I think you have done a very nice subtle look for an engine in service but not too far from a cleaning rag. Thanks for the info.That's pretty much it. On the chassis I brush on a very dilute mix of Humbrol black 85 and gloss varnish. Just dirty thinners really. This can run into nooks and crannies and picks out the details more in the rec areas. I blow dry with a hair dryer then brush over with a damp brush (thinners only) to clear some of the black off. I then overspray the chassis with a light whisk of the dirty thinners. Up top I first sprayed on light coats of a very dilute "dark earth " mix of Humbrol Matt enamels. I then went in very close at low pressure and a fine spray pattern down each line of vertical rivets. Some of this mix was also sprayed on the cylinders and chassis. The tank cab and bunker sides were also given clean with a damp brush using vertical strokes only. That's pretty much it apart from some dry brushing with very diluted metal coat on the checker plate areas to try to emulate the wearing of the paint by the cold hoppers worn by the engine men. It's not state of the art and others do it much better than I can, but I'm satisfied with it.
P A D
Registered
Getting back to the smoke unit issue, assuming the unit is faulty, I decided to buy a new unit. I've tried it and there's still a problem. Everything works in forward and reverse, all the sounds, the directional lights and the under tank lights. As soon as the smoke is switched on, the lights flash, the speaker makes a clicking noise and thd loco just stutters. Switch off the smoke unit and it's fine again. I connected the original unit to the transformer and turned the power up to a quarter, so about 5 volts. It puffs away merrily so the unit is fine.
On the loco, the smoke unit is connected correctly to the voltage regulator and as mentioned earlier, I've rechecked all the other connection against the photos I took before dismantling, and they are all back where they were. I now know the smoke unit itself is OK, but I don't know if the problem existed before I dismantled the model as I did not try that function. Everything else was OK as I ran it on blocks of wood with the terminals connected to the wiper pick ups. I've checked all the wiring as best as I can and I can't see any damaged insulation that may be shorting. One other thing is the volume control for the sound has no impact on the volume, whether on maximum or minimum. It's quite loud and would be fine in the garden, but too loud indoors. I'm not concerned about that, but the control is on the same circuit board as the inspection light and smoke unit on/off switches, so I don't know if that has any relevance to the smoke unit issue. Any further thoughts or suggestions to find the cause and a solution would be much appreciated.
Cheers,
Peter
Without going back to the beginning of the thread:
I believe the loco has a decoder fitted?
For the sound; there is a CV which can be used to set the volume within the configuration of most decoders. This CV can also have a value set to enable an external volume control. - My guess, would be that this CV is not set correctly?
The smoke unit problem is a little more worrying.. It could be a fault on the decoder, or it could be a fault in the wiring I will download the information for the loco, and see what I can suggest..
PhilP.
P A D
Registered
Hi Phil, yes it has a Massoth decoder. I'm not sure which component is the decoder, but these are the photos I took to help put the site back in the original terminals after I removed them. If you need to see anything else that will help, let me know as I can strip it again and take more.Without going back to the beginning of the thread:
I believe the loco has a decoder fitted?
For the sound; there is a CV which can be used to set the volume within the configuration of most decoders. This CV can also have a value set to enable an external volume control. - My guess, would be that this CV is not set correctly?
The smoke unit problem is a little more worrying.. It could be a fault on the decoder, or it could be a fault in the wiring I will download the information for the loco, and see what I can suggest..
PhilP.
Cheers,
Peter
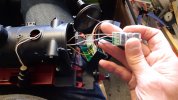
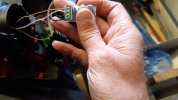
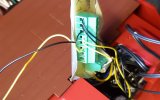
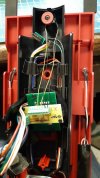
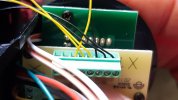
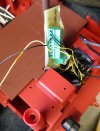
Excellent!
The photo's help..
Just having a cuppa, but the yellow's and black's are lights (from memory).. The little board, looks to be a Massoth 5/6V regulator board (again, from memory)..
Can you just confirm the colour of the two wires from the loco into the little board please?
One appears Green, the other could be Slate(grey) or Violet(purple)?
Thanks,
PhilP.
idlemarvel
Neither idle nor a marvel
If it is a Massoth sound decoder you need to set CV200 (master volume control) to 255 to enable the external volume control.
Having checked the Piko documentation...
Wires into the PIKO 5V regulator, are Black and Green..
Disconnect the smoke unit from the regulator. - Try loco.
Still a fault?
Disconnect the black / Green wires from the regulator board.
Still a fault?
I am guessing we may have to trace back to where the regulator board is connected? - It could be track-power, it could be to a decoder output..
Let us know how you get on with the regulator board tests..
PhilP.
P A D
Registered
Ok chaps,
The decoder is a massoth xls.
The yellow and black wires are for the lights. Those are the ones I disconnected along with the ones from the smoke unit.
Can you just confirm the colour of the two wires from the loco into the little board please? Phil, not sure which ones you mean and in which image?
Dave, your suggestion re the volume is I assume referring to use with dcc. I'm using DC.
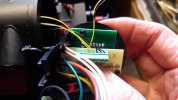
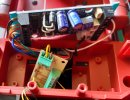
Here are some photos of the decoder.
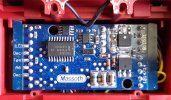
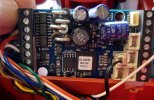
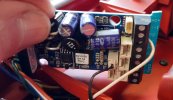
This smaller board is above the massoth. There was insulation tape between the two which I removed for the photo.
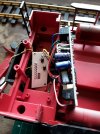
The decoder is a massoth xls.
The yellow and black wires are for the lights. Those are the ones I disconnected along with the ones from the smoke unit.
Can you just confirm the colour of the two wires from the loco into the little board please? Phil, not sure which ones you mean and in which image?
Dave, your suggestion re the volume is I assume referring to use with dcc. I'm using DC.
Here are some photos of the decoder.


This smaller board is above the massoth. There was insulation tape between the two which I removed for the photo.


Yep..Ok,
Smoke unit switch off - runs fine.
Smoke unit switch on - faulty.
Smoke unit removed - runs fine with the smoke switch on and off.
Black and green wires disconnected from regulator board - runs fine with smoke switch on or off.
Does that tell you anything?
So, you are using the Piko switch (because you are analogue, DC) for the smoke unit?
The green wire to the regulator, is being fed with +22V from the decoder?
The black wire to the regulator board.. Where is that connected please?
I think you may be confused by the Piko '+22V' labelling in some of your documentation?
The regulator for the smoke unit needs to be fed with track-power, via the switch in the loco which you are using. NOT the '+22v' from the decoder.
I think you will find, when you switch the smoke unit on, you are connecting the +22V decoder-out feed to one of the track-power wires.. Hence the decoder not liking it.
Regarding the volume control..
CV 200 'tells' the decoder either, what volume to produce sound at, OR use the external volume control. - So would need changing (possibly) to a value of 255.
BUT,
The volume control within the loco is NOT connected to the XLS decoder anyway. - The loudspeaker is connected to the XLS (obviously) and is the small 2-way plug on the face of the decoder..
PhilP.
idlemarvel
Neither idle nor a marvel
Good spot Phil. Makes the volume control rather redundant....The volume control within the loco is NOT connected to the XLS decoder anyway. - The loudspeaker is connected to the XLS (obviously) and is the small 2-way plug on the face of the decoder..
PhilP.
From page 10 of the manual..
It shows the switches and volume control on a sub-assembly in the smokebox..
We need to get 'track-power' (or we could use decoder +ve. AND decoder -ve.) to this board, and the smoke-unit switch.. - Personally, I would use raw track-power, rather than adding load to the decoder. ***
Then we need to get the volume control wires back into the XLS decoder, to make that function.
NOTE: We may need to get CV 200's value altered to '255' to make this work!
***This very much depends how the board / switch is wired back to the area of the decoder.

