OcCre LCC 106 Tram conversion to a MBRO Double Deck Bogie Trailer car for a Steam Tram

dunnyrail

DOGS, Garden Railways, Steam Trains, Jive Dancing,
Staff member
GSC Moderator
Country flag
Back in 2014 I posted this in reeply to someone who was looking for builder to do a similar conversion, I did not offer my services but it put a germ in an idea in my head..........
“I have a Manchester Bury Rochdale and Oldham Steam Tram. It also requires a Double Deck Trailer. Some of the Steam Tram Lines did have ordinary Single Deck Cars, but a Double Decker would look the business. Looks like I need to put my hand in my pocket as the Occre Double Decker would appear to make a perfect starting point. Many thanks for the idea.”
1C7887F6-A6E5-493D-8237-697D9040BEEC.jpeg
I bought my Tram from Glendale in December that year, opened the box cogitated some then started pondering some more. A big start was made and a great deal of work was done then it has sat moribund for a year or two having a few showings on here. It had sat waiting for inspiration as other projects appeared more important, but I needed to sort out how the top would be removable and also the stair handrails were causing me problems as being whitemetal were not very robust. So the lockdown has pushed it to the fore and serious progress has occurred over the last few days.

This is what I was looking to build.
BED1EDC9-9E9E-4BFA-AD82-3E48CF92F130.jpeg
First I needed to source some G scale Fox Bogies, wish I could remember where I got these from but they fitted the bill perfectly. The wheels are IP Engineering 24mm insulated steel. You can see the parts for the bogie in the first pic so someone should recognize the supplier on the instructions, Swift 16?

The tram was build up mostly following the instructions then the front of the top deck was hacked off to follow my chosen prototype, below you can see the bogies mounted on the base. The X construction is to limit the swing of the bogies, not that I have track that tight but it stops them flopping around during handling of the car. You can also see that I have noted the colours used underneath the Tram. A useful reminder for the future should any touch ups be required.
84ABE2CE-9ED1-4AC1-B96A-040A340609ED.jpeg
D8B489FD-94F9-4116-8A2F-953E689DEC4F.jpeg
Making the top deck seats was a long drawn out job.
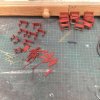
4F4CED3F-60F2-4076-8EF6-A75DC07289E7.jpeg
But the single deck was not much quicker either, it may seam that the job is tedious. Not a bit of it but not a kit for the impatient beginner! Glazing was inserted after much careful cutting using Glue ‘n’ Glaze to fill in the poor joints.
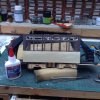
6A3C18AC-60B3-4090-BD77-87F62D7CA738.jpeg
Curving the metal for the step sides was not the easiest of processes either.
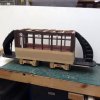
DE4CF020-DFF8-422F-B85D-B3C62096E806.jpeg
Here is a picture when the top to deck was mostly completed out in my line with the Peter Angus Steam Tram (buikt by Mike Flack).
98602042-6486-4D15-AF89-1DD2440BED3D.jpeg
More to come on this saga later.
 
Last edited:
I pontificated about the problems of securing the top deck. This as it turned out was not such an issue after a little brain work, first thing was though to get the single cell into action.

I decided that the best way would be to screw it on, thus a short piece of KS Square brass was marked for tapping by drilling through above the door to make a couple of marks so that 10 BA screws could be used to secure the tube. A similar but single hole in the top deck was also prepared. This of course was done for both ends. Perfect for the job, after so much pondering.
DB0C556A-581E-4F8B-8389-BA94AECE6EC0.jpeg
Next issue was to resolve the horrible (but nicely detailed) stanchions for the handrails. Below can be seen the crude replacements being constructed for the uprights by the stairs together with some originals, some broken.
543C4522-1519-45B8-BE2F-272D84625A71.jpeg
By this time the workbench had become the usual mess!
FA0236C1-CBF9-45F9-81C2-F9176474D6CC.jpeg
Here you can see the two uprights have been put in place and some Mains Wire cut and bent for the varying handrails, I could not find the proper stuff that came with the Kit. Needless to say after this was all done it appeared out of a box that got opened when I was looking for something else. You can just about make out the screw head that holds the top deck in position.
E34411BD-DF2C-40BE-8230-0385858D8F2B.jpegAA135537-F46F-4604-B440-4F48308D3EB1.jpeg
The short lengths of tubing are for the wires to push into at one end thus allowing the roof to be removed. Must attend to the missing seat reversing gear on that end seat.
140E0709-3EC8-4070-AA54-76090BC4F724.jpeg
Upper handrail now in place, probably not as pretty as OcCre intended to be, but certainly more robust.
8EE72648-2E09-4F7D-BED2-0195B3F10D9A.jpeg
In the last day or so I have been forming from the kit parts of the front aprons, bending thin ply is not something that I have got into much before but with water and some heat we have made progress. Details in the next post.
0F562733-4DD6-4E2B-AB3D-87065C1FA3CF.jpeg
 
Some odd work indulged in over the last few days has seen the curved front panels completed and put in place. Curving these was not the simplest of processes and not something that I was not at all comfortable with. But a dunk in cold then boiling water and fixed overnight to this as a former was a good start. Another overnight after more boiling water to to a more rounded glass saw the job done.
4703B9D6-CC8C-477D-9E31-8C77B58F7717.jpeg
Then it was a glue in place job, some old curve for the part of the top deck that was not needed has been added to the top of this and forms a nice beading. Clamped in place whilst drying overnight gave it the final bit of curve required. Note that there has been a small split with the abuse that the ply has been subjected to, no doubt caused by the boiling water but nothing else would get the curve done. I can live with the imperfection after a gentle sanding down.
9C2AE1C6-44D5-4CA9-80BC-E14E1C0F4FE6.jpeg
It occurs to me that I have not shown you the bogie in full, so here it is.
9A8FED7D-F53B-4969-BB26-6F05AF88AD1F.jpeg
Next job is to consider how I couple the Tram to a Loco. You can see here that the Steam Tram has a typical 16mm Buffer, this has been modified with some metal underneath the buffer face so that it can couple to LGB Vehicles. So that is a starter for 10.
661AFFBD-9CE6-440D-968B-188F63B01AA7.jpeg
Thoughts of a subtle coupling have been pondering, so something between an Alex Jackson and Rik’s LGB Coupling replacements have been trundling round what is left of my grey matter. Thus the metalwork below has been fabricated as a start.
963972A9-CE44-409C-8847-55CF1876D036.jpeg
Here can be seen the AJ lookalike that will allow the coupling to attach (hopefully) to any LGB coupling equiped Steam Tram that attempts to pull it. Just awaits soldering up. There will also need to be something to the left to restrict too much drooping of the coupling.
01344E39-5F0F-444D-9761-70FE02338E84.jpeg
Oh the Advertising has been done a long time back, again the prototype with those adds and some other suoerfluous printing that I did.
4AAFB785-F228-406A-A602-5C801407FBFE.jpeg

94BBFF92-87CE-4B77-AB93-2CEC1363D15F.jpeg
 
Love your work!!
Watch out you made a typo in the decals: There is one s too much in Houten’s. The decal reads Houtens’s.
Thanks Henri and oops, think it will be left as is. Not that rare a thing for sign-writers to make spelling mistakes in the old days! Though how long they would be left and whether they would be both sides is open for dabate!
 
Not a rare thing at all, when I was driving for Deane's Buslines in Canberra, a funeral home had some advertising done for the buses.
It was supposed to be "Every life is different, every funeral should be too."
It came out applied to the rear of the bus as "Every life is different, every fun should be too."
It took a couple of weeks to correct.
A grave error
 
More odd jobs, I mentioned about a lip to the curved front panel. Here is the part from the kit being held by sundry clamps while the PVA dries.
3EDB4DA5-0A0C-4A8F-BBC0-8664BA84EC3C.jpeg
Next I was fiddling about with the coupling. Below you can see how it links to the Brandbright Coupling, in truth it was not an auto as thre was insufficient flex/spring in the wire so I replaced the original thick some Merco Point Control type wire. I also put in some bits to keep things from flopping about all over the place so now I can carry it out to the Track without having to worry too much about getting things in line. The cross metal keeper is just a piece of brass tube bent to a U shape then flexed out slightly so that it is a tight interferance fit into the two holes. This will allow easy removal of the bogie should the need arise.
A5771532-B4DC-4DBE-A3DD-2FAF40AA1A45.jpegE8475C76-4C69-492C-9A70-6CB8B197DC43.jpeg
Some test running was required and I can hapoiky report that R1 curves are not an issue, neither is propelling through R3 crossover a real test for the beast. Below with my Deltang powered Steam Tram in the Viaduct makes a pretty picture.
522DB8B6-98CC-4D12-B879-B041DA633B84.jpeg
 
More work has been done, I have painted the handrails but they still need some more tweaking.

Today I have been fitting the lettering and that suggested that the destination board could do with a facility to allow swopping destinations. So below is how I have made them with bits of left over wood from the kit and coffee stirrer. Looks a little stark but once painted will be less visible. The lettering on the other side of each board os upside down so to change it a removal and flip the board over then put it back. I imagine this is what the conductor would do at each Terminus before the start of the journey the other way. Before I put the lettering in place I go round the edges with a black felt tip pen to ensure no white edge is visible.
7BC4EADD-2C2C-4792-B2F9-D180F5744F4B.jpeg
I have also been doing some painting and weathering to the bogies, dry brush technique for the weathering.
B1F9D0D0-18DA-45CD-9792-02C5FC82B473.jpeg
B68913DB-6654-40FE-9854-A16B5908ABC8.jpeg

37A1E2F2-2955-43FA-B7CD-C5FA1CF3D625.jpeg
 
I had a need to get inside today as I noticed a couple of missing windows at each end. My method of securing the top deck came into use and I am happy to say worked as expected, miracles sometimes occur.
42BA8573-975F-4C03-9302-BEB7B21C75B3.jpeg
Having completed it now there are a lot of left over bits, most noticeably the chassis, trolley pole and detailing for the top deck that has been cut off.
F862D62F-68E8-42F0-BCB8-0A5A85DEB15D.jpeg
The keft over timber and i structions have been bagged for storage, bits may come in useful. The wood for the chassis is also in this bag.
0CEBBB32-0700-47DD-819D-8523C342849B.jpeg
So out on the line with the appropriate German lettered and numbered Steam Tram. Not sure what a Rochdale Tram Trailer is doing in East Germany being hauled by an English looking Steam Tram through the Harz Mountains? Answers on a new £20 pound note please.
96DC0A16-1081-4A77-925E-FAC4283D266A.jpegADFAD16D-F550-4135-814D-F449B5B25DB2.jpeg
 
Gave it a little run in the Garden with the Live Steam MBRO Steam Tram today, would have liked to take more time over a Vid but we had a Street Party today in our front gardens, all within social distancing rules of course.
C1A2DDBC-C31F-46BA-A200-7E0D51E0E7E0.jpeg
 
Back
Top Bottom