New beginnings

Madman

Registered
25 Oct 2009
17,219
2,992
Pennsylvania, USA
Best answers
0
Country flag

Madman

Registered
25 Oct 2009
17,219
2,992
Pennsylvania, USA
Best answers
0
Country flag
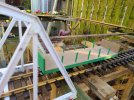
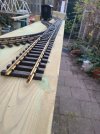
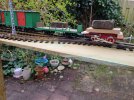
Six metres of track, in a "C" shape.
Not perfectly level, but close.
There's room for some kind of trackside scene on the right hand side, suggestions are appreciated.


Next up are three things, and they can be done in different orders. They are:
- Closing the circle;
- Connecting the rails to electricity;
- Putting up overhead.
In principle I'd like to close the circle first, because I'm looking forward to when I can put the power on and watch a tram go "round and round". To do that, I need to move the footpath and that involves pruning a large plant. It does need pruning, but it's just beginning to bloom now, so I'd like to postpone pruning until after that.

I'm still thinking about it.


View attachment 324363

View attachment 324362

View attachment 324361

Don't think too long, it may hurt.....:giggle:
 

Madman

Registered
25 Oct 2009
17,219
2,992
Pennsylvania, USA
Best answers
0
Country flag
I made up my mind and pruned the plant. :devil: By the way, it's a Forsythia.

Soon the semi-circle will be a circle. :inlove:

Good idea. You almost cannot kill a Forsythia. My mother broke off a piece of one and stuck it in the ground in front of our house, when I was a very young lad. It never stopped growing.
 

Jasper

Hey, I'm only being creative here.
11 Mar 2017
564
100
56
The Netherlands
Best answers
0
Country flag
Good idea. You almost cannot kill a Forsythia. My mother broke off a piece of one and stuck it in the ground in front of our house, when I was a very young lad. It never stopped growing.
Good to know. I have (so far) no intention of killing it.
 

Jasper

Hey, I'm only being creative here.
11 Mar 2017
564
100
56
The Netherlands
Best answers
0
Country flag
Today I reached a milestone. I now have a continuous circuit of track:

20240306_164823.jpg

20240306_164933.jpg


I wanted to put electric current on the rails, but didn't have the necessary connectors etc at the ready. I did get a few things out to put on the rails. Here's my first freight car, I built it in the summer of 1991.

20240306_170500.jpg


And this is my first (and still the only complete) loco. The headlights run on a battery.

20240306_172410.jpg

20240306_172427.jpg
 
Last edited:

Jasper

Hey, I'm only being creative here.
11 Mar 2017
564
100
56
The Netherlands
Best answers
0
Country flag
Most of the woodwork is now done.

20240309_174429.jpg

20240309_180129.jpg
 

Jasper

Hey, I'm only being creative here.
11 Mar 2017
564
100
56
The Netherlands
Best answers
0
Country flag
What's happening?

The day before yesterday, I achieved a lifetime goal: a working layout.
Yesterday, it rained all day and I was forced to do other things.
This morning it is dry (well more or less) and before even having a proper breakfast I'm already outside, testing a locomotive.

Do y'all think I've caught a virus or something? :eek:
 

David1226

Registered
24 Oct 2009
7,955
7,951
74
Abingdon, Oxfordshire
Country
United-States
Best answers
0
Country flag
What's happening?

The day before yesterday, I achieved a lifetime goal: a working layout.
Yesterday, it rained all day and I was forced to do other things.
This morning it is dry (well more or less) and before even having a proper breakfast I'm already outside, testing a locomotive.

Do y'all think I've caught a virus or something? :eek:
I think you may have a touch of Modulus Trainus.

David
 

Rhinochugger

Retired Oik
27 Oct 2009
36,865
4,248
North West Norfolk
Best answers
0
Country flag
This remark hits close to home for me. I have always had a problem with making things work, and the railway hobby is no exception.

When I started building, back in 1991, I built several cars and started on a loco, but built no layout although I did have the space for one. Then I got discouraged, and stopped modelling altogether. (I did start a family, and that's the usual valid excuse, but it doesn't explain everything.)
Several more false starts followed over the decades. The last one was five or so years ago, this is as far as I got:

View attachment 324175

An actual layout of the most basic sort, basically just an oval. I never gave it electric power, and then I began pursuing other interests and Mother Nature took over my little tramway:

View attachment 324176

This time around, I want to break the spell. I want to get to a situation of "a working layout" and take it from there. As I'm typing these words I realise I have built this first stretch of track in full view of the living room, so it will remind me every day that it is actually happening! That's how I intend to break the spell and reach my goal of a garden tramway. I have the whole garden at my disposal, I have rolling stock and know how to build more, I have a good workshop now, and I have the time. I think I can do it!
Yep, when I built the first garden railway in Sussex, I went for a quick, unsubtle blast - no fancy electrics, one passing loop, keep it simple so that the construction didn't get bogged down (s'cuse the pun) and got trains running :):):):)
 

Jasper

Hey, I'm only being creative here.
11 Mar 2017
564
100
56
The Netherlands
Best answers
0
Country flag
An eventful afternoon, and a lesson in dealing with problems.

++++++++++

Years ago, I bought an old LGB Otto and took it apart to modify it. But I never finished it, as I moved away from modelling.

Today I dug it out and tried it. But it didn't behave well. It ran irregularly, had terrible wheelslip, and couldn't pull even one wagon. So I searched this site for solutions (indecisive), carefully dried track with a towel (no avail), and then a light went on in my head: how about weighting?

So I used a terrace stone to weight the chassis...

20240312_163935.jpg

.... which brought a huge improvement in running behaviour. (One of the wagons decided to derail, so I weighted that too.)

So here I was, happily running my train around, but now a different wagon started to spontaneously uncouple in curves. I decided to address this problem another time.

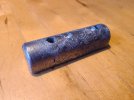
Afterwards, I went to the attic and rummaged through an old box, and found this:

20240312_171310.jpg

It definitely belongs to the Otto (I tried) so that's another riddle solved. I think I'll continue modding it.

++++++++++

To sum up: today I learnt that you had best solve one problem at a time. The uncoupling thing can be addressed later. Also, I've decided I need to build a load for that first wagon so it doesn't derail.

Thanks for reading. :)
 
Last edited:

Rhinochugger

Retired Oik
27 Oct 2009
36,865
4,248
North West Norfolk
Best answers
0
Country flag
An eventful afternoon, and a lesson in dealing with problems.

++++++++++

Years ago, I bought an old LGB Otto and took it apart to modify it. But I never finished it, as I moved away from modelling.

Today I dug it out and tried it. But it didn't behave well. It ran irregularly, had terrible wheelslip, and couldn't pull even one wagon. So I searched this site for solutions (indecisive), carefully dried track with a towel (no avail), and then a light went on in my head: how about weighting?

So I used a terrace stone to weight the chassis...

View attachment 324750

.... which brought a huge improvement in running behaviour. (One of the wagons decided to derail, so I weighted that too.)

So here I was, happily running my train around, but now a different wagon started to spontaneously uncouple in curves. I decided to address this problem another time.

Afterwards, I went to the attic and rummaged through an old box, and found this:

View attachment 324751

It definitely belongs to the Otto (I tried) so that's another riddle solved. I think I'll continue modding it.

++++++++++

To sum up: today I learnt that you had best solve one problem at a time. The uncoupling thing can be addressed later. Also, I've decided I need to build a load for that first wagon so it doesn't derail.

Thanks for reading. :)
Metal wheels on the rolling stock brings many advantages - weight and smoother running being the main ones :nod::nod:
 

Jasper

Hey, I'm only being creative here.
11 Mar 2017
564
100
56
The Netherlands
Best answers
0
Country flag
I don't actually think the squeaky sound is produced by the train.
As I remember things, that noise came from a bird that sat high up in a tree about 20 metres to the west. Since that first run I have done a number of runs, and if the squeak had been present on all or most of them I think I'd have noticed it.
To confirm all this, I went into the trash folder on my phone (that I filmed this with) and listened to all train footage I could find. No squeak.


TL DR - it's a bird.
 
Last edited:

dunnyrail

DOGS, Garden Railways, Steam Trains, Jive Dancing,
Staff member
GSC Moderator
25 Oct 2009
26,255
5,003
75
St.Neots Cambridgeshire UK
Best answers
0
Country flag
I don't actually think the squeaky sound is produced by the train.
As I remember things, that noise came from a bird that sat high up in a tree about 20 metres to the west. Since that first run I have done a number of runs, and if the squeak had been present on all or most of them I think I'd have noticed it.
To confirm all this, I went into the trash folder on my phone (that I filmed this with) and listened to all train footage I could find. No squeak.


TL DR - it's a bird.
Looking at your vid you appear to have only 1 hook on your stock. Please correct me if I am wrong. Long experience with assistance from D DougLN of this forum had all my stock converted to a hook each end with nine in the loco. Scrounging hooks from the loco will help build up the second hook for stick, they are also available as spares from LGB. Then the loco has a small piece of 20-30 thou plasticard placed under the coupling, taking coupling off will find an oblong space where the plasticard goes, complete this with a hole fro the screw in the plasticard and enjoy trouble free no uncoupling running.
 

Jasper

Hey, I'm only being creative here.
11 Mar 2017
564
100
56
The Netherlands
Best answers
0
Country flag
Looking at your vid you appear to have only 1 hook on your stock. Please correct me if I am wrong. Long experience with assistance from D DougLN of this forum had all my stock converted to a hook each end with nine in the loco. Scrounging hooks from the loco will help build up the second hook for stick, they are also available as spares from LGB. Then the loco has a small piece of 20-30 thou plasticard placed under the coupling, taking coupling off will find an oblong space where the plasticard goes, complete this with a hole fro the screw in the plasticard and enjoy trouble free no uncoupling running.
I understand what you're saying, assuming "nine in the loco" is a typo for "none on the loco". And yes, you are right that every wagon only has 1 hook.

My observation so far is that these uncouplings only occur when the wagons run with the hook forward. Also, they only occur in certain spots and I suspect a tilt in the track may be part of the issue.
So, further tests are in order. Thanks for your suggestion.
 
Last edited:

dunnyrail

DOGS, Garden Railways, Steam Trains, Jive Dancing,
Staff member
GSC Moderator
25 Oct 2009
26,255
5,003
75
St.Neots Cambridgeshire UK
Best answers
0
Country flag
I understand what you're saying, assuming "nine in the loco" is a typo for "none on the loco". And yes, you are right that every wagon only has 1 hook.

My observation so far is that these uncouplings only occur when the wagons run with the hook forward. Also, they only occur in certain spots and I suspect a tilt in the track may be part of the issue.
So, further tests are in order. Thanks for your suggestion.
Yes no hooks on the loco, FPF (Fat Podgy Finger) syndrome strikes again.