Distrackted
Registered
The LGB Club Car 36360 "Barwagen" is very nice, but I always felt there was something missing on the tables. I also wanted to have overhead lighting in this car to go along with other similar cars that I have put lighting into. My preference lately has been to use the LGB ball bearing wheels with power pickups and Massoth 8122302 digital LED light bar and additional 8122202 analog LED light bar connected via function output A2 on the digital unit. I assign both function outputs A1 and A2 on the digital light bar to function key F7 so that both light bars trun on and off simultaneously. I do the same for a set of related passenger cars in a consist and set the digital addresses of the 8122302 units to the same for all the cars. That way I can turn the overhead lights on and off for all cars at the same time by simply pressing the F7 button on the controller. In the case where the locomotive cab lights are on their own function output, they can be similarly configured.
There are 8 tables in the LGB 36360. I decided to use LEDs for the table lights. 3 mm LEDs are the right diameter to sit on top of the "light bases (or whatever they are) on the tables. Wires to the LEDs can be threaded down through the base and run along out of sight under the benches and tables. The ID of the bases is not large, but 22 gauge or finer wires soldered to the LEDs will fit. However, there is only room for heat shrink on one of the LED legs, but that is sufficient to prevent them from shorting out inside the plastic base.
Since there are a total of 8 LEDs optimally drawing 15 to 20 mA each, this would be too much of a draw for the function outputs of the Massoth lighting unit. I could have used a relay from a function output on the Massoth LED strip, but instead I decided to use a Massoth 8242052 6 volt voltage regulator to drive the LEDs in conjunction with a current limiting resistor. This allows the table lamps to also work with DC. The voltage regulator and the connections to the overhead lighting are hidden in the water closet. I also hid a toggle switch (accessible from below the car) inside the water closet to allow the table lights to be switched on or off as desired.
I initially made a big learning mistake in trying to simplify the wiring. I ran the LEDs in parallel and thought I could get by with a single 1 or 3 watt limiting resistor, neglecting to realize that the LEDs are not good at sharing and take whatever portion of the current their individual characteristics demand. Some of the LEDs were bright and some were dim and it looked terrible. Therefore I had to use 8 individual 220 ohm resistors, 1 per white LED. To make things a bit tidy and to allow for easier replacement of any of the LEDs, I put together a small prototyping circuit board with the resistors and screw connectors. I put this somewhat out of site in the galley compartment. I printed a custom bracket for the board and used double side foam tape to adhere it to the floor. This allows the board to be simply unclipped to be able to replace an individual LED and wiring.
As for the table lamp "shades" I decided to 3D print them. They are neither prototypical nor probably to scale, but do add a cheery look to the tables. I chose green (like bankers lamps) because I like that colour. I designed them using Tinkercad and printed them on my Anycubic 4Max Pro 2 printer using Polymaker "PolyLite Translucent Green" PETG filament. The "shades" were designed to slip tightly down over the "bases" and at the same time hold the LED tightly down. The ID of the shades is 4.9 mm and the wells are 8 mm deep.
I'm sure there are much better ways of doing some of this, and it would be nice to not see any of the wiring, but overall I'm happy that 36360 now seems more complete and inviting. I'm posting this with the hope that some of these ideas may be helpful to others.
Footnote #1 - I really dislike the snap on roofs on this style of LGB passenger car. It is like a puzzle which expects to to unhook 2 tabs oriented 90 degrees to each other simultaneously! I much prefer the older ones with screws! I have yet to remove a roof without breaking off either one of the locking tabs, or a piece of the window glazing. Fortunately I have found fixes for both. Toe repair the glazing I put a thin piece of polyethylene film behind the missing piece of glazing plastic. I then fill in the area with a Bondic pen and use the included UV LED light to cure the clear resin. For the locking tabs, I have printed a row of 'L' shaped PETG "hooks" from which I cut one off. I then glue that into the place of the missing tab (see photos).
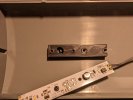
Footnote #2 - The water closet interferes with placement of the LED light bar above the galley. To get around this, the light bar needs to be shifted. To facilitate this, I 3D printed a flat bar with 2 holes that press fit tightly over the light mounting studs of the LGB ceiling. Another 2 small holes drilled further along the bar allow the LED light bar to be attached clear of the water closet wall. (see photos)
* I am by no means an expert with 3D printing and do pretty rudimentary things with it, but I do find it really handy for making these kinds of bits and pieces. Of course many of them could also be made by cutting, drilling and gluing polystyrene or ABS plastic stock, but I find 3D printing to be very quick, efficient and inexpensive for small parts.
Figure 1: 3 mm white LED with wires attached fro threading through "base"
.
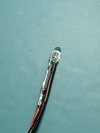
Figure 2: LED mounted on table
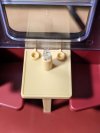
Figure 3: 3D printed shade - side view
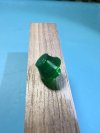
Figure 4: 3D printed "shade" - bottom view
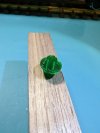
Figure 5: 3D printed "shade" -bottom end on view
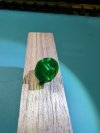
Figure 6: Massoth digital and analog lighting boards attached to roof
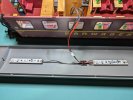
Figure 7: Massoth 6 volt regulator in WC
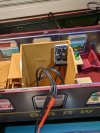
Figure 8: Toggle switch for table lamps concealed in WC
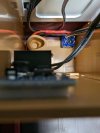
Figure 9: Toggle switch for table lamps from below car
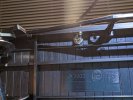
Figure 10: Custom 3D printed bracket to hold resistor/LED connection board
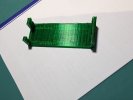
Figure 11: Bracket with foam tape attached
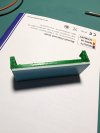
Figure 12: Bracket in place in Galley (WC removed temporarily)
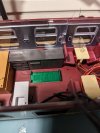
Figure 13: Resistor / LED connection board in place with wiring (WC still removed)
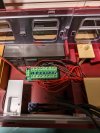
Figure 14: Table lamp with shade on
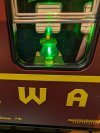
Figure 15: All table lamps in place
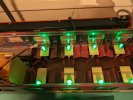
Figure 16: Side view of car with overhead and table lamps on
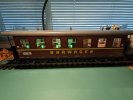
Figure 17: 3D printed (PETG) repair clip strip
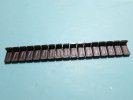
Figure 18: Individual roof repair clip separated from strip
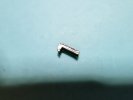
Figure 19: Roof repair clip glued in place
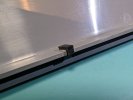
Figure 20: Custom 3D printed block to shift LED light board away from WC wall
There are 8 tables in the LGB 36360. I decided to use LEDs for the table lights. 3 mm LEDs are the right diameter to sit on top of the "light bases (or whatever they are) on the tables. Wires to the LEDs can be threaded down through the base and run along out of sight under the benches and tables. The ID of the bases is not large, but 22 gauge or finer wires soldered to the LEDs will fit. However, there is only room for heat shrink on one of the LED legs, but that is sufficient to prevent them from shorting out inside the plastic base.
Since there are a total of 8 LEDs optimally drawing 15 to 20 mA each, this would be too much of a draw for the function outputs of the Massoth lighting unit. I could have used a relay from a function output on the Massoth LED strip, but instead I decided to use a Massoth 8242052 6 volt voltage regulator to drive the LEDs in conjunction with a current limiting resistor. This allows the table lamps to also work with DC. The voltage regulator and the connections to the overhead lighting are hidden in the water closet. I also hid a toggle switch (accessible from below the car) inside the water closet to allow the table lights to be switched on or off as desired.
I initially made a big learning mistake in trying to simplify the wiring. I ran the LEDs in parallel and thought I could get by with a single 1 or 3 watt limiting resistor, neglecting to realize that the LEDs are not good at sharing and take whatever portion of the current their individual characteristics demand. Some of the LEDs were bright and some were dim and it looked terrible. Therefore I had to use 8 individual 220 ohm resistors, 1 per white LED. To make things a bit tidy and to allow for easier replacement of any of the LEDs, I put together a small prototyping circuit board with the resistors and screw connectors. I put this somewhat out of site in the galley compartment. I printed a custom bracket for the board and used double side foam tape to adhere it to the floor. This allows the board to be simply unclipped to be able to replace an individual LED and wiring.
As for the table lamp "shades" I decided to 3D print them. They are neither prototypical nor probably to scale, but do add a cheery look to the tables. I chose green (like bankers lamps) because I like that colour. I designed them using Tinkercad and printed them on my Anycubic 4Max Pro 2 printer using Polymaker "PolyLite Translucent Green" PETG filament. The "shades" were designed to slip tightly down over the "bases" and at the same time hold the LED tightly down. The ID of the shades is 4.9 mm and the wells are 8 mm deep.
I'm sure there are much better ways of doing some of this, and it would be nice to not see any of the wiring, but overall I'm happy that 36360 now seems more complete and inviting. I'm posting this with the hope that some of these ideas may be helpful to others.
Footnote #1 - I really dislike the snap on roofs on this style of LGB passenger car. It is like a puzzle which expects to to unhook 2 tabs oriented 90 degrees to each other simultaneously! I much prefer the older ones with screws! I have yet to remove a roof without breaking off either one of the locking tabs, or a piece of the window glazing. Fortunately I have found fixes for both. Toe repair the glazing I put a thin piece of polyethylene film behind the missing piece of glazing plastic. I then fill in the area with a Bondic pen and use the included UV LED light to cure the clear resin. For the locking tabs, I have printed a row of 'L' shaped PETG "hooks" from which I cut one off. I then glue that into the place of the missing tab (see photos).
Footnote #2 - The water closet interferes with placement of the LED light bar above the galley. To get around this, the light bar needs to be shifted. To facilitate this, I 3D printed a flat bar with 2 holes that press fit tightly over the light mounting studs of the LGB ceiling. Another 2 small holes drilled further along the bar allow the LED light bar to be attached clear of the water closet wall. (see photos)
* I am by no means an expert with 3D printing and do pretty rudimentary things with it, but I do find it really handy for making these kinds of bits and pieces. Of course many of them could also be made by cutting, drilling and gluing polystyrene or ABS plastic stock, but I find 3D printing to be very quick, efficient and inexpensive for small parts.
Figure 1: 3 mm white LED with wires attached fro threading through "base"
.

Figure 2: LED mounted on table

Figure 3: 3D printed shade - side view

Figure 4: 3D printed "shade" - bottom view

Figure 5: 3D printed "shade" -bottom end on view

Figure 6: Massoth digital and analog lighting boards attached to roof

Figure 7: Massoth 6 volt regulator in WC

Figure 8: Toggle switch for table lamps concealed in WC

Figure 9: Toggle switch for table lamps from below car

Figure 10: Custom 3D printed bracket to hold resistor/LED connection board

Figure 11: Bracket with foam tape attached

Figure 12: Bracket in place in Galley (WC removed temporarily)

Figure 13: Resistor / LED connection board in place with wiring (WC still removed)

Figure 14: Table lamp with shade on

Figure 15: All table lamps in place

Figure 16: Side view of car with overhead and table lamps on

Figure 17: 3D printed (PETG) repair clip strip

Figure 18: Individual roof repair clip separated from strip

Figure 19: Roof repair clip glued in place

Figure 20: Custom 3D printed block to shift LED light board away from WC wall


