Lighting my LGB 36360 SOEG "Barwagen" Car

Distrackted

Registered
16 Apr 2017
48
7
67
Swansea, UKE
Best answers
0
Country flag
The LGB Club Car 36360 "Barwagen" is very nice, but I always felt there was something missing on the tables. I also wanted to have overhead lighting in this car to go along with other similar cars that I have put lighting into. My preference lately has been to use the LGB ball bearing wheels with power pickups and Massoth 8122302 digital LED light bar and additional 8122202 analog LED light bar connected via function output A2 on the digital unit. I assign both function outputs A1 and A2 on the digital light bar to function key F7 so that both light bars trun on and off simultaneously. I do the same for a set of related passenger cars in a consist and set the digital addresses of the 8122302 units to the same for all the cars. That way I can turn the overhead lights on and off for all cars at the same time by simply pressing the F7 button on the controller. In the case where the locomotive cab lights are on their own function output, they can be similarly configured.

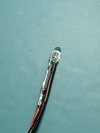
There are 8 tables in the LGB 36360. I decided to use LEDs for the table lights. 3 mm LEDs are the right diameter to sit on top of the "light bases (or whatever they are) on the tables. Wires to the LEDs can be threaded down through the base and run along out of sight under the benches and tables. The ID of the bases is not large, but 22 gauge or finer wires soldered to the LEDs will fit. However, there is only room for heat shrink on one of the LED legs, but that is sufficient to prevent them from shorting out inside the plastic base.

Since there are a total of 8 LEDs optimally drawing 15 to 20 mA each, this would be too much of a draw for the function outputs of the Massoth lighting unit. I could have used a relay from a function output on the Massoth LED strip, but instead I decided to use a Massoth 8242052 6 volt voltage regulator to drive the LEDs in conjunction with a current limiting resistor. This allows the table lamps to also work with DC. The voltage regulator and the connections to the overhead lighting are hidden in the water closet. I also hid a toggle switch (accessible from below the car) inside the water closet to allow the table lights to be switched on or off as desired.

I initially made a big learning mistake in trying to simplify the wiring. I ran the LEDs in parallel and thought I could get by with a single 1 or 3 watt limiting resistor, neglecting to realize that the LEDs are not good at sharing and take whatever portion of the current their individual characteristics demand. Some of the LEDs were bright and some were dim and it looked terrible. Therefore I had to use 8 individual 220 ohm resistors, 1 per white LED. To make things a bit tidy and to allow for easier replacement of any of the LEDs, I put together a small prototyping circuit board with the resistors and screw connectors. I put this somewhat out of site in the galley compartment. I printed a custom bracket for the board and used double side foam tape to adhere it to the floor. This allows the board to be simply unclipped to be able to replace an individual LED and wiring.

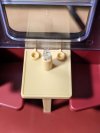
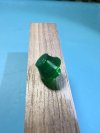
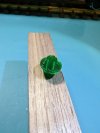
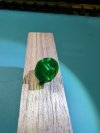
As for the table lamp "shades" I decided to 3D print them. They are neither prototypical nor probably to scale, but do add a cheery look to the tables. I chose green (like bankers lamps) because I like that colour. I designed them using Tinkercad and printed them on my Anycubic 4Max Pro 2 printer using Polymaker "PolyLite Translucent Green" PETG filament. The "shades" were designed to slip tightly down over the "bases" and at the same time hold the LED tightly down. The ID of the shades is 4.9 mm and the wells are 8 mm deep.

I'm sure there are much better ways of doing some of this, and it would be nice to not see any of the wiring, but overall I'm happy that 36360 now seems more complete and inviting. I'm posting this with the hope that some of these ideas may be helpful to others.

Footnote #1 - I really dislike the snap on roofs on this style of LGB passenger car. It is like a puzzle which expects to to unhook 2 tabs oriented 90 degrees to each other simultaneously! I much prefer the older ones with screws! I have yet to remove a roof without breaking off either one of the locking tabs, or a piece of the window glazing. Fortunately I have found fixes for both. Toe repair the glazing I put a thin piece of polyethylene film behind the missing piece of glazing plastic. I then fill in the area with a Bondic pen and use the included UV LED light to cure the clear resin. For the locking tabs, I have printed a row of 'L' shaped PETG "hooks" from which I cut one off. I then glue that into the place of the missing tab (see photos).

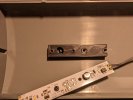
Footnote #2 - The water closet interferes with placement of the LED light bar above the galley. To get around this, the light bar needs to be shifted. To facilitate this, I 3D printed a flat bar with 2 holes that press fit tightly over the light mounting studs of the LGB ceiling. Another 2 small holes drilled further along the bar allow the LED light bar to be attached clear of the water closet wall. (see photos)

* I am by no means an expert with 3D printing and do pretty rudimentary things with it, but I do find it really handy for making these kinds of bits and pieces. Of course many of them could also be made by cutting, drilling and gluing polystyrene or ABS plastic stock, but I find 3D printing to be very quick, efficient and inexpensive for small parts.


Figure 1: 3 mm white LED with wires attached fro threading through "base"
.
PXL_20230121_021005142.jpg

Figure 2: LED mounted on table

PXL_20230123_042539047.jpg

Figure 3: 3D printed shade - side view
PXL_20230123_030556493.jpg

Figure 4: 3D printed "shade" - bottom view
PXL_20230123_030608139.jpg

Figure 5: 3D printed "shade" -bottom end on view
PXL_20230123_030626695.jpg

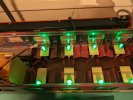
Figure 6: Massoth digital and analog lighting boards attached to roof
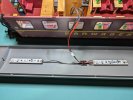
PXL_20230119_033113827.jpg

Figure 7: Massoth 6 volt regulator in WC
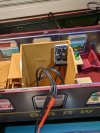
PXL_20230119_033036754.jpg

Figure 8: Toggle switch for table lamps concealed in WC
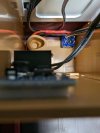
PXL_20230119_033056292.jpg

Figure 9: Toggle switch for table lamps from below car
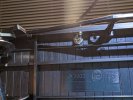
PXL_20230119_033457531.jpg

Figure 10: Custom 3D printed bracket to hold resistor/LED connection board
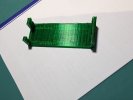
PXL_20230121_045745208.jpg

Figure 11: Bracket with foam tape attached
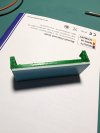
PXL_20230121_050309882.jpg

Figure 12: Bracket in place in Galley (WC removed temporarily)
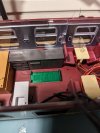
PXL_20230121_050509118.jpg

Figure 13: Resistor / LED connection board in place with wiring (WC still removed)
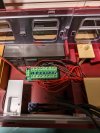
PXL_20230121_051257395.jpg

Figure 14: Table lamp with shade on

PXL_20230123_030801191.jpg

Figure 15: All table lamps in place

PXL_20230123_010339791.jpg

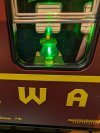
Figure 16: Side view of car with overhead and table lamps on
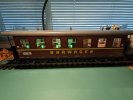
PXL_20230122_001609593.jpg

Figure 17: 3D printed (PETG) repair clip strip
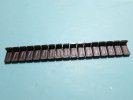
PXL_20230123_013254537.jpg

Figure 18: Individual roof repair clip separated from strip
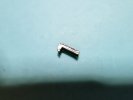
PXL_20230123_013312121.jpg

Figure 19: Roof repair clip glued in place
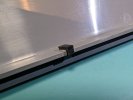
PXL_20230123_013347883.jpg

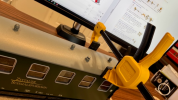
Figure 20: Custom 3D printed block to shift LED light board away from WC wall
PXL_20230123_010501963.jpg
 
  • Like
Reactions: 1 user

Jeff H

Registered
20 Jun 2020
10
2
17
Dallas
Best answers
0
Country flag
Thanks for sharing! The results look fantastic. I'm definitely bookmarking this for future reference, as I would like to add lighting to my SOEG Barwagen as well. I'm not sure I'm brave enough to tackle the individual table lighting yet, but perhaps someday as I have several other coaches (BVZ Steam Pub, Bernina La Bucunada, etc.) that would look great.

Also, I had the same experience taking the roof off for a peek inside. I broke one of the roof clips and the top of one of the windows supports. It seems most of the roofs of these DR/Saxon/SOEG 580mm coaches are the same. I wanted to share that I've had some success removing these roofs using a Dewalt medium sized trigger clamp to squeeze the edges of the roof together, which makes it a little easier to snap off. It's not easy positioning the clamp to just squeeze the roof (and not the top edges of the car body), but when you get it just right, the roof does pull off a bit easier. It's not a foolproof method, as I've still managed to crack a few of the clear window supports, but I'm getting better at it.

Too bad some of the windows aren't open, as I always found that to make it easier to pull on the sides of the car body to loosen up things a bit. I'm curious what other methods people use to remove these types of roofs?

1674922501397.png
 

Dan

Registered
28 Jan 2010
656
52
Eastern MA, USA
Best answers
0
Country flag
With DCC I find it easier to wire leds in series to limit current draw. I have even used 12 volt led light strips in series to run on my 24 volt DCC track power. Also, I use the CL2 N3 with 20ma leds in series.
 
8 Mar 2014
7,806
972
San Diego
Country
Armenia
www.elmassian.com
Best answers
0
Country flag
Exactly how I do it... with fixed power on the rails, it makes sense to series as many LEDs as possible...6 in parallel would be 120 milliamps, 6 in series would be 20 milliamps... it adds up quickly.

Greg
 

Distrackted

Registered
16 Apr 2017
48
7
67
Swansea, UKE
Best answers
0
Country flag
Thank you Dam and Greg for the feedback and suggestions.

Agreed that series would be a more efficient way to do it and it pretty well guarantees that all the LEDs would be close to the same brightness. However in my case, only about half of my locomotives are DCC, so I have both analog and DCC sources connected. I switch from one to the other through a large toggle switch to my overhead layout. That way I can run either DC or DCC and have the lighting work in the passenger cars either way, as long as the DC is greater than 6 volts. Also, with regular LEDs, if they are in series and one fails, all the lights go out? Correct me if that's wrong. For sure the current is less at 20 mA through the series, which is really what matters to the power supply. However in my case of 8 LEDs , even thought the current draw is 8 times higher, the power consumed would only be double - ie 24 volts x 20 mA = 480 mW for series vs 6 volts x 20 mA = 120 mW x 8 = 960 mW for parallel. I imagine the voltage regulator consumes some power as well, and as the number of LEDs goes up the comparison favours series connection even more. Fortunately, with my small layout, I am never pushing the limits of my power supplies.
 

Distrackted

Registered
16 Apr 2017
48
7
67
Swansea, UKE
Best answers
0
Country flag
Thanks for sharing! The results look fantastic. I'm definitely bookmarking this for future reference, as I would like to add lighting to my SOEG Barwagen as well. I'm not sure I'm brave enough to tackle the individual table lighting yet, but perhaps someday as I have several other coaches (BVZ Steam Pub, Bernina La Bucunada, etc.) that would look great.

Also, I had the same experience taking the roof off for a peek inside. I broke one of the roof clips and the top of one of the windows supports. It seems most of the roofs of these DR/Saxon/SOEG 580mm coaches are the same. I wanted to share that I've had some success removing these roofs using a Dewalt medium sized trigger clamp to squeeze the edges of the roof together, which makes it a little easier to snap off. It's not easy positioning the clamp to just squeeze the roof (and not the top edges of the car body), but when you get it just right, the roof does pull off a bit easier. It's not a foolproof method, as I've still managed to crack a few of the clear window supports, but I'm getting better at it.

Too bad some of the windows aren't open, as I always found that to make it easier to pull on the sides of the car body to loosen up things a bit. I'm curious what other methods people use to remove these types of roofs?

View attachment 309411
Thank you Jeff for the great suggestion! I'm not sure of the names of the different styles of roofs, but some are the same in cross section from end to end, vs this style. For the former, even though they use the same tab arrangement, I was usually able to squeeze the sides of the roof together by hand and often remove it without damage. For this style however, being so much more rigid, I would need to find my old Joe Weider squeezy exercise things to greatly improve my hand strength. I hadn't thought of using clamps which is a much better idea

There were actually instructions on removing the roof included with one of my cars of this type. They were a bit of a joke! It shows a picture on how to put your fingers in through one of the end doors and push the wall out. Not having fingers like ET, and largish hands, I found this both impossible and quite likely to break some of the balcony structures outside the door. I made one attempt to make a curved tool to do the job, but wasn't successful.

I'll definitely try the clamp on the next one. I hope to get the new SOEG LGB club car soon and plan to add lighting to it.
 
8 Mar 2014
7,806
972
San Diego
Country
Armenia
www.elmassian.com
Best answers
0
Country flag
So, I re-read the entire thread and am a bit confused...

I get you have a 6 volt regulator apparently attached to the wheel pickups and that works on DC.

How does the decoder come into the picture for DCC operation? How is it wired in?

Greg

p.s. your current/wattage calculations don't seem to include the losses in the regulator or dropping resistors, but since I don't fully understand your wiring, I will hold off until I understand.
 

Distrackted

Registered
16 Apr 2017
48
7
67
Swansea, UKE
Best answers
0
Country flag
So, I re-read the entire thread and am a bit confused...

I get you have a 6 volt regulator apparently attached to the wheel pickups and that works on DC.

How does the decoder come into the picture for DCC operation? How is it wired in?

Greg

p.s. your current/wattage calculations don't seem to include the losses in the regulator or dropping resistors, but since I don't fully understand your wiring, I will hold off until I understand.
Greg,

I realized soon after I sent the last post that I failed to consider the power drawer of the current limiting resistors in my comparison. I did however mention that the voltage regulator probably consumed power as well.


The Massoth 8132202 LED light strip has an integrated function decoder that can be set to operate on both DCC and analog mode, for which I have set the CVs accordingly. The voltage regulator for the table lamps is simply connected to track power separately from the Massoth digital light module. I had not actually tried the car on DC before, but because of your post, thought I'd better check.

It works beautifully. Both the overhead lighting and the table lamps all come on full bright as soon as a locomotive sees sufficient voltage to begin to move.
 
8 Mar 2014
7,806
972
San Diego
Country
Armenia
www.elmassian.com
Best answers
0
Country flag
Thanks, just wanted to know about the decoder, if you were still going through it... so how does the decoder connect to the regulator? I'm confused because you say the regulator is connected to track power... so how does the decoder turn the lights on and off?
 

Distrackted

Registered
16 Apr 2017
48
7
67
Swansea, UKE
Best answers
0
Country flag
Thanks, just wanted to know about the decoder, if you were still going through it... so how does the decoder connect to the regulator? I'm confused because you say the regulator is connected to track power... so how does the decoder turn the lights on and off?
Greg, sorry about the lack of clarity. The decoder in the 8132202 only turns its own LEDs on via function A1 and those of a connected 812202 analog light strip via function A2.

Just the table lamps are connected to the voltage regulator and are turned on and off via a toggle switch mounted through the floor of the car. This was described and pictured in the post. The table lamps are totally separate from the decoder. Hope that makes sense now. Cheers!
 

TTNUT

Registered
26 Nov 2018
9
0
66
Bradford
Best answers
0
Country flag
The LGB Club Car 36360 "Barwagen" is very nice, but I always felt there was something missing on the tables. I also wanted to have overhead lighting in this car to go along with other similar cars that I have put lighting into. My preference lately has been to use the LGB ball bearing wheels with power pickups and Massoth 8122302 digital LED light bar and additional 8122202 analog LED light bar connected via function output A2 on the digital unit. I assign both function outputs A1 and A2 on the digital light bar to function key F7 so that both light bars trun on and off simultaneously. I do the same for a set of related passenger cars in a consist and set the digital addresses of the 8122302 units to the same for all the cars. That way I can turn the overhead lights on and off for all cars at the same time by simply pressing the F7 button on the controller. In the case where the locomotive cab lights are on their own function output, they can be similarly configured.

There are 8 tables in the LGB 36360. I decided to use LEDs for the table lights. 3 mm LEDs are the right diameter to sit on top of the "light bases (or whatever they are) on the tables. Wires to the LEDs can be threaded down through the base and run along out of sight under the benches and tables. The ID of the bases is not large, but 22 gauge or finer wires soldered to the LEDs will fit. However, there is only room for heat shrink on one of the LED legs, but that is sufficient to prevent them from shorting out inside the plastic base.

Since there are a total of 8 LEDs optimally drawing 15 to 20 mA each, this would be too much of a draw for the function outputs of the Massoth lighting unit. I could have used a relay from a function output on the Massoth LED strip, but instead I decided to use a Massoth 8242052 6 volt voltage regulator to drive the LEDs in conjunction with a current limiting resistor. This allows the table lamps to also work with DC. The voltage regulator and the connections to the overhead lighting are hidden in the water closet. I also hid a toggle switch (accessible from below the car) inside the water closet to allow the table lights to be switched on or off as desired.

I initially made a big learning mistake in trying to simplify the wiring. I ran the LEDs in parallel and thought I could get by with a single 1 or 3 watt limiting resistor, neglecting to realize that the LEDs are not good at sharing and take whatever portion of the current their individual characteristics demand. Some of the LEDs were bright and some were dim and it looked terrible. Therefore I had to use 8 individual 220 ohm resistors, 1 per white LED. To make things a bit tidy and to allow for easier replacement of any of the LEDs, I put together a small prototyping circuit board with the resistors and screw connectors. I put this somewhat out of site in the galley compartment. I printed a custom bracket for the board and used double side foam tape to adhere it to the floor. This allows the board to be simply unclipped to be able to replace an individual LED and wiring.

As for the table lamp "shades" I decided to 3D print them. They are neither prototypical nor probably to scale, but do add a cheery look to the tables. I chose green (like bankers lamps) because I like that colour. I designed them using Tinkercad and printed them on my Anycubic 4Max Pro 2 printer using Polymaker "PolyLite Translucent Green" PETG filament. The "shades" were designed to slip tightly down over the "bases" and at the same time hold the LED tightly down. The ID of the shades is 4.9 mm and the wells are 8 mm deep.

I'm sure there are much better ways of doing some of this, and it would be nice to not see any of the wiring, but overall I'm happy that 36360 now seems more complete and inviting. I'm posting this with the hope that some of these ideas may be helpful to others.

Footnote #1 - I really dislike the snap on roofs on this style of LGB passenger car. It is like a puzzle which expects to to unhook 2 tabs oriented 90 degrees to each other simultaneously! I much prefer the older ones with screws! I have yet to remove a roof without breaking off either one of the locking tabs, or a piece of the window glazing. Fortunately I have found fixes for both. Toe repair the glazing I put a thin piece of polyethylene film behind the missing piece of glazing plastic. I then fill in the area with a Bondic pen and use the included UV LED light to cure the clear resin. For the locking tabs, I have printed a row of 'L' shaped PETG "hooks" from which I cut one off. I then glue that into the place of the missing tab (see photos).

Footnote #2 - The water closet interferes with placement of the LED light bar above the galley. To get around this, the light bar needs to be shifted. To facilitate this, I 3D printed a flat bar with 2 holes that press fit tightly over the light mounting studs of the LGB ceiling. Another 2 small holes drilled further along the bar allow the LED light bar to be attached clear of the water closet wall. (see photos)

* I am by no means an expert with 3D printing and do pretty rudimentary things with it, but I do find it really handy for making these kinds of bits and pieces. Of course many of them could also be made by cutting, drilling and gluing polystyrene or ABS plastic stock, but I find 3D printing to be very quick, efficient and inexpensive for small parts.


Figure 1: 3 mm white LED with wires attached fro threading through "base"
.
View attachment 309219

Figure 2: LED mounted on table

View attachment 309220

Figure 3: 3D printed shade - side view

View attachment 309221

Figure 4: 3D printed "shade" - bottom view

View attachment 309222

Figure 5: 3D printed "shade" -bottom end on view

View attachment 309223

Figure 6: Massoth digital and analog lighting boards attached to roof

View attachment 309224

Figure 7: Massoth 6 volt regulator in WC

View attachment 309225

Figure 8: Toggle switch for table lamps concealed in WC

View attachment 309226

Figure 9: Toggle switch for table lamps from below car

View attachment 309227

Figure 10: Custom 3D printed bracket to hold resistor/LED connection board

View attachment 309228

Figure 11: Bracket with foam tape attached

View attachment 309229

Figure 12: Bracket in place in Galley (WC removed temporarily)

View attachment 309230

Figure 13: Resistor / LED connection board in place with wiring (WC still removed)

View attachment 309231

Figure 14: Table lamp with shade on

View attachment 309232

Figure 15: All table lamps in place

View attachment 309233

Figure 16: Side view of car with overhead and table lamps on

View attachment 309234

Figure 17: 3D printed (PETG) repair clip strip

View attachment 309235

Figure 18: Individual roof repair clip separated from strip

View attachment 309236

Figure 19: Roof repair clip glued in place

View attachment 309237

Figure 20: Custom 3D printed block to shift LED light board away from WC wall

View attachment 309238
Hi
 

TTNUT

Registered
26 Nov 2018
9
0
66
Bradford
Best answers
0
Country flag
The LGB Club Car 36360 "Barwagen" is very nice, but I always felt there was something missing on the tables. I also wanted to have overhead lighting in this car to go along with other similar cars that I have put lighting into. My preference lately has been to use the LGB ball bearing wheels with power pickups and Massoth 8122302 digital LED light bar and additional 8122202 analog LED light bar connected via function output A2 on the digital unit. I assign both function outputs A1 and A2 on the digital light bar to function key F7 so that both light bars trun on and off simultaneously. I do the same for a set of related passenger cars in a consist and set the digital addresses of the 8122302 units to the same for all the cars. That way I can turn the overhead lights on and off for all cars at the same time by simply pressing the F7 button on the controller. In the case where the locomotive cab lights are on their own function output, they can be similarly configured.

There are 8 tables in the LGB 36360. I decided to use LEDs for the table lights. 3 mm LEDs are the right diameter to sit on top of the "light bases (or whatever they are) on the tables. Wires to the LEDs can be threaded down through the base and run along out of sight under the benches and tables. The ID of the bases is not large, but 22 gauge or finer wires soldered to the LEDs will fit. However, there is only room for heat shrink on one of the LED legs, but that is sufficient to prevent them from shorting out inside the plastic base.

Since there are a total of 8 LEDs optimally drawing 15 to 20 mA each, this would be too much of a draw for the function outputs of the Massoth lighting unit. I could have used a relay from a function output on the Massoth LED strip, but instead I decided to use a Massoth 8242052 6 volt voltage regulator to drive the LEDs in conjunction with a current limiting resistor. This allows the table lamps to also work with DC. The voltage regulator and the connections to the overhead lighting are hidden in the water closet. I also hid a toggle switch (accessible from below the car) inside the water closet to allow the table lights to be switched on or off as desired.

I initially made a big learning mistake in trying to simplify the wiring. I ran the LEDs in parallel and thought I could get by with a single 1 or 3 watt limiting resistor, neglecting to realize that the LEDs are not good at sharing and take whatever portion of the current their individual characteristics demand. Some of the LEDs were bright and some were dim and it looked terrible. Therefore I had to use 8 individual 220 ohm resistors, 1 per white LED. To make things a bit tidy and to allow for easier replacement of any of the LEDs, I put together a small prototyping circuit board with the resistors and screw connectors. I put this somewhat out of site in the galley compartment. I printed a custom bracket for the board and used double side foam tape to adhere it to the floor. This allows the board to be simply unclipped to be able to replace an individual LED and wiring.

As for the table lamp "shades" I decided to 3D print them. They are neither prototypical nor probably to scale, but do add a cheery look to the tables. I chose green (like bankers lamps) because I like that colour. I designed them using Tinkercad and printed them on my Anycubic 4Max Pro 2 printer using Polymaker "PolyLite Translucent Green" PETG filament. The "shades" were designed to slip tightly down over the "bases" and at the same time hold the LED tightly down. The ID of the shades is 4.9 mm and the wells are 8 mm deep.

I'm sure there are much better ways of doing some of this, and it would be nice to not see any of the wiring, but overall I'm happy that 36360 now seems more complete and inviting. I'm posting this with the hope that some of these ideas may be helpful to others.

Footnote #1 - I really dislike the snap on roofs on this style of LGB passenger car. It is like a puzzle which expects to to unhook 2 tabs oriented 90 degrees to each other simultaneously! I much prefer the older ones with screws! I have yet to remove a roof without breaking off either one of the locking tabs, or a piece of the window glazing. Fortunately I have found fixes for both. Toe repair the glazing I put a thin piece of polyethylene film behind the missing piece of glazing plastic. I then fill in the area with a Bondic pen and use the included UV LED light to cure the clear resin. For the locking tabs, I have printed a row of 'L' shaped PETG "hooks" from which I cut one off. I then glue that into the place of the missing tab (see photos).

Footnote #2 - The water closet interferes with placement of the LED light bar above the galley. To get around this, the light bar needs to be shifted. To facilitate this, I 3D printed a flat bar with 2 holes that press fit tightly over the light mounting studs of the LGB ceiling. Another 2 small holes drilled further along the bar allow the LED light bar to be attached clear of the water closet wall. (see photos)

* I am by no means an expert with 3D printing and do pretty rudimentary things with it, but I do find it really handy for making these kinds of bits and pieces. Of course many of them could also be made by cutting, drilling and gluing polystyrene or ABS plastic stock, but I find 3D printing to be very quick, efficient and inexpensive for small parts.


Figure 1: 3 mm white LED with wires attached fro threading through "base"
.
View attachment 309219

Figure 2: LED mounted on table

View attachment 309220

Figure 3: 3D printed shade - side view

View attachment 309221

Figure 4: 3D printed "shade" - bottom view

View attachment 309222

Figure 5: 3D printed "shade" -bottom end on view

View attachment 309223

Figure 6: Massoth digital and analog lighting boards attached to roof

View attachment 309224

Figure 7: Massoth 6 volt regulator in WC

View attachment 309225

Figure 8: Toggle switch for table lamps concealed in WC

View attachment 309226

Figure 9: Toggle switch for table lamps from below car

View attachment 309227

Figure 10: Custom 3D printed bracket to hold resistor/LED connection board

View attachment 309228

Figure 11: Bracket with foam tape attached

View attachment 309229

Figure 12: Bracket in place in Galley (WC removed temporarily)

View attachment 309230

Figure 13: Resistor / LED connection board in place with wiring (WC still removed)

View attachment 309231

Figure 14: Table lamp with shade on

View attachment 309232

Figure 15: All table lamps in place

View attachment 309233

Figure 16: Side view of car with overhead and table lamps on

View attachment 309234

Figure 17: 3D printed (PETG) repair clip strip

View attachment 309235

Figure 18: Individual roof repair clip separated from strip

View attachment 309236

Figure 19: Roof repair clip glued in place

View attachment 309237

Figure 20: Custom 3D printed block to shift LED light board away from WC wall

View attachment 309238
Hi Distrackted, great article which is providing a very useful source of information for beginners like me, so thank you. I would just like to add i did find an easier way of removing the roof without damage. First remove both bogies so you can sit the model flat on a towel and flat surface to prevent damage. Then remove both balcony's retained by 2 screws underneath for each balcony. This then gives you more access for fat fingers to push the coach wall out releasing the roof all down one side. Then i used a piece of softwood 12mm x 12mm to push the opposite sidewall out using the door frame as a lever. This is easily done providing care is taken not to put too much force against the door opening. I agree though LGB should replace this method of roof retention and go back to a screwed method.
Thanks again TTnut
 

Distrackted

Registered
16 Apr 2017
48
7
67
Swansea, UKE
Best answers
0
Country flag
Hi Distrackted, great article which is providing a very useful source of information for beginners like me, so thank you. I would just like to add i did find an easier way of removing the roof without damage. First remove both bogies so you can sit the model flat on a towel and flat surface to prevent damage. Then remove both balcony's retained by 2 screws underneath for each balcony. This then gives you more access for fat fingers to push the coach wall out releasing the roof all down one side. Then i used a piece of softwood 12mm x 12mm to push the opposite sidewall out using the door frame as a lever. This is easily done providing care is taken not to put too much force against the door opening. I agree though LGB should replace this method of roof retention and go back to a screwed method.
Thanks again TTnut
I hadn't thought to remove the balconies. That's a great idea! It is very difficult to work around the fine railings without risking damage to them. I will definitely do that next time. Thanks for the suggestion.

Btw I received the new SOEG LGB Club car recently and added digital lighting to it. I managed to get the roof off and back on again by persistent, careful squeezing and prying. It's the first one without damaging anything! It took a while and in the end after much coaxing it snapped back into place. I still find it confusing how the roof interlocks with the body in 2 directions! It may be cost effective for assembly at the factory, but definitely perplexing to make modifications later.
 

TTNUT

Registered
26 Nov 2018
9
0
66
Bradford
Best answers
0
Country flag
Hi, I too have the SOEG Club Car and as yet have that one to tackle. I hope the roof comes off as easy as yours did ! I will be using the Massoth digital lights 8122302 as I have used them in the LGB 36360 Barwagon. Happy railway running the better weather is coming ! , and thanks again for your information.
TT NUT