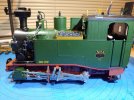
LGB 20980 Saxon 1K How to Open

Distrackted

Registered
Country flag
Hi there,

has anyone ever removed the body shell from one of these? I have a Massoth LS decoder ready to install but am stymied as to how to get into the locomotive. I have removed all the obvious screws and the back of the cab is loose but the rest is still stuck solid. The explosion diagram in the owner manual is not much help.

Thanks for any advice anyone might have.

Cheers!
 
Hello again,

I have now figured it out. There were 3 more screws hidden by the motor block which had to be removed with all the running gear attached. I will try and document the steps for adding the Massoth LS decoder and speaker to this locomotive, as well as putting it all back together, and post pictures when done.

Cheers!
I have now completed this project and as mentioned will try and post a description and pictures.

I started with a DC only LGB 20980 Saxon 1K locomotive. This locomotive is equipped with the LGB 10 pin direct decoder interface and also has a place to mount a 57 mm speaker.
I ordered a Massoth 8211100 LS decoder (with sound project 821x098 Saxonian 1K), a Massoth 8312062 10-pin cable, some Massoth 8312204 2-pin speaker cables, and a Visaton K 57 C speaker. I had some Massoth 8104010 decoder brackets on hand, as well as some 1/8" and 1/4" ABS sheet to fabricate a small speaker enclosure. The speaker enclosure, aside from improving sound quality, also served as a platform to mount the LS decoder. The decoder had to be mounted longitudinally to fit within the boiler profile, inside of the side tanks. Initially I had the decoder bracket attached to the top of the speaker enclosure, but was unable to refit the body as it was a few mm too high. I corrected this by milling a rebate into the top layer of the speaker enclosure to allow the bracket to be mounted a bit lower. I also tidied up some of the bulky factory wiring by coiling it up and putting it inside the firebox housing. I put a flat piece of heat shrink against the backside of the mode switch to prevent damage to these wires. I have attached a large number of images. Due to the limit of 20 pictures I will create a second post with the remaining project photos shortly. Thanks for looking!

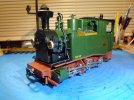
The first picture is the locomotive before disassembly:20211102_202216.jpg

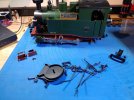
All of the removable fragile bits were carefully removed:

20211102_175028.jpg

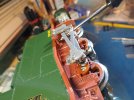
Two small screws holding the side rod hangers were removed:

20211102_173557.jpg

The cylinders were carefully removed:

20211102_170233.jpg

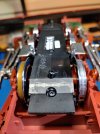
The motor block screws (shown extended) were removed:

20211102_173241_HDR.jpg

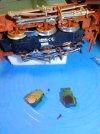
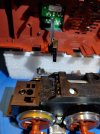
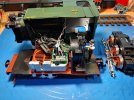
The motor block cable was unplugged and the motor block separated from the locomotive body:

20211102_165842_HDR.jpg

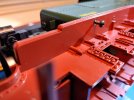
Two long screws attaching the frame to the body at the rear were removed:

20211102_165605_HDR.jpg

Two short screws below the fronts of the side tanks on each side were removed:

20211102_165612_HDR.jpg

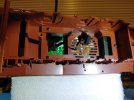
Three screws attaching the body to the frame, which were concealed by the motor block were removed. The long one at the front:

20211101_191650.jpg

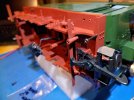
Body and frame now separated:

20211030_173003_HDR.jpg

Another view:

20211030_173025_HDR.jpg

And another view:

20211030_173013_HDR.jpg

I made a custom speaker enclosure by laminating 1/8" and 1/4" ABS sheets (gel superglue works amazingly well for this!)

20211030_173057.jpg

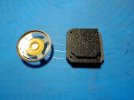
The Visaton K 57 C speaker is a great fit:

20211030_173122.jpg

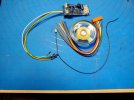
These are the parts I added:

20211030_173514.jpg

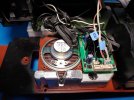
Here is a view with the speaker enclosure in place:

20211030_194156.jpg

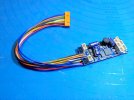
Here is the decoder with the 10 pin cable soldered in place (top view):

20211031_162029.jpg

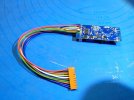
And the bottom view:

20211031_162038.jpg

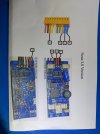
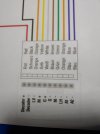
Here is a picture of the correct wiring scheme for the newer LS decoders:

20211031_162148.jpg

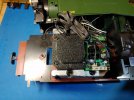
Here is the decoder bracket mounted to the speaker enclosure:

20211030_210316_HDR.jpg
 
I have now completed this project and as mentioned will try and post a description and pictures.

I started with a DC only LGB 20980 Saxon 1K locomotive. This locomotive is equipped with the LGB 10 pin direct decoder interface and also has a place to mount a 57 mm speaker.
I ordered a Massoth 8211100 LS decoder (with sound project 821x098 Saxonian 1K), a Massoth 8312062 10-pin cable, some Massoth 8312204 2-pin speaker cables, and a Visaton K 57 C speaker. I had some Massoth 8104010 decoder brackets on hand, as well as some 1/8" and 1/4" ABS sheet to fabricate a small speaker enclosure. The speaker enclosure, aside from improving sound quality, also served as a platform to mount the LS decoder. The decoder had to be mounted longitudinally to fit within the boiler profile, inside of the side tanks. Initially I had the decoder bracket attached to the top of the speaker enclosure, but was unable to refit the body as it was a few mm too high. I corrected this by milling a rebate into the top layer of the speaker enclosure to allow the bracket to be mounted a bit lower. I also tidied up some of the bulky factory wiring by coiling it up and putting it inside the firebox housing. I put a flat piece of heat shrink against the backside of the mode switch to prevent damage to these wires. I have attached a large number of images. Due to the limit of 20 pictures I will create a second post with the remaining project photos shortly. Thanks for looking!

The first picture is the locomotive before disassembly:View attachment 291924

All of the removable fragile bits were carefully removed:

View attachment 291925

Two small screws holding the side rod hangers were removed:

View attachment 291926

The cylinders were carefully removed:

View attachment 291927

The motor block screws (shown extended) were removed:

View attachment 291928

The motor block cable was unplugged and the motor block separated from the locomotive body:

View attachment 291929

Two long screws attaching the frame to the body at the rear were removed:

View attachment 291930

Two short screws below the fronts of the side tanks on each side were removed:

View attachment 291931

Three screws attaching the body to the frame, which were concealed by the motor block were removed. The long one at the front:

View attachment 291932

Body and frame now separated:

View attachment 291933

Another view:

View attachment 291934

And another view:

View attachment 291935

I made a custom speaker enclosure by laminating 1/8" and 1/4" ABS sheets (gel superglue works amazingly well for this!)

View attachment 291936

The Visaton K 57 C speaker is a great fit:

View attachment 291937

These are the parts I added:

View attachment 291938

Here is a view with the speaker enclosure in place:

View attachment 291939

Here is the decoder with the 10 pin cable soldered in place (top view):

View attachment 291940

And the bottom view:

View attachment 291941

Here is a picture of the correct wiring scheme for the newer LS decoders:

View attachment 291942

Here is the decoder bracket mounted to the speaker enclosure:

View attachment 291943

And the remaining pictures.....

The 10 pin interface plug was removed from the LGB mainboard:


20211101_151442.jpg

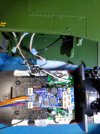
The LS Decoder was mounted in the bracket:

20211101_151559.jpg

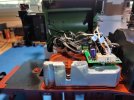
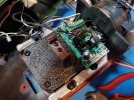
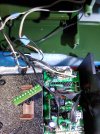
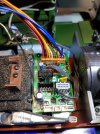
The decoder was plugged into the 10 pin interface on the LGB main board (decoder removed from bracket to show plug orientation):

20211101_161200.jpg

Here is a diagram confirming the plug orientation:

20211101_161126.jpg

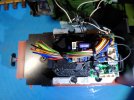
The bulky switch wire from the factory was coiled......

20211030_205724_HDR.jpg

.. and tucked into the firebox space:

20211030_205833_HDR.jpg

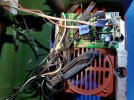
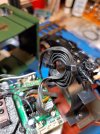
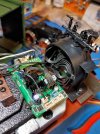
A modification (rebate) had to be made to lower the decoder bracket so that the body would fit back properly - note how the decoder wires are cable tied to allow them to tuck into the smokebox cavity when the locomotive is put back together::

20211101_185126.jpg

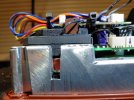
Another view of the modification to the bracket height:

20211101_185107.jpg

The locomotive all went back together perfectly and runs and sounds great!!!

20211102_202204.jpg
 
Nice job. Brave man to wave a soldering iron near a sound decoder. I seem to remember that putting mine back together was much harder than taking it apart.
 
thank you
i have one and opening it to add a smoker is on my list of coming holiday season aggravations:rolleyes:
 
thank you
i have one and opening it to add a smoker is on my list of coming holiday season aggravations:rolleyes:
I'm sure it will go smoothly. My original problem was that I had recently upgraded a 20271 Heidi and all the body screws were accessible without having to remove the motor block. So the Saxon had me stymied until I figured out the three hidden screws. All the best with your project!
 
Back
Top Bottom