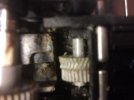
LGB 2028 mogul
- Thread starter Edgar
- Start date
You are using an out of date browser. It may not display this or other websites correctly.
You should upgrade or use an alternative browser.
You should upgrade or use an alternative browser.
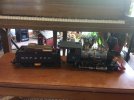
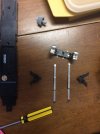
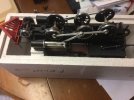
My post will have to be broken up for the antique phone and satellite internet to function. With the extra cabeese and passenger cars drawing juice on the side tracks the lighting seemed impressive. Towards the end of the evening the power G transformer was maxed out and the engine still running at a slow enough pace. The next morning engine had an obvious limp. I figured that the motor has been damaged. A few days later the bottom panel was removed for inspection. The shreds of plastic where removed before I took pictures 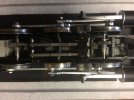
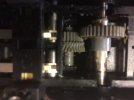


After three attempts at correcting the quartering, the engine appeared to run smoothly with normal throttle. Did this happen due to lack of maintenance and lube? Did the difference in wheel circumference play a roll; the traction tires are missing on both back wheels? I have a replacement gear, but tires will have to be ordered. I’ll need help with advice on correcting my problem.
I would suggest that the loco is quite old?
I think there was probably already wear on the idler, and adding a long formation put more strain on the drive, it possibly slipped a tooth or two, and this put the quartering out..
The motion would Bind. The loco would slow, and the worm would chew through the gear..
Replace the idler (both, if the other one is also worn). Clean out the old grease, and replace with a small amount of plastic-friendly grease.
PhilP
Don't know of a thread, offhand..Phil, can the idler gear be replaced from the bottom or does the top of the model need to be disassembled? Do you know of a forum thread with pictures describing the process?
Edgar
It is done from the bottom
Take plenty of pictures, and watch the metal strips are in the right place, and for flying carbon brushes, when you lift the wheels..
I take 'left-side' and 'right-side' pictures of the motion as well.
If you can wait until you have the parts, and do it in one go, it also helps..
Run the loco slowly, on blocks. Look for binding, listen for 'clicks' (which can mean a rod is catching).
Then repeat running backwards.
If you get stuck, posting pictures here, we can sort you out.
PhilP
I may have misled you then.. 
The pin will certainly not drift out sideways.. It must mean you have to lift the motor, and change it from the top? - The idler floats on a short axle, which just drops into a slot in the block.
The pin will certainly not drift out sideways.. It must mean you have to lift the motor, and change it from the top? - The idler floats on a short axle, which just drops into a slot in the block.
Any helpful hints for disassembling this model to replace the idler gear will put to proper use. I was able to use information from the forum to get my 2020 apart and my 2115 when they needed repairs. The 2028D is my favorite model and I would hate to make a serious mess because I didn’t ask.
I have found with older LGB models that the motor/gearbox assembly must be removed from the loco body.
Have you searched for spares leaflet it may provide some insight.
Have you searched for spares leaflet it may provide some insight.
I’ve looked at a schematic that JonD had posted in an older thread; they don’t really offer a sequence to follow. I’m assuming the cab comes off and then the boiler. Will the motor have thrust bearings? Are there other considerations that I should be aware of?
Most LGB engines I have worked on have the same idler gear and these are removed form the top.
However, the American 2-4-0 steamer (made in China) these are removed from the bottom. And the idler shaft goes through the motor block and one side had the 'serated' end. Plus the 2-4-0 idler gear is not the same one as the moguls and F7's.
However, the American 2-4-0 steamer (made in China) these are removed from the bottom. And the idler shaft goes through the motor block and one side had the 'serated' end. Plus the 2-4-0 idler gear is not the same one as the moguls and F7's.
I have just done this to my oldest 1988 mogul...(update methodology next post)
1 work over a towel to avoid bouncing parts. use a small dish or two . Youll beed a flat heard and phillips screwdriver, as well as a small hex wrench for the driver wheel and rod screws.
2 never force anything, if it doesnt fit easily, youre overlooking something...motor contacts no seated, plungers, etc. cabs may interlock with handrails, boiler, etc. go slowly and youll figure things out.
3 allow yourself plenty of time so you can finish in a single sitting. This will help you from forgetting things from disassembly. Sometimes, you might have to do it twice.
4 photos, or layout removed pieces as they were oriented.
5 thoroughly clean and relube. I use a soft toothbrush and dish detergent to remove old grease. I actuall ran mine under luke warm water as i scrubbed (but i live in COlorado where everything will dry out rather quickly. otherwise dry it, somehow, paper towel, compressed air,
Rinse, dry, relube with quality grease or teflon based grease. Clean and polish backs of wheels, loco and tender, clean and replace plungers, as needed, make sure they travel freely, (if not, the plunger tube edge is usually damaged or crimped slightly, a very small fine round jewelers file will sort this) (check that contact plungers are making contact as axels slide from side to side) use a fine fine metal polish, nothing that will scratch. Replace very worn skates. clean spring areas and lightly lube with dry graphite lube.
6 backthread screws when reinserting to avoiding inadvertently mis tapping holes. tighten firmly but no more.
that loco has a lot of wear, obviously.
down to brass on a driver or two.
worm gear ate the idler..likely overloading . despite the heft, these , in life, only pulled 5-6 cars tops, often only 2-3 passenger cars, unless downgrade. if you want longevity, do not "see what she'll pull". THey will pull , but the gears suffer the unseen wear. Shorter trains are best, or, double matching locos.
Once the ldler is grooved like that, slipping will occur, and possibly quartering.
check the motor block box where the axels make contact, too, as if that area has worn and become even slightly elliptical in shape (ie the "U" is a bit wide or deeper than it ought to be, and it can, it allows driver axels to move. If even slightly, you will likely have quartering issues with new parts, if the motor block box isn't also replaced.
Last edited:
Since my previous post, i did the DEED
i (just for you!!!) disassembled my old 2018-very first version-substantially the same as your 2028 but for less lateral play in the middle drivers.
first, the idler sits in U shaped slot, accessible only from the top; it drops in
you must remove the motor block from the superstructure.
i sat mine upside down in the styro coffin for ease. be mindful of the headlight and stack, and pop valves, none are robust and should not bear the locos weight, imho.
remove the screws and washers that attach the drive rod to the connecting rods. play attention to how many washers are fitted and where ; once the drive rod (angled from the cylinders is removed, then gently prise the brass stabilizing stancheons from the cow catcher;
remove the screws from the bottom of the cab (4), remove the screws from the sides, ie those in the firebox on the sides, finally, remove the screw on the motor block bottom closest to the pilot truck , it is long and goes into the body, at least mine is, diagram shows a shorter screw, perhaps my threads were stripped at some point???; btw mind the sprung plunger for the lead pilot truck when replacing, it can push out and needs to be fully reseated before re-screwing things on the bottom plate.
once this is done the motor block can be lifted and turned over;
remove the three colored wired from their pins (pay attention to colors and position)
the block top lid has 4 screws, loosen and you will have access to the idler and the motor, but NOT to removing the drivers (that is done from the bottom side.) note that this cover slide under a couple of tabs when refitting. if you dont, it wont be properly flush with the block sides.
my loco does have thrust ball bearings. They are well and deeply seated in a small housing at the ends of the motor shaft. if yours has these , a tried method, for me, is to grease up a pair of tweezers as 'stick em' , and either remove them and set aside, or, simply leave them in and paste them in with grease as a "glue'. these bearing are deceptively important for older motors, dont lose them. The replacement new motors dont need them. dont lose them in any event.
As for quartering, if necessary, i simply set all the protruding wheel rod supports (bosses) at 6 o clock , on one side. easy to eyeball and be accurate. and it must be dead accurate. And, if you must remove and reset the idler gear onto its axel, i would recommend that the gear sit in hot but not boiling water briefly for both the off and on aspect of gear replacement operation. A gear puller will save you damage. You can note the position on the axel, use tape or ink. then with the new replacement gear, set the gear and axel over an adequately deep slot, such as on (NOT in ie clamped) a vice, and using a small hammer, gently tap the axel until the gear is properly positioned.
BTW, I thank you for the incentive, as my old girl's rods were way grottier than i knew, lots of well oiled grit from rain spattering and dry summer winds, way too long ago. I have since done a complete tear down , wash up, and relube. btw graphite powder is , imho, best for the slide gears, if you chose to lube. it wont attract grit. as for the bosses and rod holes, I use a drop or two tops. oil collects grit. But it can be flooded away with lighter fluid, wiped with a pipe cleaner etc., and re lubed.
I suggest a good but safe degreaser, if you have the likes of pine sol over your side. dish detergent works, but, i find i need to remove much grease with a paper towel, wash, repeat, wash, rinse, and then use lighter fluid, old grease is quite water resistant. if you feel competent, tear it all down and clean and wipe individual parts for the best results. Be thorough, inside rod holes, bosses, etc., If not, you can safely use a soft bristled toothbrush and pipe cleaner on the assembly, should get it 90%+ clean. be gentle. rods look sturdy but can break. They are difficult to find and very expensive. I would not run your loco without the traction tires. why? grit and rounding of grooves. if you buy NOS tyres, and they look yellow and not clear, i suggest that you soak them for an hour or more in a slightly detergent solution to rehydrate to reduce chances of them splitting. not an issue if you can find recent parts stock.
I bought my old 2018, long ago, well used from my local hobby shop. It has many hours, but still runs beautifully, even with one driver being down to the brass. (which BTW, needs to be cleaned frequently to avoid pitting and micro arcing)
Hope this helps you.
Last edited:
-
2
-
1
- Show all
Steve, I cannot think of what should be said in response to the kindness and time you’ve afforded to a stranger. I will have to wait for a week day with the kids at school to have an un-interrupted go at this. Thank you so very much!
Edgar
Edgar


