Kerr Stuart Skylark build

ge_rik

British narrow gauge (esp. Southwold and W&LLR)
24 Oct 2009
10,701
1,244
Cheshire
www.riksrailway.blogspot.com
Best answers
0
Country flag
I've decided to put this in the thread in the scratchbuild section as it's not purely 3D printing - I'm just using 3D printing as part of the process, albeit a fairly significant part.

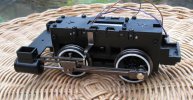
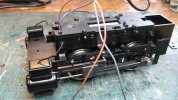
After deciding to use a Bachmann Lyn motor block as the basis for a Schull & Skibbereen loco build, a couple of fellow modellers generously sent me a couple of their redundant Lyn motor blocks, one of which was from the more recent version. It required a bit of remediation; new wheels (the flanges were worn flat in a couple of places), a new motor and new motion - but result is a rather fine motor block - far better engineered and powerful than the old mechanism!IMG_2191.JPG
After searching the web for a suitable 4-coupled loco I could place on top of the chassis, I hit upon the Kerr Stuart Skylark locos. Although there was a basic design, they produced quite a few variations - the one which appealed to me was the Metropolitan Water Board locos - which I felt could easily have been adapted to run on three foot metals.
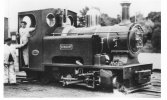
kempston 5.jpg
All I needed to do was draw and print the parts needed ........ :)

Rik
 
  • Like
Reactions: 1 user

ge_rik

British narrow gauge (esp. Southwold and W&LLR)
24 Oct 2009
10,701
1,244
Cheshire
www.riksrailway.blogspot.com
Best answers
0
Country flag
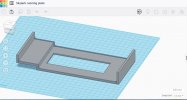
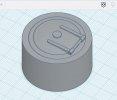
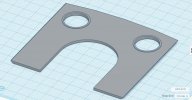
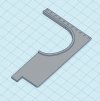
As with all my loco scratch-bash builds, I started with the running plate. Using the dimensions from drawings of one of the locos, plus the drawing of a might-have-been loco - I drew a running board which was a compromise between the two drawings which seemed to match the dimensions of the Lyn motor block.
Skylark1.jpg

I needed to take the razor saw to the block to make it fit ......
IMG_2207.JPG

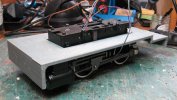
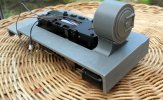
.... but it looked OK once printed out and fitted
IMG_2205.JPG

Rik
 

ge_rik

British narrow gauge (esp. Southwold and W&LLR)
24 Oct 2009
10,701
1,244
Cheshire
www.riksrailway.blogspot.com
Best answers
0
Country flag
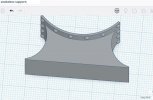
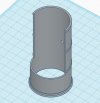
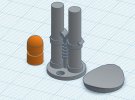
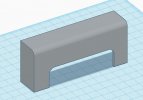
Normally, I start with the cab, but this time I thought I'd start with the front end. The support for the smokebox ......
Skylark3.jpg

.... and then the smokebox itself were drawn - I'm using TinkerCAD BTW - because it's dead easy to use and is 99.8% reliable in producing drawings which can actually be printed.
Skylark2.jpg

These were then printed out and seemed to look OK on the running plate
IMG_2209.JPG
 

ge_rik

British narrow gauge (esp. Southwold and W&LLR)
24 Oct 2009
10,701
1,244
Cheshire
www.riksrailway.blogspot.com
Best answers
0
Country flag
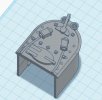
Rather than doing the boiler next, I decided to have a go at the firebox. Its design differed on the two drawings but in the end, I went for the one which was actually manufactured - as it was a bit more interesting.
Skylark5b.jpg

I've no idea about the backhead detail as it didn't appear on the plans and I have no photos of the interior of the cab - so I just guessed and then mocked up something which would do the job. It's going to be hidden away inside the cab, so I think I can get away with it.

This was printed out (eventually, after a hiccup or two) and put in place.
IMG_2217.JPG

Rik
 

ge_rik

British narrow gauge (esp. Southwold and W&LLR)
24 Oct 2009
10,701
1,244
Cheshire
www.riksrailway.blogspot.com
Best answers
0
Country flag
Next came the boiler itself. It took a couple of goes to decide how much to keep and how much to cut away to give room for the batteries and electronics, but I think this will work (fingers crossed)
Skylark4b.jpg

This is now being printed ..... so you'll have to wait for the next thrilling installment ......

Rik
 

Paul M

Registered
25 Oct 2016
11,881
1,696
60
Royston
Best answers
0
Country flag
Brilliant, I'm looking forward to the rest of the build
 

ge_rik

British narrow gauge (esp. Southwold and W&LLR)
24 Oct 2009
10,701
1,244
Cheshire
www.riksrailway.blogspot.com
Best answers
0
Country flag
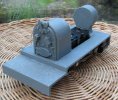
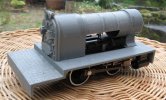
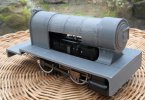
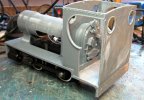
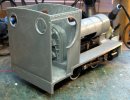
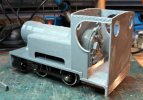
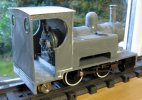
The boiler now printed out, glued to the smokebox and the firebox and fixed to the running plate.
IMG_2218.JPGIMG_2219.JPG

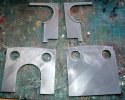
The parts for the cab have now been drawn
Skylark6a.jpgSkylark7a.jpg

.... and are being printed.

Rik
 

dunnyrail

DOGS, Garden Railways, Steam Trains, Jive Dancing,
Staff member
GSC Moderator
25 Oct 2009
26,166
4,991
75
St.Neots Cambridgeshire UK
Best answers
0
Country flag
Rather nice looking Loco that should fit right in on your lone Rik. One of these days I must take the plunge into 3d printing, I feel that I am being left behind on what I can do. Just when I had got resin casting cracked!
 

Madman

Registered
25 Oct 2009
17,136
2,952
Pennsylvania, USA
Best answers
0
Country flag
AMAZING.....:clap::clap::clap::clap::clap:
 

ge_rik

British narrow gauge (esp. Southwold and W&LLR)
24 Oct 2009
10,701
1,244
Cheshire
www.riksrailway.blogspot.com
Best answers
0
Country flag
Thanks chaps.
I get as much pleasure from drawing and printing scratchbuilds as I do from making them from scratch in plasticard. The beauty of 3d pdrawing is the ease with which I can go back and tweak the parts. Also, I can adapt parts from other builds, such as the backhead detail and this safety valve - both 'borrowed' with some reworking from my Schull and Skibbereen loco build earlier in the year

Skylark10.jpg

Rik
 

ge_rik

British narrow gauge (esp. Southwold and W&LLR)
24 Oct 2009
10,701
1,244
Cheshire
www.riksrailway.blogspot.com
Best answers
0
Country flag
I've decided the tanks will be printed upside down - to avoid having to use supports while printing (I hate using supports unless I really have to!).
Skylark8a.jpg

Rik
 

ge_rik

British narrow gauge (esp. Southwold and W&LLR)
24 Oct 2009
10,701
1,244
Cheshire
www.riksrailway.blogspot.com
Best answers
0
Country flag
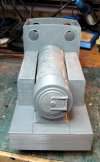
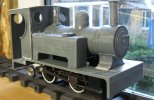
Tanks now printed, but not yet fixed into place until I sort out the space inside. Fortunately, they are large enough to accommodate 18650 li-ion cells (18mm dia x 650mm long) but just need to check I can get them in without having to dismantle. The inserts for the tanks (to fill in the gaps at the base of the tanks) are being printed as I write this
IMG_2228.JPGIMG_2229.JPGIMG_2230.JPG


Rik
 

Riograndad

Model Railroading, boats and oil painting,
6 Jul 2013
2,161
639
69
Northampton UK
Best answers
0
Country flag
Excellent!!!!!:clap::clap::clap::clap::clap::clap::clap:
 

ge_rik

British narrow gauge (esp. Southwold and W&LLR)
24 Oct 2009
10,701
1,244
Cheshire
www.riksrailway.blogspot.com
Best answers
0
Country flag
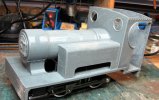
Managed to get a fair bit done over the weekend and today.
IMG_2255.JPGIMG_2257.JPG

Still got more to do - the outside frames are the biggest headache at the moment but I'm nearly there.

The lithium cells have been ordered and I've modified the design of the tanks and boiler to make sure I can squeeze them in. Won't be long before I can make the first test run!!

Rik
PS Just noticed some filler is needed for the boiler fittings - photography has a lot to answer for!
 

Riograndad

Model Railroading, boats and oil painting,
6 Jul 2013
2,161
639
69
Northampton UK
Best answers
0
Country flag
Looking good and coming on well,looking forward to the completed loco,:clap::clap::clap::clap:
 

PhilP

G Scale, 7/8th's, Electronics
5 Jun 2013
33,561
3,521
Nottingham
Best answers
0
Country flag
I will be interested in 'how you achieve' and 'how good' you can get a finish on the print.. - I have bought a 3D printed kit, and it is a little rough, in places.

PhilP
 

jimmielx

45mm gauge track - approx 16mm scale (1:19)
24 Oct 2009
786
41
Hastings, UK
Country
United-Kingdom
Best answers
0
Country flag
Rik, that looks absolutely splendid. Fantastic work.
Looking forward to seeing it progress.
 

Paul M

Registered
25 Oct 2016
11,881
1,696
60
Royston
Best answers
0
Country flag
Very, very nice