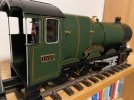
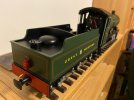
GWR..ish Castle..ish

Riograndad

Model Railroading, boats and oil painting,
6 Jul 2013
2,161
639
69
Northampton UK
Best answers
0
Country flag
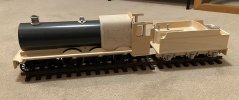
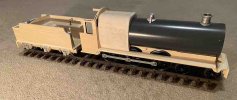
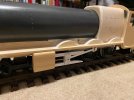
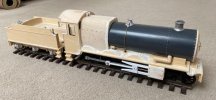
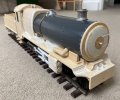
Continued work on the narrow gauge (rivet counters beware...!) Castle today. Decided to get the shape of the tender done to see how the proportions of the loco are looking. The tender helps I think.

View attachment 281018View attachment 281019
Looking good,yes the tender helps,also like the pics of the railcar,interesting take on things!!!!:clap::clap:
 

jimmielx

45mm gauge track - approx 16mm scale (1:19)
24 Oct 2009
786
41
Hastings, UK
Country
United-Kingdom
Best answers
0
Country flag
Quite a bit of progress, though not terribly obvious in the pictures!

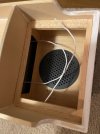
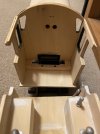
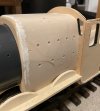
But: the cab sides and floor are now fixed; the tender now has wheels - outer pairs of ball bearing pickup wheels and the centre wheels flange-less and flattened; various white metal bits placed; the speaker will go in the tender, accessed through a removable top plate at the back; firebox has another sheet of thin ply over it with some detail; and holes drilled for cable runs through the firebox.

The decoder and smoke generator will go in the boiler, so fittings for those are on the list. As is a smokebox door, cab interior and roof, rivets, rivets, rivets, wiring, coupling between loco and tender, splashers... and the motion...

Feeling happy with how it's going so far. A lot to do!IMG_6141.jpgIMG_6143.jpgIMG_6144.jpgIMG_6145.jpgIMG_6146.jpg
 
  • Like
Reactions: 1 user

jimmielx

45mm gauge track - approx 16mm scale (1:19)
24 Oct 2009
786
41
Hastings, UK
Country
United-Kingdom
Best answers
0
Country flag
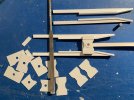
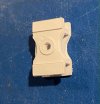
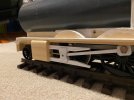
Started work on the motion. I've needed to scale this up a bit, because of the plastic strip I'm using to make it to give it a bit of strength and because the cranks on the Thomas wheels are a bit further off centre than on the prototype. The advantage of this being an imagined narrow gauge homage to the prototype is very useful at time like these!
The sliders are just plasticard strips, the crossheads are made of plasticard cut out on a vinyl cutter and then ply-ed together. It all feels pretty robust, but time will tell.
IMG_6157.jpgIMG_6159.jpg
 
  • Like
Reactions: 1 user

jimmielx

45mm gauge track - approx 16mm scale (1:19)
24 Oct 2009
786
41
Hastings, UK
Country
United-Kingdom
Best answers
0
Country flag
And fitted to a cylinder. The connecting rod angles back a bit to allow for the big lateral movement of the Thomas wheels...IMG_6161.jpgIMG_6162.jpg
 
  • Like
Reactions: 1 users

jimmielx

45mm gauge track - approx 16mm scale (1:19)
24 Oct 2009
786
41
Hastings, UK
Country
United-Kingdom
Best answers
0
Country flag
Given the motion a quick test today. I think that get's a pass.


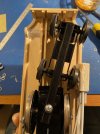
However as pointed out earlier in the thread I'm going to have to work on the front bogie (is that what it's called? I think it's not a pony truck). The rear wheel of the bogie is just catching the inside of the cylinder on the R2 curves, it's also only articulated at the body join so that is just forcing it off the rail.

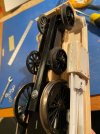
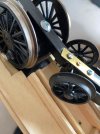
My thought is to add an articulation point where the arm from the body meets the bogie. Does anyone have a loco with a similar wheel arrangement? I'd be interested to know how a G scale model might usually do this. My Hornby A4 Pacific has the two articulation points, so that's probably favourite at the moment. I imagine the prototype is centrally pivoted with some lateral movement allowed somehow, I guess something like that could also work, I just wonder how I ensure the lateral movement is reliable. I also imagine the prototype doesn't have to negotiate R2! Here's what I currently have (minus one of the cylinders but you get the idea)... Any thoughts gratefully received.

IMG_6170.jpgIMG_6171.jpg
 

jimmielx

45mm gauge track - approx 16mm scale (1:19)
24 Oct 2009
786
41
Hastings, UK
Country
United-Kingdom
Best answers
0
Country flag
Seek and ye shall find ...

K4 misc info/tips

This is most useful food for thought! Thanks Greg!
 

Paul M

Registered
25 Oct 2016
11,881
1,696
60
Royston
Best answers
0
Country flag
Wouldn't just moving the pivot point work?
 

dunnyrail

DOGS, Garden Railways, Steam Trains, Jive Dancing,
Staff member
GSC Moderator
25 Oct 2009
26,168
4,993
75
St.Neots Cambridgeshire UK
Best answers
0
Country flag
Wouldn't just moving the pivot point work?
Perhaps as far forwards as it would go and a double pivot may be the get out if jail card.
 

Rhinochugger

Retired Oik
27 Oct 2009
36,715
4,240
North West Norfolk
Best answers
0
Country flag
Given the motion a quick test today. I think that get's a pass.


However as pointed out earlier in the thread I'm going to have to work on the front bogie (is that what it's called? I think it's not a pony truck). The rear wheel of the bogie is just catching the inside of the cylinder on the R2 curves, it's also only articulated at the body join so that is just forcing it off the rail.

My thought is to add an articulation point where the arm from the body meets the bogie. Does anyone have a loco with a similar wheel arrangement? I'd be interested to know how a G scale model might usually do this. My Hornby A4 Pacific has the two articulation points, so that's probably favourite at the moment. I imagine the prototype is centrally pivoted with some lateral movement allowed somehow, I guess something like that could also work, I just wonder how I ensure the lateral movement is reliable. I also imagine the prototype doesn't have to negotiate R2! Here's what I currently have (minus one of the cylinders but you get the idea)... Any thoughts gratefully received.

View attachment 281908View attachment 281909
I'd be tempted to separate the bar from the bogie, and link it via a pivot point just behind the front bogie wheels - say about 1/3 rd of the way back.

If I've got my thinking right, that should minimise the amount of swing in the rear bogey wheels.

The other way to cheat, is to take a bit off the inside of the cylinders - the bit that nobody will see ;);)
 

PhilP

G Scale, 7/8th's, Electronics
5 Jun 2013
33,562
3,521
Nottingham
Best answers
0
Country flag
Yep! I'd pivot the truck/bogie to the arm.. Also probably add some weight? - They can be a little 'skittish', if not controlled.

PhilP
 

jimmielx

45mm gauge track - approx 16mm scale (1:19)
24 Oct 2009
786
41
Hastings, UK
Country
United-Kingdom
Best answers
0
Country flag
Thanks so much for all the replies, really appreciated!

I'll add a pivot on the arm near the bogie, that should be the simplest thing to try first.

Unfortunately the arm itself runs right through the bogie, so I'll have to do the pivot at the back and see how I go. I've got a feeling that might give the clearance needed too, but if not I will take some chunks out of the back of the cylinders!

I've got some weight on the bogie already, but will try to add more - currently the wheels are plastic - because I had them in a drawer and were easy enough to adapt to inside frame - I could look into metal wheels for extra weight too if needed.
 

dunnyrail

DOGS, Garden Railways, Steam Trains, Jive Dancing,
Staff member
GSC Moderator
25 Oct 2009
26,168
4,993
75
St.Neots Cambridgeshire UK
Best answers
0
Country flag
Thanks so much for all the replies, really appreciated!

I'll add a pivot on the arm near the bogie, that should be the simplest thing to try first.

Unfortunately the arm itself runs right through the bogie, so I'll have to do the pivot at the back and see how I go. I've got a feeling that might give the clearance needed too, but if not I will take some chunks out of the back of the cylinders!

I've got some weight on the bogie already, but will try to add more - currently the wheels are plastic - because I had them in a drawer and were easy enough to adapt to inside frame - I could look into metal wheels for extra weight too if needed.
I think metal wheels would be a big help.
 

jimmielx

45mm gauge track - approx 16mm scale (1:19)
24 Oct 2009
786
41
Hastings, UK
Country
United-Kingdom
Best answers
0
Country flag
Progress was halted a bit last week, but all going again now!

First of all thanks for all the replies re the bogie. I've added the second articulation point and it seems to run very much better - an added bonus is a tiny bit of upwards downwards movement too which I think will help the ride. I'm going to stick with the plastic wheels for now as I think they look ok, and the bogie itself has a fair amount of weight on it already, however they are on the list to swap if I get any more problems there.
IMG_6279.jpg

And on top I've pretty much reached the stage where I will start the painting process next. For me that's sanding sealer, rivets, primer spray, colour brushed on, varnish, lining, varnish. And somewhere within that wiring and more detailing. I've got mounting points for the decoder, speaker and smoke generator in already and a route for the cables, so hopefully the electrics will be straight forward enough.
IMG_6280.jpgIMG_6281.jpg

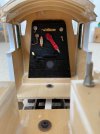
I've also made a start on the cab back end (which is not yet stuck in), a bit more to do there too.

IMG_6282.jpg

Really looking forward to getting some paint on it finally, but even looking at the pictures reminds me of a few things to do...!
 
  • Like
Reactions: 1 users

jimmielx

45mm gauge track - approx 16mm scale (1:19)
24 Oct 2009
786
41
Hastings, UK
Country
United-Kingdom
Best answers
0
Country flag
The other way to cheat, is to take a bit off the inside of the cylinders - the bit that nobody will see ;);)
I also took a chunk out of the inside of the cylinders - and indeed you'd never know! Thanks!!
 

jimmielx

45mm gauge track - approx 16mm scale (1:19)
24 Oct 2009
786
41
Hastings, UK
Country
United-Kingdom
Best answers
0
Country flag
I've been making steady progress - a few hours most evenings.

A couple of weeks ago it made a brief appearance in photographic grey.
IMG_6308.jpg
(ok, primer with a bit of black...!)
Then a week or so of painting with the usual (now rescued) varnish dramas along the way.

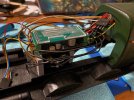
Electrics are now in too - I have a new found respect for anyone doing this kind of work in the smaller scales - there are a lot of wires!

IMG_6560.jpg

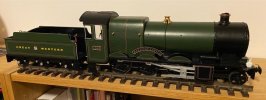
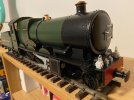
And most of the lining has been done. I still need to line the boiler, but that was the site of my varnish nightmare so it has got a bit behind - just five bands though, so that should happen in the next few days.

I'm pleased with the name and number plates which are made from plasticard cut on my vinyl cutter, as is the side window surround. The colours of the lining bands aren't reproduced well here - what looks light yellow in the pictures is actually orange.
IMG_6565.jpg

IMG_6566.jpg
IMG_6567.jpg
IMG_6568.jpg

I just had it out on the track to confirm that it 'works'. It's running in the right direction and the sound works (crikey it's loud!). I've got quite a bit of CV programming to do - lights suitably dimmed and mapped, and figuring out the smoke generator which is all new to me. It has directional lights front and back (two colour LEDs), a cab light, firebox light, speaker and pickups in the tender, and a couple of stay alive caps - all of which is a lot of wiring - hidden under the boiler.

Once I've got the boiler lined and painted, I will still need to work on the cab, fix handrails, whistles, maybe some sort of cab floor which bridges the rather large gap between loco and tender (necessary because of my R2 curves) and I'm sure some other things that will come to me, but I'm pleased with the progress and that it will be running in time for the warmer weather!

Hopefully I'll get a chance to put it on the rails again in the daylight tomorrow - I'll post a picture if I do...
 
  • Like
Reactions: 1 users

Martino

Photography, The GWR, Aviation, Travel, Cars.
24 Oct 2009
3,748
380
71
Jasper, Georgia. USA
www.facebook.com
Best answers
0
Country flag
That is great! Really impressed.