Getting started laying track

Now I actually have to build a raised platform. I was hoping I could drop it on my deck just to get something running and save a few dollars. Oh well I guess!

Why the sudden need to change to a "raised platform" ? Health or "local planning laws" ?

Also, when I started my line I used mostly flexi track and a railbender, all LGB rail and its clones - Bachman, USAT, Aristocraft, etc. I let my garden's perimeter (don't we all) and my imagination do the rest. All much easier to get things to fit. You just need to remember to "pin" the flexi track to whatever it sits on, 5" nails every 2-3 feet should do. Don't be shy with a hacksaw to get bits to fit. I have used some set track where its more rigid structure was usefull. Always go for the widest radius on switches, and set track curves that your alloted space allows - future proofing for when you develop a taste for longer 8 coupled (Mikes). Max

house pictures 006.JPGGarden looking east.jpg
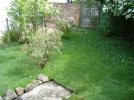
Left, after application of imagination, right before. Rotate garden 90° counter clockwise to correct orientation before/after.
 
Last edited:
Why the sudden need to change to a "raised platform" ? Health or "local planning laws" ?

Also, when I started my line I used mostly flexi track and a railbender, all LGB rail and its clones - Bachman, USAT, Aristocraft, etc. I let my garden's perimeter (don't we all) and my imagination do the rest. All much easier to get things to fit. You just need to remember to "pin" the flexi track to whatever it sits on, 5" nails every 2-3 feet should do. Don't be shy with a hacksaw to get bits to fit. I have used some set track where its more rigid structure was usefull. Always go for the widest radius on switches, and set track curves that your alloted space allows - future proofing for when you develop a taste for longer 8 coupled (Mikes). Max

View attachment 343476View attachment 343477
Left, after application of imagination, right before. Rotate garden 90° counter clockwise to correct orientation before/after.
My first plan was to put it on the deck that never gets used but it’s too small. The next area I have is full of bare spots, playground gravel , regular gravel and a tarp. Previously it was used for parking cars. Also a tree stump. I think it would be better to clear the lot and start over from scratch. I would prefer to sit than kneel. I’m a plumber so I need those for a while
 
My first plan was to put it on the deck that never gets used but it’s too small. The next area I have is full of bare spots, playground gravel , regular gravel and a tarp. Previously it was used for parking cars. Also a tree stump. I think it would be better to clear the lot and start over from scratch. I would prefer to sit than kneel. I’m a plumber so I need those for a while

It's a bit of a cheat. The "lawn area" of my garden is actually 30" higher than the floor of my house. The paths you see, in the pictures of my original post, are concrete cappings that actually slope down to the side, kitchen, entrance of my house. I decided to make use of this feature and had the concrete caps removed and the hard-core infill removed so the front of the layout, and it's sidings area, are raised. That was about 10 years after those first pictures. It also allows the sidings, that were placed along the line of that brick wall, with the lattice and door (long story, my house and it's neighbour date back to 1720 !) to enter the house to provide some convenient set up provision......in the living room. See the pictures. I hope they might provide some inspiration. Max

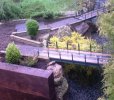
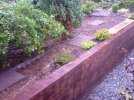
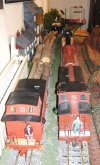
Pictures 1 & 2 show the same layout as in my previous post but with the concrete path cappings removed and the front area now raised by 30". Facing is now oak sleepers. The garden has not been raised, just the paths dropped to the house's actual floor level. Yes there has been a lot of planting, see if you can spot those that were there in original pictures from 10 years before, but now grown up. You can see the road bed construction before weed proof membrane cover and ballasting. The previous crossover formation has not been changed in any way. Note the embeded concrete "rice crispie" pads used to stabilise areas were the switches and crossover are placed. # 3 picture shows the sidings, and #4, with the house guardian Izzy, at the entrance to the house. Remember this is all now 30" above the ground level, inside and out. The picture #5 shows the extended sidings are now inside the house. House's brick wall with hole knocked through to fit the entrance hole. Handy height above ground is the same as the sofa ! Look in the distance and you can see the "cat flap" exit to where the cat is sitting in #4.

railway rebuild 003.JPGrailway rebuild 004.JPGrailway rebuild 005.JPGGuardian at the gate 001.JPGSteam up back.JPG
 
It's a bit of a cheat. The "lawn area" of my garden is actually 30" higher than the floor of my house. The paths you see, in the pictures of my original post, are concrete cappings that actually slope down to the side, kitchen, entrance of my house. I decided to make use of this feature and had the concrete caps removed and the hard-core infill removed so the front of the layout, and it's sidings area, are raised. That was about 10 years after those first pictures. It also allows the sidings, that were placed along the line of that brick wall, with the lattice and door (long story, my house and it's neighbour date back to 1720 !) to enter the house to provide some convenient set up provision......in the living room. See the pictures. I hope they might provide some inspiration. Max

Pictures 1 & 2 show the same layout as in my previous post but with the concrete path cappings removed and the front area now raised by 30". Facing is now oak sleepers. The garden has not been raised, just the paths dropped to the house's actual floor level. Yes there has been a lot of planting, see if you can spot those that were there in original pictures from 10 years before, but now grown up. You can see the road bed construction before weed proof membrane cover and ballasting. The previous crossover formation has not been changed in any way. Note the embeded concrete "rice crispie" pads used to stabilise areas were the switches and crossover are placed. # 3 picture shows the sidings, and #4, with the house guardian Izzy, at the entrance to the house. Remember this is all now 30" above the ground level, inside and out. The picture #5 shows the extended sidings are now inside the house. House's brick wall with hole knocked through to fit the entrance hole. Handy height above ground is the same as the sofa ! Look in the distance and you can see the "cat flap" exit to where the cat is sitting in #4.

View attachment 343510View attachment 343514View attachment 343515View attachment 343512View attachment 343511tha
i figured if i raised it i would be off the ground and i could run back to the deck with a reverse loop or something
 
It's a bit of a cheat. The "lawn area" of my garden is actually 30" higher than the floor of my house. The paths you see, in the pictures of my original post, are concrete cappings that actually slope down to the side, kitchen, entrance of my house. I decided to make use of this feature and had the concrete caps removed and the hard-core infill removed so the front of the layout, and it's sidings area, are raised. That was about 10 years after those first pictures. It also allows the sidings, that were placed along the line of that brick wall, with the lattice and door (long story, my house and it's neighbour date back to 1720 !) to enter the house to provide some convenient set up provision......in the living room. See the pictures. I hope they might provide some inspiration. Max

Pictures 1 & 2 show the same layout as in my previous post but with the concrete path cappings removed and the front area now raised by 30". Facing is now oak sleepers. The garden has not been raised, just the paths dropped to the house's actual floor level. Yes there has been a lot of planting, see if you can spot those that were there in original pictures from 10 years before, but now grown up. You can see the road bed construction before weed proof membrane cover and ballasting. The previous crossover formation has not been changed in any way. Note the embeded concrete "rice crispie" pads used to stabilise areas were the switches and crossover are placed. # 3 picture shows the sidings, and #4, with the house guardian Izzy, at the entrance to the house. Remember this is all now 30" above the ground level, inside and out. The picture #5 shows the extended sidings are now inside the house. House's brick wall with hole knocked through to fit the entrance hole. Handy height above ground is the same as the sofa ! Look in the distance and you can see the "cat flap" exit to where the cat is sitting in #4.

View attachment 343510View attachment 343514View attachment 343515View attachment 343512View attachment 343511
thats a nice layout
 
Im just tired of not seeing anything running. gotta get something going. i saw that plan in the lgb book and said it could be a start since it had large radius curves and was expandable.
 
From what I can see most of the straights appear to be 1000 type, short sections appear to be where the arrows are in the pic below. I would suggest making up what works then see where you are. This is a very odd track plan by LGB typicalling I believe making you buy more track than is really needed to make a balanced interesting line.

The long line to the loco shed looks very odd to me, also a couple of very short sidings could do with a remodel. Far better woukd be to loose that short siding on the loop at the bottom left using the point at the end of the loop to make a balanced curve at the bottom of the line. You could then use a left in the loop to make a slightly shorter shed line. The spare right point could make a third loop on the right hand station. Any spare track could be possibly used on sidings to the right station.View attachment 343466
im open to alterations and revisions, just gotta get something going.
 
Back
Top Bottom