David1226
Registered
Part 1
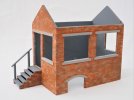
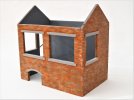
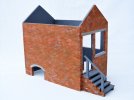
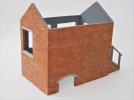
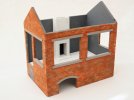
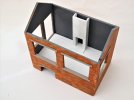
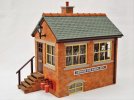
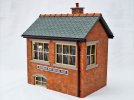
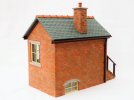
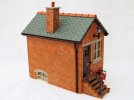
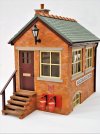
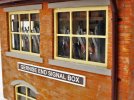
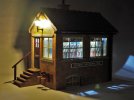
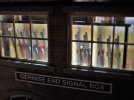
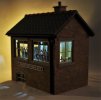
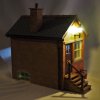
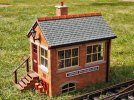
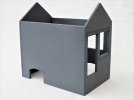
One of the cast resin buildings that Father Christmas delivered for 2020, for Gernise End Station, was a signal box by Thorley Miniatures. First job was to clean up the resin castings, using various files and abrasive papers,wash them to remove any mould release agent. I started construction by gluing the four walls together using Gorilla superglue. Any gaps at the joins were filled using a smear if ordinary home decorating Pollyfilla.
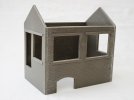
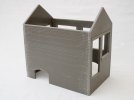
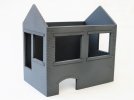
Once the joins had been cleared up the whole structure was primed with a spray of grey primer. I have decided not to fit the roof until after I have painted the walls as it will then be easier to fit the door and window frames once they have also been painted.
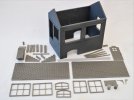
The component parts. These provide the roof and chimney, the door and windows and a pair of fire buckets on brackets. Thin glazing material is also provided for the windows. There are various sign boards supplied but not shown as I did not use them on this model.
A number of parts are used to assemble the steps up to the signal box door. While there is a leaflet enclosed with the kit that provides much useful advice and tips on assembling and painting the model, there are not actually any drawings or diagrams to show how the parts are assembled. I made reference to the excellent set of photographs, of the completed signal box, that accompanied the sales offer on eBay.
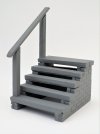
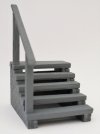
I had an issue with the way the steps were shown as being put together. The steps were shown as being butt jointed to the narrow side walls without any visible means of support. It defied any engineering logic and did just not look right. I decided that the steps were going to have modified to look right. I re-arranged the steps so that they sit on top of, and are supported by, the side walls. To facilitate this, I had to cut off the top two courses of bricks so that the top steps would be level with the door sill. I added a 3.0mm thickness of plasticard to the inside face of the side walls to give a more realistic thickness of brickwork. I thought that the handrail support posts were too low so I fabricated new ones from 4.8mm square plastic tube, scribed to represent wood grain, in order to raise the height of the rail. I am happy that the steps now look ‘right’.
The modified side walls.
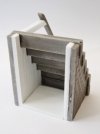
Steps now placed on top of the support walls with taller handrail.
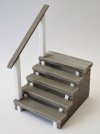
Steps primed for painting.


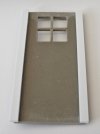
The door to the signal box was intended to be glued in but there was no means of locating it in position. In order to accurately locate the door I glued a strip if plasticard overlapping the rear of both sides. These overlaps can now be glued to the inside face of the signal box wall.
Plasticard strips on door rear
Front view of modified door
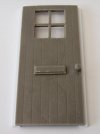
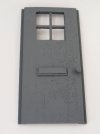
Primed door
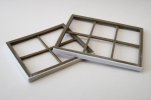
Another issue that I discovered was the poor fit of the window frames into the apertures in the walls. Some dimensions were too tight so the appropriate surfaces on the frames were rubbed on abrasive paper to ease the fit. Other dimensions were too loose with gaps between the frame and the wall. In these cases I glued a shim of plasticard of the appropriate thickness to the frame, to take up the slack. Using these two methods I obtained a good fit with all the window frames.
Plasticard shims added
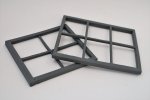
Window frames primed, ready for painting.
One of the cast resin buildings that Father Christmas delivered for 2020, for Gernise End Station, was a signal box by Thorley Miniatures. First job was to clean up the resin castings, using various files and abrasive papers,wash them to remove any mould release agent. I started construction by gluing the four walls together using Gorilla superglue. Any gaps at the joins were filled using a smear if ordinary home decorating Pollyfilla.


Once the joins had been cleared up the whole structure was primed with a spray of grey primer. I have decided not to fit the roof until after I have painted the walls as it will then be easier to fit the door and window frames once they have also been painted.


The component parts. These provide the roof and chimney, the door and windows and a pair of fire buckets on brackets. Thin glazing material is also provided for the windows. There are various sign boards supplied but not shown as I did not use them on this model.

A number of parts are used to assemble the steps up to the signal box door. While there is a leaflet enclosed with the kit that provides much useful advice and tips on assembling and painting the model, there are not actually any drawings or diagrams to show how the parts are assembled. I made reference to the excellent set of photographs, of the completed signal box, that accompanied the sales offer on eBay.
I had an issue with the way the steps were shown as being put together. The steps were shown as being butt jointed to the narrow side walls without any visible means of support. It defied any engineering logic and did just not look right. I decided that the steps were going to have modified to look right. I re-arranged the steps so that they sit on top of, and are supported by, the side walls. To facilitate this, I had to cut off the top two courses of bricks so that the top steps would be level with the door sill. I added a 3.0mm thickness of plasticard to the inside face of the side walls to give a more realistic thickness of brickwork. I thought that the handrail support posts were too low so I fabricated new ones from 4.8mm square plastic tube, scribed to represent wood grain, in order to raise the height of the rail. I am happy that the steps now look ‘right’.
The modified side walls.

Steps now placed on top of the support walls with taller handrail.

Steps primed for painting.


The door to the signal box was intended to be glued in but there was no means of locating it in position. In order to accurately locate the door I glued a strip if plasticard overlapping the rear of both sides. These overlaps can now be glued to the inside face of the signal box wall.
Plasticard strips on door rear

Front view of modified door

Primed door

Another issue that I discovered was the poor fit of the window frames into the apertures in the walls. Some dimensions were too tight so the appropriate surfaces on the frames were rubbed on abrasive paper to ease the fit. Other dimensions were too loose with gaps between the frame and the wall. In these cases I glued a shim of plasticard of the appropriate thickness to the frame, to take up the slack. Using these two methods I obtained a good fit with all the window frames.
Plasticard shims added

Window frames primed, ready for painting.


