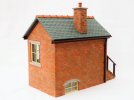
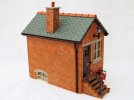
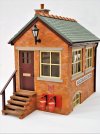
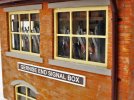
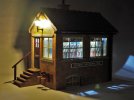
Claptowte Railway - Gernise End Signal Box

David1226

Registered
Country flag
Part 1

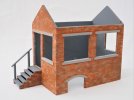
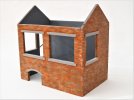
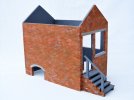
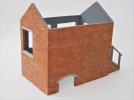
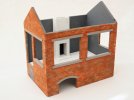
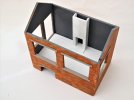
One of the cast resin buildings that Father Christmas delivered for 2020, for Gernise End Station, was a signal box by Thorley Miniatures. First job was to clean up the resin castings, using various files and abrasive papers,wash them to remove any mould release agent. I started construction by gluing the four walls together using Gorilla superglue. Any gaps at the joins were filled using a smear if ordinary home decorating Pollyfilla.
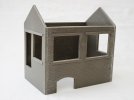
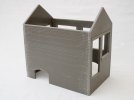
dig 210120001.JPG

dig 210120002.JPG

Once the joins had been cleared up the whole structure was primed with a spray of grey primer. I have decided not to fit the roof until after I have painted the walls as it will then be easier to fit the door and window frames once they have also been painted.
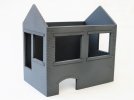
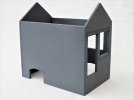
dig 210121001.JPG

dig 210121002.JPG

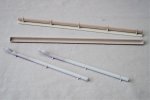
The component parts. These provide the roof and chimney, the door and windows and a pair of fire buckets on brackets. Thin glazing material is also provided for the windows. There are various sign boards supplied but not shown as I did not use them on this model.
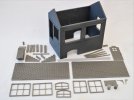
dig 210122001.JPG

A number of parts are used to assemble the steps up to the signal box door. While there is a leaflet enclosed with the kit that provides much useful advice and tips on assembling and painting the model, there are not actually any drawings or diagrams to show how the parts are assembled. I made reference to the excellent set of photographs, of the completed signal box, that accompanied the sales offer on eBay.

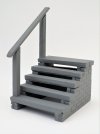
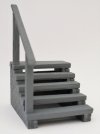
I had an issue with the way the steps were shown as being put together. The steps were shown as being butt jointed to the narrow side walls without any visible means of support. It defied any engineering logic and did just not look right. I decided that the steps were going to have modified to look right. I re-arranged the steps so that they sit on top of, and are supported by, the side walls. To facilitate this, I had to cut off the top two courses of bricks so that the top steps would be level with the door sill. I added a 3.0mm thickness of plasticard to the inside face of the side walls to give a more realistic thickness of brickwork. I thought that the handrail support posts were too low so I fabricated new ones from 4.8mm square plastic tube, scribed to represent wood grain, in order to raise the height of the rail. I am happy that the steps now look ‘right’.

The modified side walls.
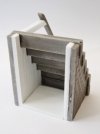
dig 210123001.JPG

Steps now placed on top of the support walls with taller handrail.
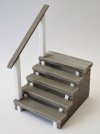
dig 210123002.JPG

Steps primed for painting.

dig 210123003.JPGdig 210123003.JPGdig 210123003.JPG

dig 210123004.JPG

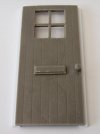
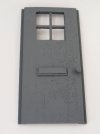
The door to the signal box was intended to be glued in but there was no means of locating it in position. In order to accurately locate the door I glued a strip if plasticard overlapping the rear of both sides. These overlaps can now be glued to the inside face of the signal box wall.

Plasticard strips on door rear
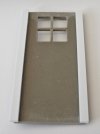
dig 210123005.JPG

Front view of modified door

dig 210123006.JPG

Primed door

dig 210123007.JPG

Another issue that I discovered was the poor fit of the window frames into the apertures in the walls. Some dimensions were too tight so the appropriate surfaces on the frames were rubbed on abrasive paper to ease the fit. Other dimensions were too loose with gaps between the frame and the wall. In these cases I glued a shim of plasticard of the appropriate thickness to the frame, to take up the slack. Using these two methods I obtained a good fit with all the window frames.

Plasticard shims added
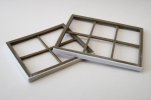
dig 210123008.JPG

Window frames primed, ready for painting.
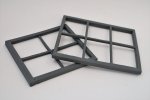
dig 210123009.JPG
 
Part 2

When it came to painting the brickwork, I wanted to paint all four buildings that Father Christmas had brought me, the toilet block, station building, signal box and coal office, at the same time, for continuity of colour and appearance. Again, for continuity, it was my intention to try and replicate the colour and appearance of the 1/24th scale textured brick paper that I had used on various scratch built structures.

I started with the toilet block as it was the smallest building and would be a good test piece, not having painted brickwork before. I was very pleased with the result and immediately moved on to the largest building, the station. Both of these models were by the same manufacturer, Kippo Models, so the brick modelling and texture, and therefore the result, was identical. I moved on to the coal office, by GRS, which had similar brick texture. The result was very similar.

The last building, on which I painted the brickwork, was the signal box by Thorley Miniatures. The texture of the brickwork on this kit was unlike the other models, being very low relief by comparison, and it just did not take the paint and colour up in the same way as the other models. I eventually obtained an appearance that I was happy with, but the finish and colour was not the same as the other models, but then, not all buildings use the same bricks and look the same.

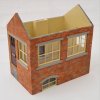
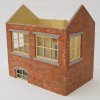
Having painted the brickwork, including the chimney stack and the walls of the steps up to the door, I tackled the lintels and the sills. The window frames would be painted in the corporate cream. For the lintels/sills, I could not decide whether to paint them brown, to represent unpainted timber, the corporate maroon colour, or, a concrete grey to represent, you’ve guessed it... concrete. In the end, I opted for concrete.

I was not happy with the appearance of the window apertures, as the brick modelling did not wrap around into them. To rectify this, I cut mortar lines into the sides of the window recesses, using a razor saw. This necessitated a quick touch up of the paint of course.

The steps have not yet been attached, they are just posed for these photos. I have decided that the steps will be painted brown to represent timber baulks, to ring the changes colour wise.

dig 210226001.JPG

dig 210226002.JPG

dig 210226003.JPG

dig 210226004.JPG

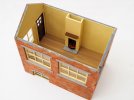
It was at this stage that I decided that rather than leave any interior detailing until sometime in the future, I would incorporate it into the build as I went along. To that end I glued some offcuts of 3mm Foamex sheet across the two end walls and halfway along the side walls, so as not to obscure the basement windows, to a height 3.0mm below floor level. I then cut a piece of 3.0mm plasticard to sit on top of, and be supported by, the Foamex, to form the signal box floor. I scribed the plasticard to represent floorboards and drew a razor saw sideways along the length of the boards to impart the appearance of wood grain.

I then fabricated a chimney breast, with fireplace and hearth, out of 3.0mm plasticard. I drilled and opened out a hole in the bottom of the chimney breast and a corresponding hole in the floor to allow wires to be passed from a battery box, to be mounted under the floor, to an internal light and an outside lamp.

dig 210228001.JPG

dig 210228002.JPG

The next stage was to paint, separately, the interior walls, the chimney breast and the floor. When dry, I glued the floor onto the supporting Foamex. I then fitted the previously painted window frames and glazing, and the signal box door.

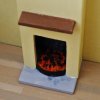
I made and installed a fire in the grate, made by picking at a suitably cut down piece of the make- up sponge, as used to paint the brickwork, with a pair of pointed tweezers, then paining it. I glued the fire and grate into the hearth, and added a pre-painted ‘wooden’ mantle piece, from plasticard. I then glued the completed chimney breast into the cabin, ensuring that the holes in the floor and the base of the chimney breast lined up to allow the wiring for the lighting to pass through.

dig 210303001.JPG

dig 210303002.JPG

dig 210303003.JPG

dig 210303004.JPG

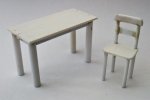
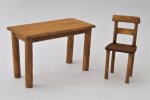
In order to start furnishing the interior of the signal box I constructed a table and a chair from Plasticard. Once painted, I glued the table into a corner of the room, to the right of the chimney breast.

dig 210303005.JPG

dig 210304001.JPG

I placed a telephone on the table, courtesy of a white metal casting from Pendle Valley Workshop. The casting had a blank face, that is to say, no dial. A punching from a paper hole punch is exactly the right size, so I punched out a round of thin plastcard and painted a dial on it before gluing it to the black painted phone. I added some nondescript paperwork to the table from scrap plasticard. I downloaded an illustration of a wall calendar, printed it on card and glued it to the wall above the table.

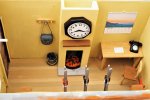
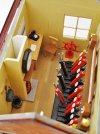
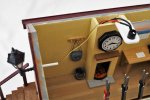
To the left of the chimney breast, I added a coat hook rack, from scraps of plasticard. I created a haversack to hang on the coat hooks. The body was of this was made from Fimo modelling clay which was then fired in the domestic oven. The strap was added from a couple of layers of masking tape. On the floor beneath the coat hooks, I placed a coal bucket with coal, for the signalman’s fire. This was made from a scrap piece of plastic tube. I added a wall clock to the chimney breast, this was a 1/12th scale doll’s house item as, at the time, I could not find a suitable 1/24th scale item. It is too large and will be replaced with a smaller clock in the future.

dig 210409004.JPG

David
 
Last edited:
Part 3

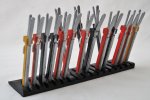
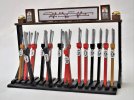
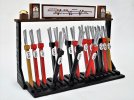
Being a signal box, central to the whole detailing regime was the addition of a lever frame. I scoured 'tinternet looking for a suitable model, but was unable to find anything. What I did come across was an excellent tutorial video, on YouTube, describing how to build one. The main material used was 3mm Foamex sheet, a material that I had not previously worked with. I found the video easy to follow and although the demonstrator was obviously very experienced and accomplished. My own efforts, following his example, were quite crude by comparison, but given that the lever frame is intended to be representational and not much of it will be visible inside the building, I am not displeased with the result.
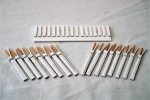
I have built a 16 lever frame. Below is a photo showing the frame and 16 levers. I have omitted the number plates on the front of the levers having decided to add these after the levers have been painted. The base and levers are 3.0mm Foamex, the release levers and collar are 1.0mm plasticard, the lever handle should have been brass rod, but having mislaid mine, I used wooden cocktail sticks instead.

dig 210331001.JPG

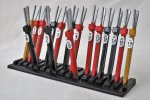
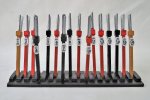
Different railway companies used different colour codes to identify lever use. I followed British Railway practice of yellow for distant signals, red for home/starter signals and black for point levers. The number plates are 40thou plasticard with rub-on numbers.

dig 210402002.JPG

dig 210402003.JPG

dig 210402004.JPG

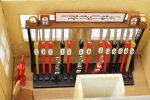
Having placed the lever frame into the signal box, the levers appear to be over scale. I suspect the dimensions are more suitable for 16mm scale rather than G Scale. Given that the levers will only be viewed through the windows from the outside this should not be a problem. If I do not include a signalman figure (he’s just popped out to spend a penny between scheduled services), the scale difference should be less obvious.

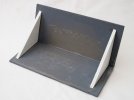
Having built the lever frame, my next task was to make support brackets and a shelf to fit above the levers. This shelf will take the track diagram and a pair of block instruments with associated bells. The shelf and supports were made from 3.0mm Foamex. The track diagram and block instrument dials were drawn using Microsoft Paint and printed on white card. The block instruments, their bell boxes and the track diagram frame were made using Foamex and plasticard. The block instrument bells are 10.0mm brass plated upholstery studs.

dig 210409001.JPG

dig 210409002.JPG

dig 210409005.JPG

The only other fitting in the signal box is the operating wheel for the level crossing gates. Having researched the subject, it would appear that there are almost as many designs of wheel as there are signal boxes. Many resemble a ship’s wheel so the obvious solution was to buy a resin cast ship’s wheel from a model boat supplier, via eBay. Again, this can only be squinted at through a window.

dig 210409006.JPG

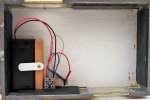
The last task to be completed internally is the installation of the lamps, wiring and battery box. A wall lantern was added to the gable wall above the entrance door, an internal light was added to the centre of the room and the associated wiring fed down through the chimney breast to the 2 x AA switchable battery box mounted under the raised floor. Both lights are 3.0 volt LEDs.

dig 210409014.JPG

dig 210409015.JPG

The instructions for assembling the building call for the various components, that come together to form the roof, to be glued on. Having added detail to the building interior, I felt that if any of the detail were to become unglued at some time in the future, I would need access in order to effect repairs. I therefore decided to construct the roof in such a way that it could be removed.

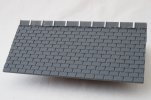
To facilitate this, I glued together two thicknesses of 3.0mm Foamex, at each end of the roof, to form ‘dummy’ gable ends to fit inside the gable ends of the building. The roof components were then glued to these ‘dummy’ gable ends so that the whole roof assembly becomes a plug fit into the building. The material supplied for the roof ridge was a plain length of plastic angle with nothing to delineate individual roof tiles. I glued on lengths of styrene strip to simulate the ridges where moulded ridge tiles join together, copying the pattern of the ridges on the Kippo Models buildings. The roof was then painted and, when dry, the pre painted chimney stack was glued on.
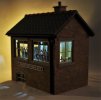
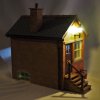
dig 210329001.JPG

dig 210329002.JPG

There are some modifications to the exterior of the building. A glaring omission from the kit is the absence of any guttering and rainwater down pipes. I decided to make my own and add them. I sourced some 8.0mm channel for the guttering and plastic tube for the down pipes, with fittings from styrene strip. In order make the guttering fit at the bottom edge of the roof tiling, I had to add spacers from 3.0mm Foamex to project the gutters away from the wall. The gutters and pipes were painted before being glued on, followed by the pre-painted, kit supplied, facia boards to the gable ends.

dig 210309001.JPG

The kit is supplied with various cast resin and printed signs, none of which were relevant to my requirements, so I did not use them.

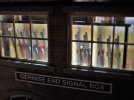
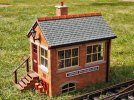
I did create my own name board ‘GERNISE END SIGNAL BOX’, printed on card and stuck into a frame of plasticard and styrene strip, which was glued onto the front of the building.

The pre-painted steps were finally glued onto the building, below the entrance door.

Included in the kit is a pair if fire buckets with brackets and mounting board. After painting, these were attached to the wall of the signal box, next to the entrance steps. Above the fire buckets I attached an etched brass warning plate from Pendle Valley Workshops.

The last thing to attach was to plug in the roof to the top of the building.


David
 
Nice work as always David, and the detailing is supberb!

I had the same issues with the fitting of the window frames too, although I didn't 'glaze' mine. My windows are plasti-card painted black and then varnished to simulate glass, as my 2 boxes hide an electrical enclosure containing the points decoder for the nearby junctions....
 
Outstanding sir !
 
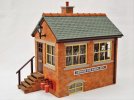
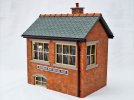
The signal box has some fresh air in the garden, 18.4.2021

P4180015.JPG

David
 
Back
Top Bottom