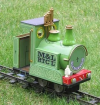
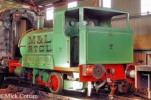
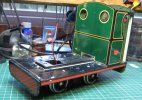
Cardboard kitbuilt loco

ge_rik

British narrow gauge (esp. Southwold and W&LLR)
Country flag
After reading an article in this month's Garden Rail about a chap who builds locos for his garden railway from cardboard, I decided to try one of Rail-Road's card kits. I have mixed feelings about it, as explained in my blog post.


Rik
 
That looks great Rik, did the model come pre-painted or did you do that as well?
 
Hi Graeme
One of the advantages is that the livery and lining is pre-printed. The disadvantage is that you have to be very careful not to leave gluey fingerprints on the surface during construction.

Rik
 
I think Chimney excepted that it looks just fine, I assume that you have just plonked it on a non roddled chassis as this is likely to be an experiment rather than a change of theme for the future. I can certainly see these being for fair and fine days. But looking at your blog would suggest the many changes to strengthen the loc you made mean that the construction for proper use is not as simple as may be expected, however curving card for the tanks and other complex shapes will be so much easier than with plastic or indeed metal. But does look the part, I look forwards to some possible Steam Trams from the same source.
 
I've often wondered about these. They do look the part, but then all models made by the manufacturer do, it's only when they're built in the real world the flaws appear. But flicking through your build Ric, if you're a dab hand, like yourself, a good model can be produced. As Jon says, probably not for inclimate weather. I'll have investigate further, as they look good to practice on before really splashing out.
 
I think Chimney excepted that it looks just fine, I assume that you have just plonked it on a non roddled chassis as this is likely to be an experiment rather than a change of theme for the future. I can certainly see these being for fair and fine days. But looking at your blog would suggest the many changes to strengthen the loc you made mean that the construction for proper use is not as simple as may be expected, however curving card for the tanks and other complex shapes will be so much easier than with plastic or indeed metal. But does look the part, I look forwards to some possible Steam Trams from the same source.
Indeed. I wanted to build and evaluate the kit as supplied - though I did make a few minor modifications to it during the build process. The chassis is extremely basic. It could easily be improved upon by adding coupling rods and also extending the wheelbase but, at the end of the day, it will only be powered with a 3v motor and so won't have much pulling power. I intend to replace the chassis with a decent motor block and enhance the finish of the loco - and also give the body more rigidity with additional internal bracing.

Rik
 
I've often wondered about these. They do look the part, but then all models made by the manufacturer do, it's only when they're built in the real world the flaws appear. But flicking through your build Ric, if you're a dab hand, like yourself, a good model can be produced. As Jon says, probably not for inclement weather. I'll have investigate further, as they look good to practice on before really splashing out.
Someone has added a comment on my YouTube video saying that one of his LocoLines models has faded over the past couple of years and he says it's not been stored in direct sunlight. I have no way of verifying this other than taking his word for it. My models are stored in a display case in the house - not in direct sunlight, so it will be interesting to see how mine fares over the next couple of years.
Rik
Ok it may be worth giving it a spray of UV protection, having lost my Laser Printer to old age I now need to print things on my replacement Inkjet so have to UV protect the prints. It comes out matt after the spray so no worries (well with the one I have GHIANT INK JET FIX MATT) of glossing the finished article.

Oh I see he does a Toby type tram and a Glynn Valley one. Well worth a look at the site.
 
Update on the cardboard Hunslet

I wasn't too happy with the very basic motorised chassis and so fell back on my preferred stand-by, the LGB Toytrain Otto motor block. I've had this one lounging in my bits-box for ages. I tracked down a couple of wheelsets with not too badly worn worm wheels, chopped it about a bit and carved out a hole in the running plate to make it fit
IMG_3131.JPG

I added a shaped sheet of lead flashing to the underside of the running plate
IMG_3142.JPG

I'll add some more lead as the bash progresses once I know how much space the batteries etc will take up.
 
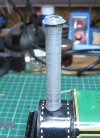
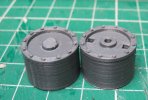
I've started drawing and 3D printing a few detailing parts. A new chimney .....
IMG_3143.JPG

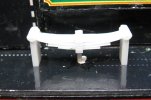
.... new springs ....
IMG_3144.JPG

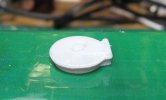
.... and a tank filler....
IMG_3145.JPG

.... so far. More to follow.
 
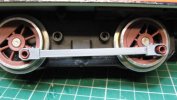
I've also started drawing and printing the motion, which was missing from the motor block. The coupling rods .....
IMG_3146.JPG

.... and cylinders.
IMG_3147.JPG

I've decided to make the slide rods, piston rod and crosshead and maybe the connecting rod from brass as I'm not sure how robust they would be as 3D prints.

I'll keep you posted as things progress

Rik
 
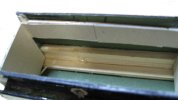
I've also strengthened the interior of the boiler and tank with some additional bracing and some thin card tabs. It was a bit rickety before.
IMG_3141.JPG

Rik
 
You're certainly going to town with it. It will be interesting to see how the card fairs with all the modifications
 
You're certainly going to town with it. It will be interesting to see how the card fairs with all the modifications
Thanks Paul
I've created a new wrapper for the saddle tank. Just need to check what comes out of the printer matches the green livery of the cab.

The disadvantage of having pre-printed body panels is (as I have discovered) a stray gluey finger can make a mess of the finish during the construction process. A tidier modeller than me would have no problem.:rolleyes:

Rik
 
Now almost finished. A fair bit of additional detailing and fitted out with Micron RC and a MLS soundcard.
IMG_3201.JPG

IMG_3203.JPG

IMG_3204.JPG

IMG_3205.JPG


The roof hasn't been glued down yet - I need to tweak the sound settings a bit more (the chuffs need to be better synched) - the soundcard is under the cab roof (an early one with preset pots for the settings). The video reveals there's too much empty space under the running plate and she needs a whistle on the roof - but almost there.


Rik
 
Excellent, as always, Rik..

PS> You have a young admirer (of the Peckforton Railway).. I will forward you the email.

PhilP
 
Back
Top Bottom