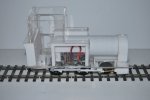
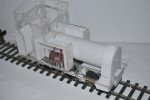
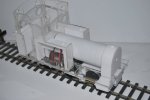
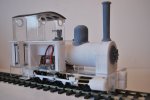
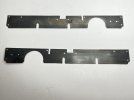
Boot Lane Works Nancy

JimmyB

Now retired - trains and fishing
Country flag
I am building a Boot Lane Nancy, 32mm gauge, the plan is to make it into an Xmas train, so nice lead time. Not going to tell how I built the loco, as that is in the instructions, but I will show the progress, and any issue and thoughts:

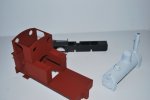
I ordered the kit last week 16th (Tuesday), and it arrived the next day, so service and dispatch is great. Looking at the parts which are a mixture of filament and resin printed, and acrylic sheet, they looked well produced, and a quick look through the instructions and they seemed fine - here is what you get, including wheels and motor:
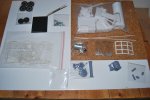
DSC_0189.JPG
 
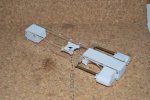
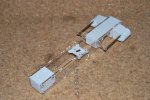
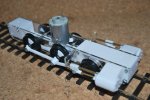
Starting the build, my first issue was that there is no information identifying the parts, the very first instruction is to attach the motion bracket to the 2mm acrylic frames, the accompanying photo shows the motion bracket in white, from an end on view, and they were in fact acrylic. Moving forward looking for the frame stretchers, and having built chassis before, the two large item that were the frame stretchers were not what I expected. So a slow start, but I soon had the simple chassis complete:

DSC_0190.JPG

DSC_0191.JPG

One point 2 mm screws are used to hold the parts together, and it is suggested that the hole opening is opened slightly with a taper reamers, as the screws form there own threads, I have a 2 mm tap, and found tapping the threads first was a better solution.

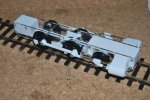
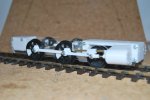
Finishing off for the day is adding the wheels:

DSC_0192.JPG

DSC_0193.JPG

One final instruction was the motor, which I fitted, and on my 0 Gauge track gave a quick run, the motor is described as 3 - 6 volts, so with 2 AA batteries powered up, and ran quite nicely, so final power will probably be a 3.7 volt Li-Ion battery:

DSC_0194.JPG
 
A little surprised you haven't painted the chassis before fitting the motion and wheels?

I think you will find that you will need to key the surface of the acrylic frames, to get the paint to adhere properly.

Good idea to tap the holes. Should help to give a sturdy build.
I admit to being quite impressed with the Boot Lane offerings..

Will follow this with interest.

PhilP
As it is bolted together, I plan to disassemble to paint, it will not be until it is fully assembled that I will know where (and maybe what) electronics to fit.
 
As it is bolted together, I plan to disassemble to paint, it will not be until it is fully assembled that I will know where (and maybe what) electronics to fit.
The RCT-MR601 works nicely with a single-cell Lipo.. :blush:

But then I would say that, wouldn't I?
:D

PhilP
 
Had a quick look, and Boot Lane say it is inspired by the Rye and Camber Tramway Bagnall loco. Now that was a 3ft gauge operation, so you could run it to scale on 45mm track :D:D - but then it probably wouldn't be so easy to get it round the Crimbo tree :shake::shake:
 
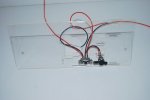
So progress, first my comments, on building the body, there are no real instructions, just a list of parts (but not against a drawing), a dry fit is paramount to get things right, and even so mistakes happen, a cut out is already made for the switch which handily is a DPDT Centre off, so a slight change to my wiring, and a hole for the charging port:

DSC_0195.JPG

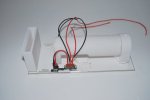
Next step (for me) is to add the parts that are screwed to the footplate.

DSC_0196.JPG

Then build the cab around them, you may notice the charging port has moved!! There are no instructions on what is glued to what, but as the electronics are in the boiler, and the battery in a side tank, nothing is glued to the boiler except the smoke box.

DSC_0197.JPG
 
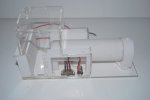
With the electronics (Loco Remote Mini B with sound) added, the body is trial fitted on the chassis and tested, though not in this photo a speaker was tested and I was not overly impressed with the sounds, as yet I have not fully planned the lights.

DSC_0198.JPG


DSC_0199.JPG

Having the cab mad of clear acrylic does aid in knowing where everything fits.

DSC_0199.JPG

Next stop the detail!!
 
With the electronics (Loco Remote Mini B with sound) added, the body is trial fitted on the chassis and tested, though not in this photo a speaker was tested and I was not overly impressed with the sounds, as yet I have not fully planned the lights.

View attachment 323262


View attachment 323263

Having the cab mad of clear acrylic does aid in knowing where everything fits.

View attachment 323264

Next stop the detail!!
I wonder if the speaker will sound better when located wherever in the loco having a sound box? I tend to test the speaker in a plastic box on the bencg to get a better idea of how the sound will be. Hi Fi speakers sound awful outside of their box.
 
So progress, first my comments, on building the body, there are no real instructions, just a list of parts (but not against a drawing), a dry fit is paramount to get things right, and even so mistakes happen, a cut out is already made for the switch which handily is a DPDT Centre off, so a slight change to my wiring, and a hole for the charging port:

View attachment 323259

Next step (for me) is to add the parts that are screwed to the footplate.

View attachment 323260

Then build the cab around them, you may notice the charging port has moved!! There are no instructions on what is glued to what, but as the electronics are in the boiler, and the battery in a side tank, nothing is glued to the boiler except the smoke box.

View attachment 323261
What will you use to stick the clear acrylic?
 
So a quick update:

Detail assembly was carried out:

DSC_0003.JPG

Then stripped down for painting, primer and undercoat:

DSC_0013.JPG

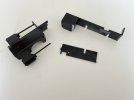
It was at this point that disaster struck, and whilst rubbing back the chassis, I dropped it, and the acrylic side frame broke, though not shattered, I felt that glueing them would not provide the required strength:

IMG_2022.jpeg

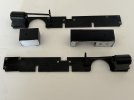
After contacting Boot Lane, and initially not receiving a reply, I stripped down the chassis to the constituent parts:

IMG_2023.jpeg

This was with a view to producing my own side frames in brass:

IMG_2024.jpeg

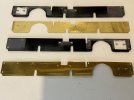
However, Bootlane have now been in touch, and are supplying the replacement parts FOC, so what to do with the frames. As they are only half (or less) the thickness of the acrylic frame my thoughts are to use them outside of the acrylic to provide some additional strength and with them blackened will negate the need to paint the acrylic - thoughts:

IMG_2027.jpeg
 
It will add some low-down weight, and of course it will 'look' like metal..

PhilP
 
my thoughts are to use them outside of the acrylic to provide some additional strength and with them blackened will negate the need to paint the acrylic - thoughts
That's a good idea. As you have found, acrylic is very brittle and also quite light: a bit of low-down weight will help the loco ride better, too. The areas above the front horn guide and the pony wheel cut-out haven't got much meat to them so reinforcement can only be a good thing. The only complication might be achieving the correct back-to-back measurement on the wheels if the frames are a little bit thicker?
 
It will add some low-down weight, and of course it will 'look' like metal..

PhilP
That's a good idea. As you have found, acrylic is very brittle and also quite light: a bit of low-down weight will help the loco ride better, too. The areas above the front horn guide and the pony wheel cut-out haven't got much meat to them so reinforcement can only be a good thing. The only complication might be achieving the correct back-to-back measurement on the wheels if the frames are a little bit thicker?
I will of course let you all know how it goes, the pros and cons.
 
Ce
I will of course let you all know how it goes, the pros and cons.
rtainly a metal chassis will be mire robust, can it fit inside the frames with a few mods? Then no issues about painting, brass is notoriously tricky to keep painted unless you used self etching primer.
 
Back
Top Bottom