Anglification of Some Assorted Rolling Stock

musket the dog

Registered
31 Oct 2009
787
143
Leicester
nlrr.webs.com
Best answers
0
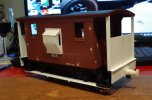
Really looking great so far. Isn't it amazing how the addition of duckets immediately made a difference to the caboose? Keep up the updates, please.
Thanks very much Rik, I think the builds are very much the sum of their details. I was just thinking how much of a visual difference there is with your Hartland-esk chassis with the addition of European springing gear and proper brake details :)
 
Last edited:

musket the dog

Registered
31 Oct 2009
787
143
Leicester
nlrr.webs.com
Best answers
0
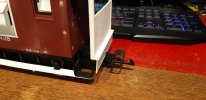
Next up on the caboose rebuild was the buffers. I have used a various sources for centre buffers on previous builds, IP Engineering, Binnie and GRS. At the time of building I only have some Binnie and IP parts in stock which are much too short with the LGB couplings added to the Bachmann caboose. I have printed my own quite successfully before from Shapeways so it seemed like a good job for my own printer.

201107 (1).jpg

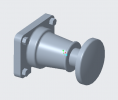
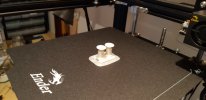
I designed a buffer that I thought would make a good compromise in length with the long reach of the couplings and something that looked reasonably sensible. Both were printed together, taking just over an hour. I think I really should have made the base and the heads as separate parts. The build quality under the head isn't the greatest as the printer had to build the disc of the buffer head free standing.

201114 (3).PNG
201107 (2).jpg

These were fixed to the buffer beam with super glue. I will add the coupling hook for chain link stock screwed directly into the buffer beam.

201114 (1).jpg

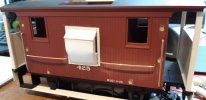
Next job on the van will be handrails, when I can find a wire of a suitable thickness. I think then, I will be nearly ready to paint it. When I can figure out a good way of doing it, and I've cleared a few more projects, I will look for a way to move the couplings backwards on their mounts.
 
Last edited:

musket the dog

Registered
31 Oct 2009
787
143
Leicester
nlrr.webs.com
Best answers
0
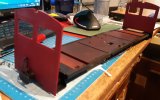
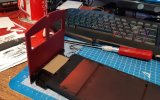
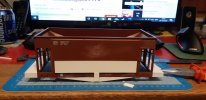
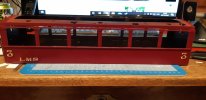
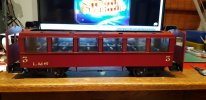
Next up on the list is the ex-Jackson Sharp. After primer the inside of the coach was painted Ford Rio Brown. I wanted something that approximated the colour of the wood stain I have used on my laser cut wooden coaches. I think it's a little too dark, but definitely better than the blue plastic. The coat was masked up and Ford Burgundy red was applied to the outside. I had originally read that Rover Damask Red was a very good match for Crimson Lake, but unfortunately it is no longer stocked on the shelves by Halfords.

201107 (4).jpg

The brake pipes and steps were given a coat of black (I prefer the look of black paint to the shiny moulded finish). The planking was given a coat of Humbrol Natural Wood and the interior screwed back into the floor. I would like to change the interior to something a little less 'uniform'. Maybe with longitudinal benches running the length of the passenger compartment.

201113 (1).jpg
201113 (2).jpg

201113 (4).jpg

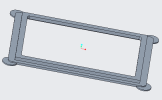
The next conundrum was the glazing. I wanted to find a way of giving the appearance that the glazing was fitted flush to the frames but I also wanted to avoid cutting and measuring 12 individual pieces of glazing. I thought I might be able to design a frame where the outside would fit the window hole with enough tolerance to account for all the individual frames, but have an internal hole of consistent size so that I could cut 12 identical pieces of plastic for the glass.

201114 (4).PNG

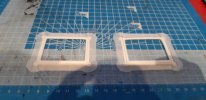
The 'mouse ears' at each corner are to assist with adhesion to the bed and prevent warping. They are 0.5mm thick and a easily cut away after the part has been printed. Each takes around 40 minutes to print and is roughly 60x45x2.5mm. I am currently at part 7/12.

201113 (5).jpg

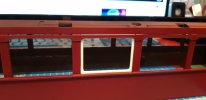
Each pops into the window frame and will be secured once they have been painted the same brown as the interior.

201113 (7).jpg
 

musket the dog

Registered
31 Oct 2009
787
143
Leicester
nlrr.webs.com
Best answers
0
I now have 12 window frames for the ex-Jackson, all in primer awaiting a dry day (where I'm also home in the daylight) for a coat of paint. The brake van now has some handrails and is ready to be painted.

A few updates back I mentioned I had picked up a couple of Piko ore hoppers for a conversion. Back in 1899 the Furness Railway ordered a pair of 45 ton bogie hoppers from the Pressed Steel Car Company in the USA. 10 more were ordered from a domestic supplier and some survived until the 1950's as internal user wagons in steel mills. My plan was to back date the Piko offerings to something similar.
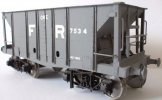
Ore Hoppers (5).jpg
Photo taken from here

How did a small narrow gauge line, in an unimportant part of the Midlands end up with such luxurious wagons? Well, the primary reason for the existence of the N&L.L.R is to move bulk quarry products. Aggregate, sand, clay and bulk rock were pulled out of ground in no less than 12 pits served along the line's length. Excluding the largest few which had their own branch line running directly into the good yard at Narborough, the quarries' products had always been transported in small 4 wheel tubs along the main line in their own trains. When the LMS inherited the line, to say they were offended by the practice of running long trains of unbraked, unsprung and poorly maintained 'minecarts' along the same line as the principal passenger and regular goods services, was putting it lightly. Something would have to be done...

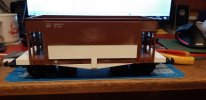
The Piko wagons are very simple, made of two mouldings; the body and the baseplate. The first step of the conversion was to remove all of the moulded handrails from the wagon and sand back the joints.
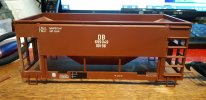
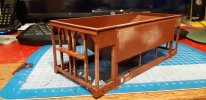
201107 (5).jpg

201124 (1).jpg

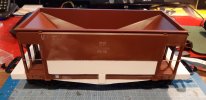
The try and more closely match the basic silhouette of the prototype, the open half of the side plating was filled in with 2mm Plasticard. A triangle was added to the bottom of the chassis rail and reinforced from the back. Another rectangle of card was added to create the space where the large central strap attaches the body to the frame.
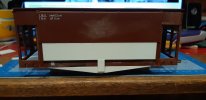
201124 (2).jpg
 

musket the dog

Registered
31 Oct 2009
787
143
Leicester
nlrr.webs.com
Best answers
0
The people in charge of the money recognised that a lot of time and manpower could be saved by investing in some modern facilities. At Narborough they constructed a overhead gantry to allow the narrow gauge wagons to unload vertically, directly into standard gauge wagons waiting below. New wagons would be needed for this, it made sense to build them to a standard that could be picked up by the regular pick-up goods. As the Furness had done nearly 25 years previously, they turned to the Americans for a quick and easy fix.

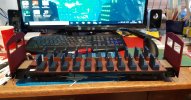
A very recognisable feature of the modern style of wagon the Piko product represents is the bogies overhanging the ends of the body. The early versions and the ones shipped to the UK have a short balcony to cover the outer wheels. The side frames and floor were extended using 2mm Plasticard. The end was capped using 1.5mm, that would be easier to sand back to the edges of the frame. The angle iron and rivets that joins the balcony to the vertical uprights was drawn up in CAD and printed. There will be additional support under the floor once the chassis is clipped back in.
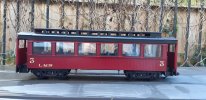
201202 (1).jpg

201202 (2).jpg

201202 (3).jpg

The two halves were reassembled to check that everything still worked as it should and to check I was still heading in the right direction.

201202 (4).jpg

The latest job I have done is to add in the new ladder rail. This is 1mm weld wire. I think it might be a little too small in diameter, but I am satisfied that it's a big improvement over the moulded originals.

201204.jpg
 

dunnyrail

DOGS, Garden Railways, Steam Trains, Jive Dancing,
Staff member
GSC Moderator
25 Oct 2009
26,076
4,976
75
St.Neots Cambridgeshire UK
Best answers
0
Country flag
Nice to see a build that shows lots of mods using 3D printed parts, certainly this is the way to go once you have got your head around the complexities of 3D drawings. If only it had have been introduced when I was 25!
 

musket the dog

Registered
31 Oct 2009
787
143
Leicester
nlrr.webs.com
Best answers
0
Hello again everyone,

A bit more progress to update on for the Jackson-Sharpe bash.

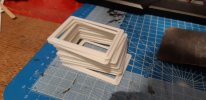
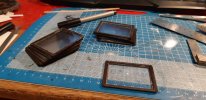
One of the main benefits I saw to having a 3D printer was for the repeated manufacture of smaller detail parts. Not only does this stop me going crazy staring at the same pieces of cut plastic 20 times over, but it ensures some sort of consistency between the tolerances of the parts. On that theme, over a couple nights of printing, I soon had 12 identical window frames. These were primed and painted in the same Ford Rio Brown as the interior.

201129 (1).jpg

201129 (2).jpg

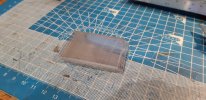
Us railway modellers are a funny bunch aren't we? Whilst walking past the scrap bin at work I noticed that 12 full sets of brand new (and quite expensive) LED indicators had been thrown away. Of course all I was really interested in was the rigid plastic packaging each one was boxed in. Once the clear plastic was liberated from the opaque, I had a few coaches worth of glazing. Two sheets were needed to make up the 12 panes for the coach. These were glued into the back of the painted frames using Wilko's generic 'Hard Plastic Glue'.

201208 (2).jpg
201208 (3).jpg
 

musket the dog

Registered
31 Oct 2009
787
143
Leicester
nlrr.webs.com
Best answers
0
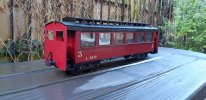
Before the window frames were added into the coach I added the decals. These are from Fox Transfers which I have used several times for OO and G scale stuff. The quality is very good indeed and when applied with some Humbrol DecalFix they take the grain and the panel lines of the moulded wood very well. I messed up and ordered the next scale up, but I don't think they look too out of place on the large plain side. Once they had dried for a day, the decals were sealed in with Halford's gloss clear coat.

201208 (1).jpg

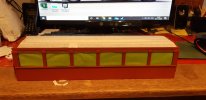
The window frames were added to the coach. Each is a nice snap fit into the aperture in the coach side but is also secured with a dab of poly cement on each corner.

201211 (1).jpg

The roof was painted satin black and added back to the top of the coach. I would say at this point I am pretty much where I want to be with the coach. I still need to remember the safe place I stored the clerestory glazing and add this back in. When I get some more 3mm LEDs I will also add lighting to the top of the coach. Eventually it will also need a fleet number and some weathering.

201222 (2).jpg

201222 (3).jpg

I've got two more of these to convert on a slight variation on the theme. The first is another coach which will become a 1st/3rd composite, maybe with an additional entrance in the centre of the coach. The second is a combine which will become a brake/baggage coach.
 
  • Like
Reactions: 1 user

Riograndad

Model Railroading, boats and oil painting,
6 Jul 2013
2,161
639
69
Northampton UK
Best answers
0
Country flag
Cracking builds and transformations,looking forward to the next cars,very impressed with the glazing,well done:clap::clap::clap::clap::clap::clap:and to me the lettering size works well,,,,,IMO;)
 

38thfoot

Grand dreams; limited talent
19 Nov 2013
86
18
Hazel Grove, S Manchester
Best answers
0
Country flag
I've got one of those cabooses that I'm planning on converting; I'm now planning on using your example as a set of instructions, minus the finesse and quality!

Interested to see how you're filling the roof aperture.
38
 

musket the dog

Registered
31 Oct 2009
787
143
Leicester
nlrr.webs.com
Best answers
0
I've got one of those cabooses that I'm planning on converting; I'm now planning on using your example as a set of instructions, minus the finesse and quality!

Interested to see how you're filling the roof aperture.
38
Thank you for the kind words 38, the truth is though by taking the photos at the end of each modelling session I can cover mosts of the bodges I've had to repair along the way. I'm hoping one there is some primer on the brake van it will hide the last of the scar where I went slightly over board with the Stanley knife cutting the hole for the ducket.

For the roof I was going to keep it simple. My plan was to use a 0.5mm piece of plasticard scribed at regular intervals on the reverse side to cover the whole roof. The scribing will help it take the curve of the roof and hopefully look a little bit like planks. On the inside I would then use a simpler square piece of plastic to cover the whole and hopefully stop light from escaping.
 

musket the dog

Registered
31 Oct 2009
787
143
Leicester
nlrr.webs.com
Best answers
0
Loads of ideas and inspiration here. Love the repurposing of the LED packaging windows.

Rik
Thanks Rik, now that the house is back in one piece I need to crack on and finish a few more of these off :)
 

musket the dog

Registered
31 Oct 2009
787
143
Leicester
nlrr.webs.com
Best answers
0
I think it was about time I came back with an update on the brake van.

The next job I tackled was the grab rails. These are 1.5mm steel welding wire. Being mild steel they're nice and strong and when rubbed down in a few key places, hopefully they'll rust nicely too. Nothing too complicated here, holes were drilled into the body side and the wire cut and bent before being glued into place.

210521 (2).jpg

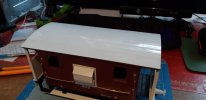
Since the last update I have also finished the roof. It was all a bit of an experiment but I'm quite pleased with the end result. It started as I described before: I laid the van upside down on a piece of 1mm plasticard. Starting at 1 edge I rolled the van onto the edge of the roof and lined it up. I then rolled it across the roof and marked where the other edge met the plastic.

210521 (6).jpg

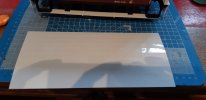
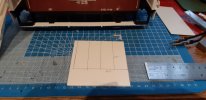
The plastic was cut to size (with a little overlap so it could be sanded flush) and lines were marked across every 10mm. These were then scored with my sharpened screwdriver which causes the plastic to form a natural arc. The existing texture on the roof was given a good key with sandpaper and the new roof glued on top.

210521 (3).jpg

210521 (4).jpg
 

musket the dog

Registered
31 Oct 2009
787
143
Leicester
nlrr.webs.com
Best answers
0
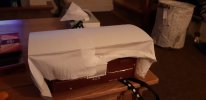
I had seen a few people covering roofs in tissue to try and replicate the look of an old fabric covered boarded roof. I had successfully used a similar technique in oo to model a loco covered in a tarpaulin, so I figured the method might transfer across.

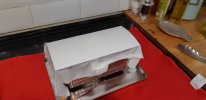
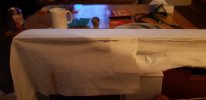
I made up a mixture of PVA and water (50/50 with a drop of washing up liquid) and poured it into the lid of a biscuit tin. I then laid in a face tissue and let it get a good soak in the mixture. I have found the facial, kleenex style tissues are less likely to break apart when wet. This was then draped over the roof, being careful to iron out any wrinkles and push air bubbles out to the side. No need to rush here, it will take a few hours to dry.

210521 (5).jpg

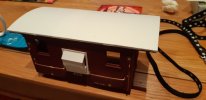
Once it had dried I was left with a large, stiff sheet moulded in place. Using a sharp craft knife I then began to pare away the excess using the lower edge of the roof as a guide.

210522 (1).jpg
210522 (2).jpg

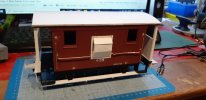
I folded in the corners and secured them with little dabs of PVA. The tissue will retain a bit of stiffness and can be worked quite easily. Hopefully, you'll end up with something like this:

210522 (3).jpg
210523 (1).jpg
 

musket the dog

Registered
31 Oct 2009
787
143
Leicester
nlrr.webs.com
Best answers
0
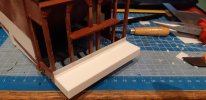
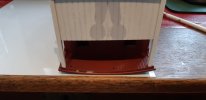
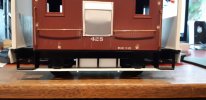
One final job on the van was to make up a ballast box. This is just 4 pieces of 2mm plasticard, cut to size to fit between the chassis' frames.

210523 (2).jpg
210705 (5).jpg

I need to reattach the brake shoes and arms, but for the time being that is as much detail I will be adding. Once the 2nd is complete I will look at adding some fixtures and fittings to the inside, but for now it is off to the paint shops.