Anglification of Some Assorted Rolling Stock

musket the dog

Registered
31 Oct 2009
787
143
Leicester
nlrr.webs.com
Best answers
0
Evening all,

Since finishing my last project of my Beyer Peacock(ish) tank loco, I've been turning my attention to some of the other projects that have been hanging around the workbench for far too long. Mainly these consist of pieces of European and American rolling stock, that need a little more British flavour, to fit in my my vision of the N.L.L.R.

As well as converting LGB Toytrain vans and open wagons along the lines of GeRik's and David's guides I have made a start on a couple of my own ideas.

The first of these is the conversion of the first of 3 Bachmann Jackson Sharpe coaches. Originally I had planned to construct something akin to one of the Leek and Manifold coaches (shamelessly stealing ideas and techniques from Rik again), but I have decided to hold off on that on the hope that one day I might be able to justify one of those lovely Peter Yatton kits.

I had studied a lot of the stock that Brush/Falcon/Hughes had constructed for various tramways around the world. Many of these had end balconies as per the Sharpes, as well as truss rod frames and occasionally clerestory roofs. My thinking being that being a manufacturer close to the railway, the N.L.L.R might have been the first to hear about stock left from an unfulfilled order...
Henri then shared the pictures of the handsome teak, RTM tramway coaches and I decided I could build something plausible somewhere between the two.

To my eye, the greatest betrayer of the Sharpe coaches origin is the full curved ends to the clerestories. I was keen to use as much of the original roof as possible, and clerestory coaches don't pop up too much in British narrow gauge, so the thought of something a little bit different appealed too.
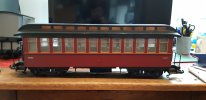
200523 _2_.jpg

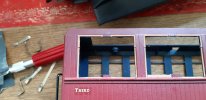
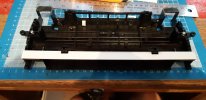
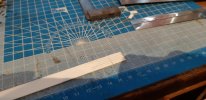
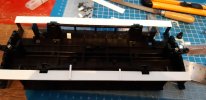
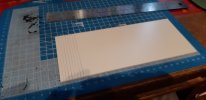
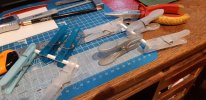
I started with an old JS purchased many moons ago from a forum member, back in the 'mad' days. After disassembling it I started to attack the windows. A common theme between the Falcon and RTM stock was the large plain windows. I would cut between each pair of windows with a razor saw to create a single large hole. The then cut slits using the saw and scored the remaining frames using a craft knife, until they could snap off.
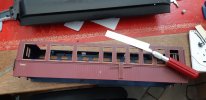
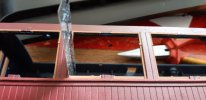
200524 _1_.jpg

200524 _2_.jpg

200524 _3_.jpg

After a couple of hours work, I had one coach body with 6 large windows on each side.
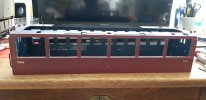
200525 _1_.jpg
 
  • Like
Reactions: 1 user

musket the dog

Registered
31 Oct 2009
787
143
Leicester
nlrr.webs.com
Best answers
0
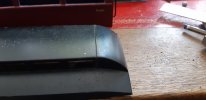
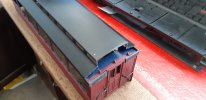
The next step was to square off the ends of the clerestory. This would require cutting the section of roof with the curved clerestory ends away from the frame, while still retaining the frame and structure beneath.

The first cut was to cut down behind the curved section to the base of the lower roof, without going through the sidewalls of the lower roof.


200525 _3_.jpg

I then removed the overhang for the balcony, using the internal wall as a guide.

200525 _4_.jpg

200525 _5_.jpg

I then cut backwards along the ridge of the roof. This left me with the two 'arms' that wrap around the front of the coach and the longest available portion of the square clerestory.

200525 _6_.jpg
 
  • Like
Reactions: 1 user

ge_rik

British narrow gauge (esp. Southwold and W&LLR)
24 Oct 2009
10,701
1,244
Cheshire
www.riksrailway.blogspot.com
Best answers
0
Country flag
Interesting so far. Looking forward to seeing how it turns out ....

Rik
 

musket the dog

Registered
31 Oct 2009
787
143
Leicester
nlrr.webs.com
Best answers
0
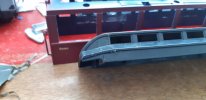
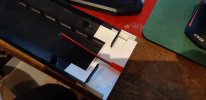
Following on from yesterday, before I got distracted. Once I had a roof with two butchered ends I could then fill in the end of each clerestory with a very snug fitting piece of 2mm plasticard.

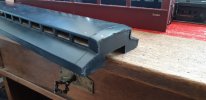
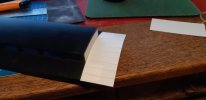
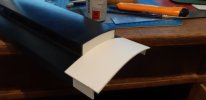
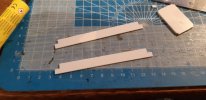
The end of the roof on each side would be extended using two more pieces of plasticard stacked on top of each other. The 1st was a 1.5mm piece, scored every 5mm to force it to bend. This was glued to the existing roof by using an overlapping piece on each side. Once scored it took the curve of the existing roof pieces quite easily and was left to set.
200617 _1_.jpg

Two vertical pieces were glued under each extension and strengthened by gusseting the corners. Once this assembly was firmly fixed it was strong enough to allow a piece of 0.5mm card to be glued over the curved piece to match the existing roof's profile.

200818.jpg

200617 _2_.jpg

The red plug is a JST connector. the lights in my coaches are powered from a battery box stored in the guard/luggage van. I run a jumper between the individual coaches. I use the battery boxes and LEDs from those christmas fairy light sets, so in theory, each van should be able to light several coaches.
 
  • Like
Reactions: 1 user

musket the dog

Registered
31 Oct 2009
787
143
Leicester
nlrr.webs.com
Best answers
0
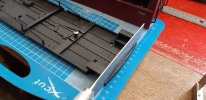
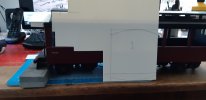
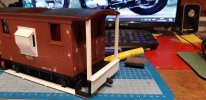
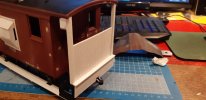
I wanted to enclose the balconies on the coach, to try and further hide the origins of the vehicle. Also something about keeping the worst of the English summer off of the passengers as they're trying to board? Once I had the roof extensions made I could use the profile to guide the shape of the end walls.

First off I had to saw away the angled ends of the balconies to leave a flat surface to attach the wall to. The razor saw was used here to give a nice straight edge.

200525 _7_.jpg

I measured out another 2mm piece of plasticard, using a flat block to hold the card at the height of the bottom step. each end was done separately (end 1 & 2) to try and give the closest match to the home made extended roof.

200617 _5_.jpg

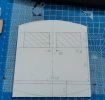
Once I had the basic shape the dimensions of the windows and planking was marked out. The planking was scored using my reliable sharpened screwdriver and the card distressed using the blade of a razor saw to give the effect of wood grain.

200619.jpg

Some 0.5mm plasticard was cut in 4mm strips and glued to the front and rear of each side to give some relief to the surface. This was given the same simulated wood grain treatment.

200617 _3_.jpg
 
Last edited:
  • Like
Reactions: 1 user

musket the dog

Registered
31 Oct 2009
787
143
Leicester
nlrr.webs.com
Best answers
0
The final changes to the roof so far were to add some 0.5 mm strip to simulate where the individual panels of the roof would be joined. The main purpose of this was to hide the join between the old roof and the extension. Where it meets the end of the clerestory it is stepped in by half its width. It was repeated at regular intervals up the length of the roof.

More 0.5mm card was used to create a trim/shade for the upper part of the windows, copied from the RTM coaches. This sits on top of the body itself, just below the facisas(?) for the roof.

200703 _1_.jpg

The final step before preparing it all for paint was to drill 3 holes in each buffer beam to take a Binnie buffer and a spare LGB brake pipe, taken from one of the previous wagon bashes.

200703 _2_.jpg

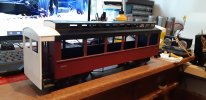
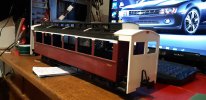
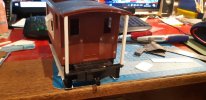
This is where this coach currently stands, waiting for me to break out the paints and have a good decorating session. I'm also currently bashing 2 Bachmann bobber cabooses into something that hopefully resembles an LMS 20 ton brake van. I'll try and write up some of that in the next couple of days. The latest project is a pair of Piko ore hoppers which I hope to try and bash to look like a pair of Furness Railway bogie ore hoppers from the early 1900's.
 
  • Like
Reactions: 1 user

JimmyB

Now retired - trains and fishing
23 Feb 2018
6,947
921
69
Weston-super-Mare
www.tumble-down-falls.co.uk
Best answers
0
Country flag
Having just carried out a repaint on a Bachmann carriage, I envy your imagination (and skills) in this conversion, mine pales to insignificance next to this :)
 

Rhinochugger

Retired Oik
27 Oct 2009
36,715
4,240
North West Norfolk
Best answers
0
Country flag
Having just carried out a repaint on a Bachmann carriage, I envy your imagination (and skills) in this conversion, mine pales to insignificance next to this :)
Trouble is, Jimmy, that Ricky's a professional and we're just amateurs :nerd::nerd:
 
  • Like
Reactions: 1 user

mike

Master at annoying..
Staff member
GSC Moderator
24 Oct 2009
51,805
4,434
Rossendale
www.gscalecentral.net
Best answers
0
Country flag
. Wow... Utterly brilliant
 

musket the dog

Registered
31 Oct 2009
787
143
Leicester
nlrr.webs.com
Best answers
0
The engineering is the easy bit, I just turn up and do what someone else tells me :D

You've made a fine job of your repaint Jimmy, the painting is often where I manage to undo all of my hard work. I don't think the coach has needed any special skills so far, you just need to start off with something you feel comfortable cutting and a rough idea of where you're heading. Certainly nothing as complex as your camera wagon yet :) I've got a few folders full of pictures on my PC of real vehicles and models with designs and ideas I like, saved for projects I might pick up in the future. it's just a case of adding card and details until I can squint and have something that looks similar :p
 

Madman

Registered
25 Oct 2009
17,136
2,952
Pennsylvania, USA
Best answers
0
Country flag
IMPRESSIVE.....;)
 

musket the dog

Registered
31 Oct 2009
787
143
Leicester
nlrr.webs.com
Best answers
0
Evening all,

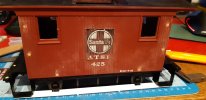
Another small report of my rolling stock abuse to come. As mentioned above another one of the current projects is to transform a pair of Bachmann bobber cabooses into something a little more suited to an English country branchline.

The story with these pair is goes as such: In my version of events the Narborough and Littlethorpe Light Railway was not one of the few UK lines to escape grouping and as such became part of the London Midland and Scottish Railway in 1923. Most of the railway's staff were quite skeptical (to put it politely) of the involvement of the big lines next door. However in defence of the meddling men from Derby, they were quick to invest in new and improved stock for the line. Some of the first was a pair of 10 ton brake vans to complement the ancient pair already on the line.

I've seen similar conversions done a couple times on the forum, I think the one that sticks out to me was by yb281 (or Mel of the Wetton Gooey) but unfortunately the pictures are no longer available on the thread. My basic plan was to try and produce something that looked like a scaled down version of the standard LMS 20 ton van. My thinking that if I was in the LMS drawing office and tasked with created a one off, I would take the simplest route possible and just scale down what I already had.

So, onto the build. I started with the more difficult of my two cabooses. Bachmann make two versions; a logging caboose, with a plain roof and an ordinary one, with a cupola. I had one of each, on the ordinary one the hole for the cupola would need to be covered. The body on these comes apart really easily, 4 clips hold it onto the chassis. The internal window frames were snipped out and the remaining plastic filed back to the frames. The handrails were removed and all the holes in the body filled with milliput. The plank detail was scribed back into the milliput before it hardened.

200731.jpg

The handrails and brake stands were removed from the chassis and placed into the box of useful bits. The middle step was cut out to match the rest of the rolling stock and the mounting tube for the brake stand was cut from the bufferbeam.

200801 _1_.jpg

A British van needs a foot board. A piece of 1.5mm plasticard was cut into a 12mm plank and glued under each bottom step. Notches were cut into the planks to clear the axle guards. Strips of 1mm card were used to create supports for the plank. Two lengths were used. The shorter as a spacer, the longer piece then fits snugly on top of the frame and can be glued down. The plank and the existing step were distressed using the teeth of a razor saw.

200801 _2_.jpg

200801 _3_.jpg

200801 _4_.jpg
 

musket the dog

Registered
31 Oct 2009
787
143
Leicester
nlrr.webs.com
Best answers
0
The NLLR vans would have look out duckets as per their standard gauge counter parts. In the LMS versions these are mounted at bench height, so the guard can sit with his back to the wall and look out to his side. I tried to do the same but I think I may have gone too low. Additionally I am almost certain I could have gotten away with not cutting the hole in the wall for the ducket.
First, I used the handy Santa Fe decal to mark out a square hole to be cut. The with several hundred strokes of the Stanley Knife I cut through the wall of the caboose. I could have probably used chain drilling, but the only files I have at my house are tiny and I didn't want to spend the time flattening the holes out after.

200805 _2_.jpg

200805 _1_.jpg

I've skipped some detail but two rectangles of 2mm card were cut to make the sides of the duckets. These would glue to the inside of the wall of the caboose, so they were made wide enough to accommodate this. The corners were chamfered. The top close to 45 degrees for the roof and the bottom closer to 30. The bottom chamfer had the external corner rounded so that the outside skin of 0.5mm plasticard could be formed around it. The side was left overlong so that it could be trimmed back to the side pieces and sanded to the angle of the roof.

200813 _1_.jpg

The roof is a rectangle of 1.5mm card, left long enough to overlap the 3 sides of the ducket.

200813 _2_.jpg

The final detail for the duckets externally is to add the steel framing. This is 0.5m plasticard in 3mm strips, Rivets are embossed using the point of a compass from behind at 3mm intervals.

200813 _3_.jpg

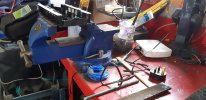
Finally for tonight, while I was visiting at my parent's house (where I keep my big files and my vice) I filed down all the detail off of the buffer beam. This was to give me a flat surface to attach my own to later.

200801.jpg
 

dunnyrail

DOGS, Garden Railways, Steam Trains, Jive Dancing,
Staff member
GSC Moderator
25 Oct 2009
26,168
4,991
75
St.Neots Cambridgeshire UK
Best answers
0
Country flag
I really need a good big vice like that.
 

tramwayknowledge

Tramway Modelling
22 Oct 2011
92
15
Fife
Best answers
0
Country flag
I really need a good big vice like that.
I once lived in Norwich. There was a good stall selling tools on Norwich Market. I was shopping there one Saturday and said to the stallholder;

''I need a good, inexpensive vice'' the man standing next to me said;

''I've been looking for one of those most of my adult life''
 
  • Haha
Reactions: 1 user

musket the dog

Registered
31 Oct 2009
787
143
Leicester
nlrr.webs.com
Best answers
0
Evening everyone,

It's been a while since I posted an update, I've been making slower progress since the railway club I attend has been able to reopen. Some more has been done to the brake van. A couple of my friends have gotten back into wargaming miniatures during the previous lockdown, so we've been having some model making evenings over Zoom to help break up the week.

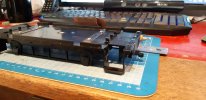
Continuing where we left off, the next step on the van was to sort out the balconies. Eight 2mm strips were cut out of 2mm plasticard. These were glued back to back to make four, 4mm square uprights.

200816 (1).jpg
200816 (2).jpg

A 1.5mm hole was drilled vertically up the length of the posts. Each upright was offered up to the balcony with the body refitted. The underside of the roof was marked onto each upright and the upright was sanded back to the correct shape. A hole was then drilled in the balcony to match and a pin inserted up through from underneath. The uprights were then pushed down onto the pin and secured with super glue.

201019 (1).jpg

A piece of 1.5mm plasticard was cut to match the shape of the end of the balcony. The main purpose of this piece was to hide all of the existing holes in the balcony end that the original railings fit into. Another piece of 1.5mm card was cut to cover the buffer beam and glued in place with polystyrene cement. Finally a end piece was cut from 2mm card. Vertical planks were scribed using the sharpened screwdriver. All the parts were distressed with the razor saw.

201019 (2).jpg
201021.jpg
201104 (1).jpg

Next up will be buffers, which I think will be a custom job for the 3D printer. I also need some long, stiff wire for handrails.
 
Last edited:
  • Like
Reactions: 1 user

musket the dog

Registered
31 Oct 2009
787
143
Leicester
nlrr.webs.com
Best answers
0
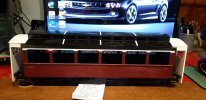
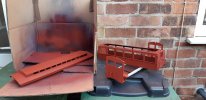
The coach has also had a coat of primer. The outside is going LMS Crimson Lake (or as close as the Ford Motor Company can provide), the inside will be brown. Everything is masked up and ready to go, just waiting for a weekend with no wind or rain to spray outside :wondering:

200927.jpg

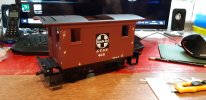
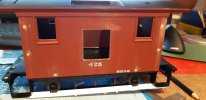
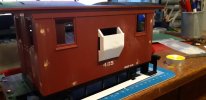
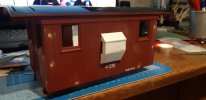
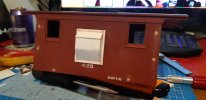
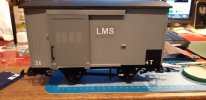
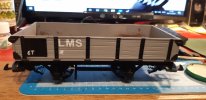
A couple of my other wagon bashes have had their lettering and numbers added. My freehand still needs a lot of work, but I don't mind look of painted over patches if I come back to them later. These need a clear coat to protect the decals and weathering before they go back into store to clear some room on the shelf. A big new project is inbound :eek:

18.jpg
26.jpg
 

ge_rik

British narrow gauge (esp. Southwold and W&LLR)
24 Oct 2009
10,701
1,244
Cheshire
www.riksrailway.blogspot.com
Best answers
0
Country flag
Really looking great so far. Isn't it amazing how the addition of duckets immediately made a difference to the caboose? Keep up the updates, please.

Rik