3m long concrete viaduct - "XPS foam" mould

Its definitely just a section where the concrete wasnt mixed properly, as I peel off the front its a lot tougher and no crumbling sections. I got someone to help me with the pour for the second section and he told me to let the dry ingredients mix for a bit before adding water. I was just bunging everything in at once and letting it mix, so its likely the short section I poured alone has lumps that arent properly mixed in.
Because I used a very fine 6mm gravel (the same one I use for ballast) the ratios were:
1-and-a-half bucket cement
2 bucket 6mm gravel
2 bucket sharp sand
2 cups 'buff' and 1 cup 'brown' cement dye powder (this produces a light brown sandstone-y shade)

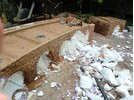
The front - much nicer see:
View attachment 342904
Not quite sure why you were putting in gravel?

Mixing should have been done all in one go but another way I have used is to have a central removable section so that you create the outside to be seen faces, then add a mix with gravel in the centre with possibly a few bits of rod to give strength then pull out the separating bits andcomplete the top surface mix. This the central bit could have gravel.

A mix of 1 part cement to 3 parts sharpe or even building sand including your colour option will give you nice clean detail, in the middle a mix of 1 cement 3 parts sharpe sand and possibly 2 parts gravel works nicely.
 
Looks really good, even the first part with a few missing brick faces looks just like some old walls around here.
Will be great to see the viaduct installed and a train running over it.
 
Thomas, what an enormous effort and what a result! Fantastic. If you don't mind i like to bring in a few hopefully helping remarks about concrete building.
1 Concrete develops shrinkage cracks as a result of the hardening process.
2 During the hardening process (about a month!) , concrete must be kept wet and therefore not allowed to dry quickly!
3 Shrinkage cracks cause damage later on as a result of rainwater penetrating the concrete and expanding during frost.
4 Concrete is porous. The ratio of water to cement determines the porosity. Porous concrete is highly susceptible to frost damage later on. It is therefore advisable to add a water-repellent agent to the concrete.
4 To minimize problems caused by shrinkage, you should also reinforce the concrete model. In your case, I would use galvanized chicken wire and apply it to the inside walls of the mold. In addition, also a few roughened concrete steel wires are needed in the longitudinal direction of your model to prevent it from breaking into pieces later.
5 An important point when making the mold is that the bricks at the surface must be shaped so that they can be removed from the mold without sticking. I think the latter is particularly challenging.

Good luck with your brave attempt to cast a concrete viaduct. However, given the above, I think it is not without reason that most viaducts are made as a single, non-reusable model from polystyrene sheets in which the grooves between the bricks are made with a soldering iron and the bricks are then roughened with a steel brush and than painted.
OK so I should probably be spraying with a hose for the next month or so?

It's already reinforced. I didn't mention it but it has rebar in the trackbed and cage like bits in the piers.

I haven't used a water repellant additive. I'd planned to give it a thin render type coating to fill cracks that frost might get into, and then some sort of water repellant finish of the type used for stamped concrete driveways.

Part of the problem is the Internet is swamped with conflicting advice from experts and companies and manufacturers. In the end I've taken most of my advice (colouring, mix ratios) from someone who does imprinted driveways, because they live in the same village.

This is all too late to help me but hopefully it will help others. I'm going to try this method of mould making again(because it's quick and looks nice) *but* paint the entire mould inner with a few mm of urethane rubber. To cast tunnel mouths and a platform if it works. Than well know if the viaduct could have been done that way too.

Current state of chipping at the mould:
 

Attachments

  • 20250522_150937.jpg
    20250522_150937.jpg
    896.5 KB · Views: 0
Thomas,
You're absolutely right: so many people so many different advices!
Best is to follow the practical advice from your local friends and connections and discuss with them
what to do with all the other advices.
Indeed keep the concrete structure wet for a few weeks to enhance the hardening process.
Your result so far is fantastic! Well done!
 
Back
Top Bottom