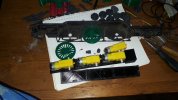
1/15 scale Big Boy anyone?

justme igor

Registered
17 Apr 2020
679
64
Netherlands Westwoud
Country
Netherlands
Best answers
0
Country flag
Out of curiosity I looked at what getting a driver printed in metal would cost. As expected, it's quite prohibitive given the quantity needed for something like this even in a cheaper medium such as steel.

Interestingly though, that led me to find the technique of lost-PLA casting; it's possible to use the PLA to form a mould in water soluble plaster: The PLA is melted out and the mould can then be used to cast in aluminium and then rinsed away. I'm probably late to the party with this but I found it fascinating. It's an interesting blend of old and new technologies.

So if you have access to the forging equipment (and I appreciate that could be quite an 'if' :D ) it should be possible to transfer any parts you 3D print, to metal if you need to. Pretty cool.
Learn how to sand cast.
Print the parts you want to cast with axle! so you can do some turning on a lathe.
Dont expect that the casted parts will come out "ready to go".
Use some wet play sand instead of that ridicules expensive "special casting sand"
Or better if you know a brick layer and he has to cut some bricks, ask for a bucket of that left over dust.

Aluminium would be good, it depends on the quality and what is added in the aluminium.
For good casting i suggest go to a car junk yard/scrap dealer and buy a car tire, or try to get zamak 3, it is easier to cast.
A furnace that can melt those metals 1000c max is not so expensive.
Aluminium "only" needs 750c zamac 600c.

Keep in mind due to the shrinkage of the metal make your 3d print 1% bigger....

There are some draw backs.
Forge(~450 euro): consumes gas and make a lot of noise, dont go for the electric ones
Crucible (~100 euro) buy a ferriet one and do not make a steel one for your aluminium castings
Sand casting is a learning process.
You need a small lathe(~500 euro) plus a small cnc(~500 euro) dont buy proxion or some chinees.
Forget your "lost" pla method....

Can it be done.... O YES!!!!!. Is it fun....O YES......is it satisfactory.... OOOOOO YY EE SS

I suggest to find on youtube some people that explain sand casting, and pleas forget all the "lost molding" technics.
Metal Casting at Home Part 21 Core & Mould Making Casting & Machining - YouTube
 
  • Like
Reactions: 1 user

justme igor

Registered
17 Apr 2020
679
64
Netherlands Westwoud
Country
Netherlands
Best answers
0
Country flag
I just had a thought...never stops in my head anyway:)
To make your boy drive it can be very simple.
I figured out a way to power all my locos with the same system.
Not wanting to hijack your tread but just want to give you food for your thoughts....
REDISIGN your wheels and mounting frame......
a picture will tell you more than a 1000 words...

20201227_121715.jpg

And with redesigning you can make very easy a copy that is 1% bigger with axle(to be cut off when done with the lathe) for sand casting.
Before i forget it again, also learn how to weld aluminium for the frame....
I hope this will give you enough food for your thought to keep you busy in the winter and we will see that beast drive on your track this summer.
About scaling the stls you found, they come with a piece of track.
Yes that is my next project after the aa20....
Only put the tracks in your 3d program and scale them down to 45mm in between the tracks, make notes!!!!! scale the rest to match.

With best regards and hoping this was helpful, best igor
 
  • Like
Reactions: 1 user

DGE-Railroad

The Orchard Line
26 Jan 2020
607
89
52
United Kingdom
Best answers
0
Country flag
Hey Igor, not hijacking at all. More eyes looking at it and more minds thinking about it equals more great ideas that I'd never have thought of!

That's a brilliant idea re: the drive. Proper 6-wheel power in your case :) That looks like fantastic.

Time is my enemy - I never seem to have enough of it. Too many projects! Great lateral thinking about scaling down the track to the right size and then using that to find the rescale percentage - the result of an engineer looking at the problem. I wish I'd considered that before getting so far down my print road!! I will do it anyway using my current rescale values and see how close I am.

I think learning to cast and machine (and to buy the parts) is going to be a step too far for me. But it *is* something I'd like to look into in the future.

I've also been wondering about thinning the Big Boy wheels to use as a face on existing wheels. That might be another option.

Thanks again and I very much look forward to seeing your build. Please post it when you get started!

I'll keep posting my progress. I'm gluing the boiler, firebox and cab together today so it's the point where it really starts to come together and look like something.
I've also been putting together the tender chassis. That thing is as long as of my locos! Definitely worthy of the name :D

I was supposed to have a few more prints but we have had a HUGE amount of rain which caused powercuts throughout the night and it has killed what was printing, so I've had to restart those
 

PhilP

G Scale, 7/8th's, Electronics
5 Jun 2013
33,561
3,521
Nottingham
Best answers
0
Country flag
How much power does your printer take?
I would look at a small UPS (Uninterruptable Power Supply) - We use them for Server's, telephone systems, and anything we want to keep running during power outages.

They also clean-up the incoming mains, so a glitch should not corrupt a print either.

Cost would depend on the amount of power consumed by the printer, and how long you want to run without power..

PhilP.
 

DGE-Railroad

The Orchard Line
26 Jan 2020
607
89
52
United Kingdom
Best answers
0
Country flag
It looks as though my 51.7% rescale was a little out. Applying that figure to the rail section provides a 48mm back-to-back measurement rather than 41mm. so I'm at 117% Probably okay for the 5' rule but not ideal :wondering:
The correct rescale percentage for the Thingiverse BigBoy would seem to be 45%

Thanks for the tip re: UPS Phil. I do use one downstairs for the ADSL router, wifi hub and little NAS, but this happened at about 2AM so there's no way it'd have been able to support the printer for the length of time I'd need, sadly. It would be a good insurance though. The printer itself is plugged in through a surge/spike cleaner :)
 
Last edited:

justme igor

Registered
17 Apr 2020
679
64
Netherlands Westwoud
Country
Netherlands
Best answers
0
Country flag
Printers with a heated bed can consume up to 500w a hour. So for a 14 hour print it would be 7 kwh. (depends mostly on the printer and bed size+material used, my longest print was 72 hours....)
That would translate into a battery of 148! Amps at 48v....I am mostly off grid but my battery capacity is around 1000A at 48v meaning over 10.000 li ion cells......(fully tested over 20.000 pieces)

Most printers can have a program upgrade or it is already in them: a pause function.
Mostly to cut it off at night or in case of a grid failure or when run out of filament.

DGE if it is in any comfort: i did throw away several kilo's of filament because it was out of scale. just started all over again.
Or one part (usually the big ones.....) was not correctly done, by me or the printer or not good filament.

As far for the pla prints, it can and will: shrink and wrap in the sun or above 40c. i suggest also to build it around a pvc pipe and glue all your parts on the pipe, thing is to long.
Saves pla and time.
Get some pvc sheet of 3mm and cut it out with a knive and or a chisel at least for the flat pieces, you will be surprised what you can achieve
If i may ramble on:
When you decide to do that thing again (or a other locomotive), make two articulations and the middle wheels "blind", so no flanges, this would it making able to get thru 2 meter radius curves.
Why do all the trouble for a static non driving model if you can do a bit more trouble and have a fully functional working driving model, but that is my thought.

Hmm yes i think i can make a tread about building a loco, from 3d design to print to drive, would be a very long one )-:
There are going to be threads in the near future of casting for some models and soldering to get the aa20( i really dont know why i am into that driving disaster) driving again powered by coal.
If you are already thinking to get started in casting or turning parts, start now and slowly.
Spend 500 euro to start and learn yourself to work with that thing, give it a year, its not so easy if you dont have the feeling for it.....I even encourage you to make mistakes, best learning process.
Yes time......It can be a enemy but also your friend
 

DGE-Railroad

The Orchard Line
26 Jan 2020
607
89
52
United Kingdom
Best answers
0
Country flag
It's living up to its name. Here's one side of the tender chassis with a Lil Critter for reference.

Having never been lucky enough to see one of these in the flesh, I didn't appreciate the size. The tender is essentially the same length as a Bachmann J&S coach.

I have also come up with an alternative drivetrain, thanks to Igor and others work with powering 3D models. It means more printing but will be a darned sight easier and cheaper than finding and modifying a pait of Aristo Mikado units, I think.
 
Last edited: