Wisbech and Upwell Coach Kit.

dunnyrail

DOGS, Garden Railways, Steam Trains, Jive Dancing,
Staff member
GSC Moderator
25 Oct 2009
26,169
4,993
75
St.Neots Cambridgeshire UK
Best answers
0
Country flag
Before you ask I am not sure when this kit will be available or what it will cost, you will need to ask Matt (3 minutes of fame 3 minutes of fame 3 minutes of fame )on this forum.

Matt approached me and asked if I would like to build and review this kit for him. I am happy to do this as he was happy to take a review of warts and all. I will also be doing some mods to the kit for my own needs as I get to keep it when work done, so I need it to be for what I want. I will point out these revisions as I go.

So what does the kit include, well 5 rather large lumps of what is I think 2mm quality ply with all the parts lazer fried. A couple of parts had popped out of the sheets that Matt had carefully put in the bag of 3d printed parts. These are sundry details including wheels. Some metal for the wheel axles and other detail, 8 very nice small ball bearing journals. A piece of brass and some comprehensive instructions which include copies of the ply parts and a sheet of glazing. Thus a complete ready to go with no additional parts to buy.

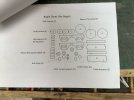
First up before I get to the build some pics of the kit.
F7C5A390-AC7F-4A2E-8335-A0A1609E42E0.jpeg
2C1919DC-A6AF-4E45-92C8-BFAEC23EED81.jpeg
3A49B2CD-6DC4-4777-B0AB-2633863CD1D2.jpeg
32C94E6D-55D1-4825-81D8-0C3D101A066E.jpeg
4F213681-93CD-47C4-9D19-83F81280173D.jpeg

DBE88CC1-9C29-4D10-9088-991DDF81F539.jpeg
4F213681-93CD-47C4-9D19-83F81280173D.jpeg
I have not shown all the Instructions but on reading they all appear to make some sense to me and are pretty comprehensive.
3CFCC90B-FF9C-4375-9941-67F0C7D821FD.jpeg
82A1277C-FC9C-414F-94A2-CCC6BB94AD45.jpeg
Thus to the nitty gritty. I decided to start up on what I felt may be the trickiest part to get right the bogies. I have to say here that this should not be a bogie coach, Matt obviously built one for himself and found that as a 4 wheeler it was too long for his curves. That is understandable as the kit is a G scale product thus not 100% accurate for either Gauge 3 or Gauge 1, if it were to scale for either if these then it would have been a 4 wheeler. But should you buy one be assured that it will fit in just right behind LGB, PIKO etc locomotives.

My original plan was to build the bogies with one side flexible thus giving the equivalent of 3 point suspension, but on carefully looking at the method of construction that would not have been possible. I was also a bit worried about the thickness between the Side Frame tabs where the Pivot Mounts fit for this as well. Thus here I have followed instructions. But I used the oblong cutouts from the Side Frames to strengthen the joint where the tabs are glued. I also cut some spare from from the ply to put additional strengthening in between the Pivots and the Side Frames. I have also elected to use Metal Wheels that were in stock so sadly the Ball Bearings will remain unused as they are for a much shorter Axle width. Below you can see where I am at just now, I have glued up the Pivots to the Side Frames and the pegs etc are holding in place the Hub Carriers that would hold the Ball Bearings in place. To enable a bearing I have cut short lengths of 3/16 KS Brass Tube that will hold the bearings in place and stop wear and tear to the wood hubs. I would have liked to put cast Axle Bearings here but only had 4 of any type in stock so have elected to use those supplied in the kit. Each side of each axle will also have a nylon and brass washer in place to get the spacing correct. Once this is all in place and the End Frames glued on the bogie should be pretty robust and heavy with the what I think are Gary Raymond Wheels. Matt suggeets in the instructions that if you want Metal Wheels you can get them from GRS with the correct axles ends for the Ball Bearings. I have not checked this out. But a GRS reference would be handy here.

EDIT have a look at post #24 if you are following this build, I should have used different parts between the bogies where the curved sections are.

3016F2A3-4D42-4D61-8C77-6B91AF467ADF.jpeg
Oh Matt at this stage would it be worthwhile you posting a print of your built coach to this thread?
 

Attachments

  • E0027025-B7A7-47CE-B0B5-D0AF331189D2.jpeg
    E0027025-B7A7-47CE-B0B5-D0AF331189D2.jpeg
    438.8 KB · Views: 0
Last edited:
  • Like
Reactions: 1 user

3 minutes of fame

3d printing, electronics and trams
14 Dec 2020
574
154
Lincolnshire
www.mgnr.uk
Best answers
0
Country flag
Thanks Jon. Glad the build is going well so far! The only thing I've spotted is that you have used the large spacers within the bogie frame rather than the small ones. The idea with the large ones was for those to go between the bogie and body, to give a more stable ride, but I know we discussed that you were going to use your own pivot design for this.

In answer to your first question, yes I am planning to make these available. I felt it was important to get one built by someone else, so as to validate both the parts and build instructions. I built the first one of these back in May, so have made some improvements to the general design. Now I have my faster laser cutter, I will make a few more for myself - and anyone else that wants one! Price TBC.

Looking forward to seeing how the rest of the build goes!

h88BeDeIQS2lNz1WpRHcvwntbzPahXDRcfVtl5gX2TrWu0-tdEH_9ZKfvfSo9biDNcERHLimzNf8AStL9_UFZusfuSGeYZg_fLSpIzy3JWNT_b7OcpdUN0PXCMwEEDa-FJGhWBytv_mfH-YFjHdDI5A0IlMwKoO8LIv4SQE2wc1rsr1HqDXsrcxeMAMLjiU6deqF8RESRTZYj_GXdbisJ3JpQk2utHbchSk3MSOxtMDD2oTJaaKQ4SRLqpyaW_oC-OhEbJNR1FhrZMMw8yatQJeZsgEjElqhKXYAFM73nK2-G2B_bSZcBhMKxtBbdWN7UBSVJolL38XiFqxO5gARU6ckYMPV7tw6GdHAR_Hss-usiobrmsGgPAkRzfk6cYWryf4WAfZSU-VjVbdm_gl3rCm6QA72mWvddEudDjYwMtg7LpQamSd14jwzC_uBHwmoeV13GyMIKSpbPC6hijZhzF9GF4rBsVBkU5oMTBgXtMBNoBt4L18jL9dkAE4P-GE2_Hm8T9LMoybuxhEa1O5p4Fj3mCxA0MEryVnhW-anwTzgKIo3ZY7SDx_etz-BM3H5f9Aqp8r6UoYD5I6TozrxAvxqil1LuV6PIzOCMMri4cV-1_gmRgmt4vyp-gbmuc037wdVL36Hq1BuoPqJaXFoAImO5JuORm2djdsRswFF4P-4ecY9zSpKlZAMbmZYR7Fm0fJ8SF9IpQsTyvuKfR69GqS-=w1548-h870-no
 

ge_rik

British narrow gauge (esp. Southwold and W&LLR)
24 Oct 2009
10,701
1,244
Cheshire
www.riksrailway.blogspot.com
Best answers
0
Country flag
Looks like it's going to be a really useful kit. Those coaches are very distinctive and attractive.
So, is it roughly 1:24 or 1:32 scale or somewhere between?


Rik
 

3 minutes of fame

3d printing, electronics and trams
14 Dec 2020
574
154
Lincolnshire
www.mgnr.uk
Best answers
0
Country flag
Looks like it's going to be a really useful kit. Those coaches are very distinctive and attractive.
So, is it roughly 1:24 or 1:32 scale or somewhere between?


Rik
The one that Jon is building is around 1:20, as I've scaled it to run with a live steam tram and they tend to be a little over scale. The infamous LGB elastic tape measure has been used, as there's some compromise to get the width right while still maintaining approx proportions.

I am considering offering it as 1:32. Scaling it down will be relatively easy and I can also offer both the extended bogie and shorter rigid versions. I need to get an idea of the likely interest for this, as for my own use, 1:20 is all I need.
 

ge_rik

British narrow gauge (esp. Southwold and W&LLR)
24 Oct 2009
10,701
1,244
Cheshire
www.riksrailway.blogspot.com
Best answers
0
Country flag
The one that Jon is building is around 1:20, as I've scaled it to run with a live steam tram and they tend to be a little over scale. The infamous LGB elastic tape measure has been used, as there's some compromise to get the width right while still maintaining approx proportions.

I am considering offering it as 1:32. Scaling it down will be relatively easy and I can also offer both the extended bogie and shorter rigid versions. I need to get an idea of the likely interest for this, as for my own use, 1:20 is all I need.
1:20 would certainly suit my 15mm:1ft line....... :)
 

Chris Vernell

Tortoise
24 Oct 2009
9,038
1,814
77
Nepean, ON
Country
Canada
Best answers
0
Country flag
I'd be interested in a couple of 1:20 bogie coaches to run behind my Bachmann Toby on R1 curves.
 

Paul M

Registered
25 Oct 2016
11,881
1,696
60
Royston
Best answers
0
Country flag
1:20 is pretty close to 1:19, 16mm scale, so there might be a market there.
 

dunnyrail

DOGS, Garden Railways, Steam Trains, Jive Dancing,
Staff member
GSC Moderator
25 Oct 2009
26,169
4,993
75
St.Neots Cambridgeshire UK
Best answers
0
Country flag
I have finished the bogies now and have made a start on the exiting bit, the body. However first up the bogies. Because I elected to not use the kit supplied wheels (they are spoked and I also wanted solid as per the WnU ones. I have had to make provision for a bearing and some fill between the wheels and axle guards. My wheels caused me another problem but more of that with the pics. The first pic shows the bogie from a WnU Bogie Coach something that I will be attempting to emulate so far as I possibly can but perfection will not be quite possible. Incidentally I have already made 2 of these bogies from scratch in 0 gauge back in the 80’s.
FC2B9F22-C00B-424B-80DC-F2CEDFFBDA53.jpeg
Here you can see how I have used 1 of the Hub Carriers to fit some KS 3/16 tube for the axle bearings. This would be where the ball bearing parts would fit. This has given me a little flop to ensure a perfectly flat ride and a small level of compensation. Inside the bearing each side is first a brass washer then a nylon one, this has been repliceted on each wheel either side. The bogie side was flexed slightly to allow some grease on the axle for long term lubrication. Finally I cut up some of the spare ply to make a thiner addition to stick over Hub Spacers that I have mounted in front of the Hub Carriers, the thin addition was chamfered with sandpaper at the top to give some detail.
47A4C4F7-8AEF-4416-83CB-EB397DB143B5.jpeg4573E234-84C4-46B2-8D4B-364785209103.jpeg
Finally the end frames were mounted in their tabs, I added some square wood from a match to make these joints a little stronger. Here you can see the parts being held to dry with clamps prior to fitting the match strengthening.
E5A11404-8E66-4DB4-915D-772B04EAE473.jpeg
I found that my chosen wheels caught on the End Frames a little so some clearance was butchered off to allow the wheels to rotate. Likely you will not need to do this if you use the kit supplied wheels or the GRS Metal ones, but worth pointing out if there are issues.
9347A833-6BBF-4BBD-827A-2EAE87F1251E.jpegI have given the bogies a good push down a light gradient on my line and can report that they track well and run smoothly.

The purpose of farming these kits out is to see if any issues arise and I thought I knew but wanted to make aure about the items noted below in Red. Matt has taken this on board together with slotting the roof support to make the Coach Body Frame assembly easier.
0FB98ECE-9FBA-4357-AEB7-05CD44BA4FB9.jpeg
Finally I have started by glueing up the Coach Body Frames to the Stretcher Bars, to silmpify the squaring up I have cut notches in the Roof Support after carefully measuring where things will be (these notches will be in the final kit) and carefully marked up the Coach Chassis after overnight glue dry before putting the Coach Body Frames on them. The Coach End Frames will be glued on last with careful reference to the Coach Sides. Doing this on a squared cutting matt on top of some cling film is a big help to squaring up the assembly and not sticking it to the mat. You can also see my squared lines across the Coach Chassis.

EDIT I did not glue the Roof Support and this will be mounted the other way up so that the temporary required notches are next to the roof timbers.
0FDE1BF3-5A36-4C56-8410-C940336ABC98.jpeg
 
Last edited:

dunnyrail

DOGS, Garden Railways, Steam Trains, Jive Dancing,
Staff member
GSC Moderator
25 Oct 2009
26,169
4,993
75
St.Neots Cambridgeshire UK
Best answers
0
Country flag
EDIT, I got this part wrong. The sides should have been glued to the Body Frames and not to the side of the Coach Chassis. This results in the gap at the top as you see here and noted in post 28 by Matt.

EDIT
I have also elected not to use the 4 Window fill ins that are present in the mould for each side. I suggest that these be left in place when you remove the sides from the frets should you wish for them to be present.

I have got to the Coach Sides fitting and things are drying up well one end, the rest were added yesterday.
BE1C032A-E206-474F-8989-C0CE5F388187.jpeg
 
Last edited:

Southwestforests

Registered
2 Nov 2021
212
46
60
Missouri
Best answers
0
Country flag
Interesting to see the build develop.
Left on my own without adult supervision I don't think wood would have ever come to mind for building model bogies ...
and real RR's used wood in their bogies in the early days and my family name is Wood! :D
 

ACD134

Medically Retired, G scale and 71/4 in the garden.
7 May 2019
18
0
61
UNITED KINGDOM
Best answers
0
Country flag
Would be very interested in a 4 wheel version to run around behind my Bachmann Toby.
 

3 minutes of fame

3d printing, electronics and trams
14 Dec 2020
574
154
Lincolnshire
www.mgnr.uk
Best answers
0
Country flag
Thanks for your efforts so far Jon.
I am taking your notes on board and will incorporate them into the final kit.

I am considering a 3D printed version of the bogie, or perhaps using 3mm ply rather than 2mm for it, as although the thin material gives a little flex - which is as designed, I fear it could be a little fragile in use.

A 3D printed version would allow me to get closer to the prototype. You will notice that I had to increase the width of the car slightly to get enough swing. Otherwise, the compromise would have been to increase the overall height of the coach so that the bogie sat below the frames.

Of course, a 4 wheel version won't have this problem, but I think that it might be too long to make the short radius curves on many railways.

ACD134 ACD134 , what scale is the Toby Tram? Can you let me have the height and width and I'll look at how I could scale the design to fit?

If anyone has the GRS resin model to hand, I would be interested in knowing the dimensions of that as well, so that I can do a 4 wheel coach to match it - at least dimensionally!
 

dunnyrail

DOGS, Garden Railways, Steam Trains, Jive Dancing,
Staff member
GSC Moderator
25 Oct 2009
26,169
4,993
75
St.Neots Cambridgeshire UK
Best answers
0
Country flag
Thanks for your efforts so far Jon.
I am taking your notes on board and will incorporate them into the final kit.

I am considering a 3D printed version of the bogie, or perhaps using 3mm ply rather than 2mm for it, as although the thin material gives a little flex - which is as designed, I fear it could be a little fragile in use.

A 3D printed version would allow me to get closer to the prototype. You will notice that I had to increase the width of the car slightly to get enough swing. Otherwise, the compromise would have been to increase the overall height of the coach so that the bogie sat below the frames.

Of course, a 4 wheel version won't have this problem, but I think that it might be too long to make the short radius curves on many railways.

ACD134 ACD134 , what scale is the Toby Tram? Can you let me have the height and width and I'll look at how I could scale the design to fit?

If anyone has the GRS resin model to hand, I would be interested in knowing the dimensions of that as well, so that I can do a 4 wheel coach to match it - at least dimensionally!
There were some pics by Penylanpip I think this morning or yesterday, that looked very much like the GRS Bogie Version to me.
 

dunnyrail

DOGS, Garden Railways, Steam Trains, Jive Dancing,
Staff member
GSC Moderator
25 Oct 2009
26,169
4,993
75
St.Neots Cambridgeshire UK
Best answers
0
Country flag
Thanks for your efforts so far Jon.
I am taking your notes on board and will incorporate them into the final kit.

I am considering a 3D printed version of the bogie, or perhaps using 3mm ply rather than 2mm for it, as although the thin material gives a little flex - which is as designed, I fear it could be a little fragile in use.

A 3D printed version would allow me to get closer to the prototype. You will notice that I had to increase the width of the car slightly to get enough swing. Otherwise, the compromise would have been to increase the overall height of the coach so that the bogie sat below the frames.

Of course, a 4 wheel version won't have this problem, but I think that it might be too long to make the short radius curves on many railways.

ACD134 ACD134 , what scale is the Toby Tram? Can you let me have the height and width and I'll look at how I could scale the design to fit?

If anyone has the GRS resin model to hand, I would be interested in knowing the dimensions of that as well, so that I can do a 4 wheel coach to match it - at least dimensionally!
Y6 W7’11” H12’11 1/4” L20’2 1/2
J70 Toby W8’0 1/2” H as Y6 L20’10 1/2”
 

penylanpip

Registered
1 Apr 2010
582
244
75
Barry, UK
www.gscalecentral.net
Best answers
0
Country flag
Young dunnyrail has pointed his finger at my W&U coach, which appeared in "eBay Mike's expedition".
It is indeed the GRS kit sitting on bogies, which I believe came from Brandbright, fitted with 28mm dia wheels.

W&U side.jpg W&U end.jpg

It measures, in mm - length: 465 over headstocks, 383 along saloon; width: 108 saloon maximum; railhead to roof apex: 133

Hope this helps, please feel able to contact me further.
 

AusrailQLD

Registered
10 Jul 2020
101
19
36
Australia
Best answers
0
Country flag
Would be very interested in a 4 wheel version to run around behind my Bachmann Toby.

You mean something like this?
 

dunnyrail

DOGS, Garden Railways, Steam Trains, Jive Dancing,
Staff member
GSC Moderator
25 Oct 2009
26,169
4,993
75
St.Neots Cambridgeshire UK
Best answers
0
Country flag
Some more work yesterday that should speed up a little now that I have some of the Speed Bond glue as recommended by Matt. Dries in about an hour, much better than my overnight spells using PVA. Though I guess that Speed Bond is a form of PVA.

Oh yes another tip that I have not yet passed on, when removing parts from the frets I always cut from below as the pips show better from that view. I regard the top as the side showing the scorch marks on the frets. This is proven by the varying parts having details that side.

Below you can see the end doors and side detail being held while the glue dries.
2371892A-4236-4E6B-B287-164B1D717C04.jpeg
Here you can see the Under-frame Components that are glued together being held whilst drying on some Cling Film to again stop adhesion to the workbench.

EDIT I GOT THIS WRONG, I SHOULD HAVE USED SLATER MICROSTRIP THAT I HAVE IN STICK. SEE PAINTED PICS.

The thin card cutouts are replacements for the 3D printed Beading that I consider a little thick for my needs. You can see where this will fit on the detail lines below the windows on the pic above.
6A5B2E74-90B4-441D-876C-E69377C17379.jpeg
Below can be seen the seats that have been glued up for the slight incline present on the front of the seat bottom. I have cut the back down to just 2 planks so that the seat does not sit above the coach window.
4804C5DB-B70A-4481-9D8D-B7FF6F2CF999.jpeg
Here you an just about make out that the trial fit has worked with the way I have modified the seat components. Not much of a back rest for our long suffering G scale figures, fortunately they do not have the ears of the chattering Railway Press.
52452516-D477-40C0-BA40-4D10C341AF75.jpeg
EDIT as noted in Post #10 and 28 the overlap pf the seat backs would have not been quite so large had I mounted the Coach Sides correctly, but a small amount would still have needed cutting off from the seat backs.
 
Last edited:

3 minutes of fame

3d printing, electronics and trams
14 Dec 2020
574
154
Lincolnshire
www.mgnr.uk
Best answers
0
Country flag
Thanks Jon.
I will modify the seat frames as the poor passenger's feet will be dangling in the air! This will then cure the seat height issue.

Glad you are enjoying the Speedbond! we got about 20 litres of it when we were doing the Model Railway Challenge TV show and we're still working our way through it! One member of the team who is into his model aircraft loves it, as he can use it for repairs instead of cyno, which keeps the wood more flexible and less likely to fail a little further along the joint.
 

3 minutes of fame

3d printing, electronics and trams
14 Dec 2020
574
154
Lincolnshire
www.mgnr.uk
Best answers
0
Country flag
Young dunnyrail has pointed his finger at my W&U coach, which appeared in "eBay Mike's expedition".
It is indeed the GRS kit sitting on bogies, which I believe came from Brandbright, fitted with 28mm dia wheels.

View attachment 292103 View attachment 292104

It measures, in mm - length: 465 over headstocks, 383 along saloon; width: 108 saloon maximum; railhead to roof apex: 133

Hope this helps, please feel able to contact me further.
Thank you! I will do a scale 4 wheel version of the kit to match the GRS coach