Tumble Down Falls

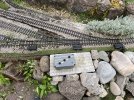
In two different post, I asked about fixing ballast and how support 'hanging' track. After thinking about dunnyrail dunnyrail response about concrete I went for that, and the use of SBR to hold the ballets, this is the result of the trial:

IMG_2219.jpeg
 
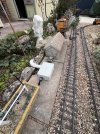
So to the expanded railway, as most of you will know slabs laid, and here are some photos:

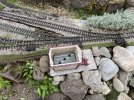
The new junction:

IMG_2218.jpeg

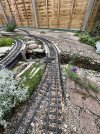
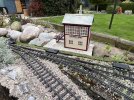
A view up the track:

IMG_2220.jpeg

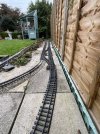
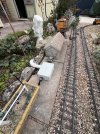
The track approaching seat corner, notice the track each side of the leg to ensure a better curve:


IMG_2221.jpeg

Round the bend, this will lead to a 'dog bone' return circle:


IMG_2222.jpeg

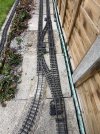
A nd finally a view back down the track:

IMG_2223.jpeg
 
So to the expanded railway, as most of you will know slabs laid, and here are some photos:

The new junction:

View attachment 328722

A view up the track:

View attachment 328723

The track approaching seat corner, notice the track each side of the leg to ensure a better curve:


View attachment 328724

Round the bend, this will lead to a 'dog bone' return circle:


View attachment 328725

A nd finally a view back down the track:

View attachment 328726
Very good JimmyB JimmyB , you are heading towards a system that could work for Timetable Operations.
 
With some subsidence on one of the gradient, remedial work was required. After track removal and ballast clearance the surface was piped and then levelled with mortar.

IMG_2415.jpeg

The track replaced, three fixed point, yet the original track had to be "jiggled" to fit. A couple of wagons run over yesterday, but today before re-ballasting, I will need a few test trains ;)

IMG_2416.jpeg
 
It seems it is almost 12 months since last posting here, so the main (and only real) change it power to my point (turnout) motors. Due to some hard landscaping in the garden, the original low voltage power cables were disconnected, and were left unpowered whilst I considered the options, basically over or under the path:

Path (removal off in progress) showing conduit under the step:
547092_IMG_2272.jpeg

New ramps in place:
547094_IMG_2290.jpeg

Arch in place to take conduit:
IMG_2954.jpeg

The new cables ready to connect to my existing Revolution point control modules:
IMG_2955.jpeg

Conduit exiting from the garage:

IMG_2956.jpeg

Over the arch, tape will be replaced by black tie-wraps:
IMG_2957.jpeg

Conduit to where the external junction box will be, the conduit was bent using heat from a hair drier:IMG_2958.jpeg

Next step, wire up in the garage (then a good tidy up), determine how/what to run to each of the points area, then fit the external junction box, and also find "camouflage" for the junction box, a small structure of some sort.
 
Back
Top Bottom