Trolley Track In The "street"

riderdan

Registered
30 Dec 2013
52
21
Kansas
Best answers
0
I posted this on the MLS site, but thought that it would be relevant here, too. The idea is for a section of "town" to have tram tracks embedded in the "street"

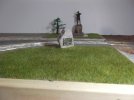
Here was my original idea:
streetcar-track.png


My final plan was to build a "base" to glue the foam to and then put that out where the town will go as a combination street/trolley track base. I'm using foam insulation in two 1/2" layers as the base. This is kind of like the picture above, but with an extra layer to make a solid base.

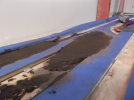
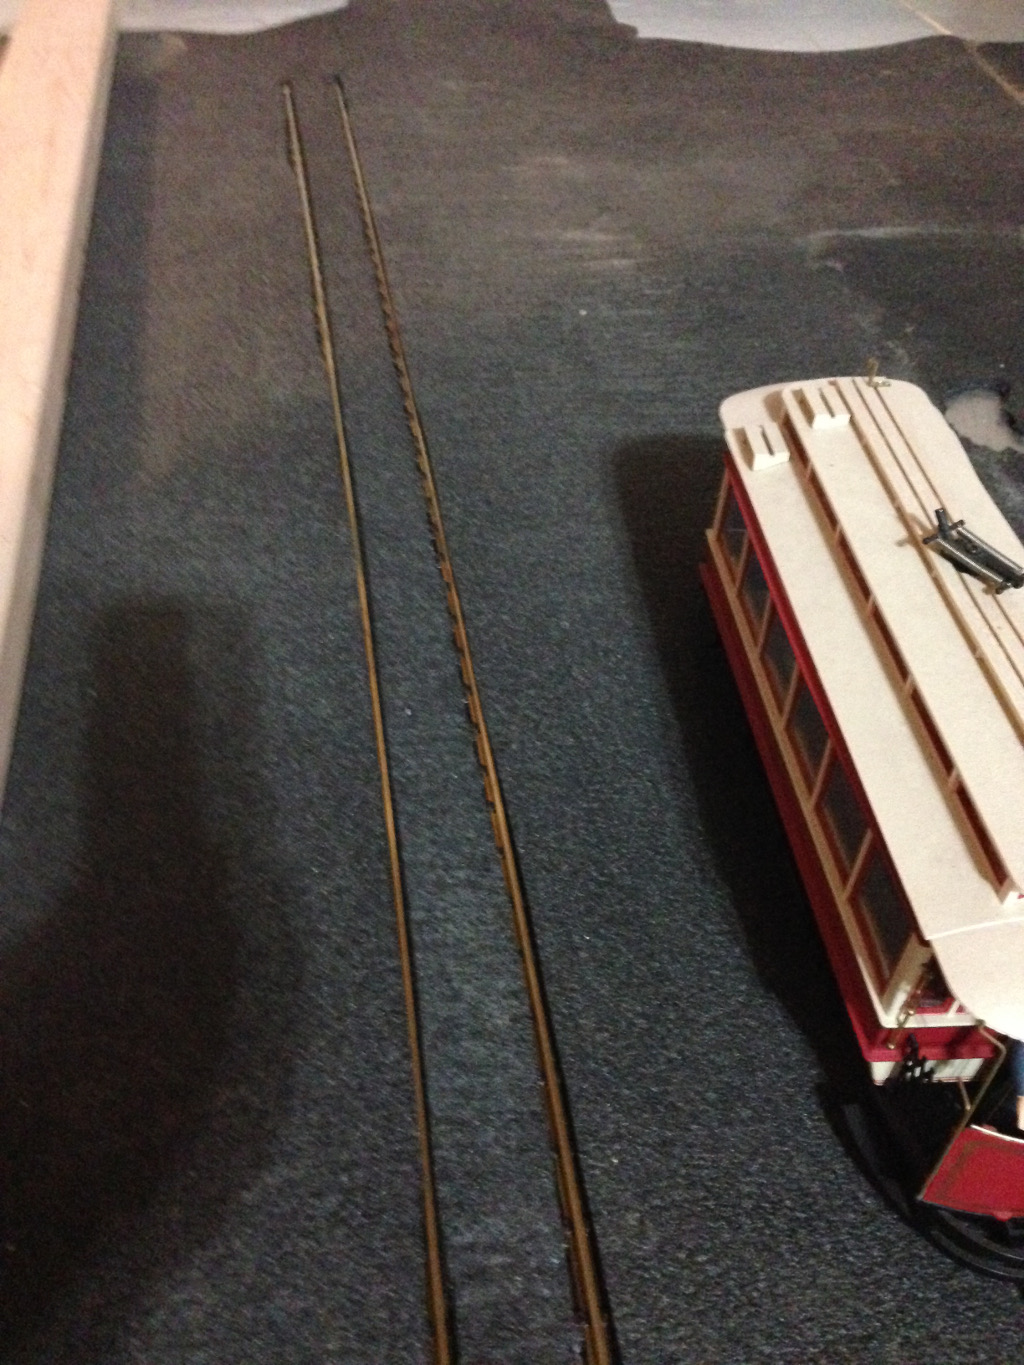
The first layer is a full 8x4 sheet of foam which I will cut down as needed. The second layer has been cut out to provide a place for the track (including ties) to set down into. On top of this, I put down the black foam I got from a fellow G scaler, and cut it to just the width of the outside of the rails. The piece that came out from between the rails I cut down to leave about 1/4" on each side for the trolley wheel flanges.

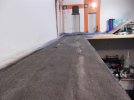
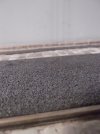
The pics below give an idea of how it will look--it's been glued up and I'm waiting for the side that's weighted down to dry so I can finish it up. The gaps you can see are where the foam isn't laying flat--they should go away when everything is glued down.


Since the "middle" layer is as wide as the track (including ties) I expect any debris that gets into the gaps will fall down into the open space out of the way of the trolley wheels. I'll cut/drill a number of holes to let any accumulated water out. I'll just have to wait and see what happens with the little bit of snow and ice we get here...

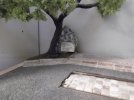
The dirty spots are where some buildings were sitting on it while it was out for a test. It didn't seem to fade, it just got a bit dirty :) I may (or may not, depending on the effort involved) put an additional piece of gray-painted foam down on each side of the street to represent sidewalks... we'll see.

I still haven't completely figured out how I'm going to handle the wind issue (I'm in Kansas where gust of 30mph are common). I expect that with 30 pounds of buildings and track on it, it will be less of a problem. I will probably bend two pieces of steel pencil rod and drive them down into the corners on the windward side just so the wind can't get under and catch it.

(Sorry for the Imperial units, it's been 20 years since I was in the military and I've forgotten most of what I knew about metric) :)
 

Madman

Registered
25 Oct 2009
17,144
2,959
Pennsylvania, USA
Best answers
0
Country flag
Nice idea. So what is the thickness of the top foam layer. Imperial measurement system okay.....:cool:
 

ntpntpntp

Registered
24 Oct 2009
7,450
275
61
UK
Country
United-Kingdom
Best answers
0
Country flag
"Let's just say we'd like to avoid any Imperial entanglements"
Obi-Wan Kenobi


One thing that's always stuck in my mind since I was a young lad: My dad gave me copy of Henry Boot's brochure on track construction from when he worked on the construction of Seaforth docks in Liverpool in the early 70s. I remember their illustration for track embedded in roadway shows the road surface outside the rails was chamfered downward to be lower than the rail-head, to avoid problems with worn wagon wheels riding on the road.

It's something I've always tried to incorporate on my small scale layouts where I've had embedded track, and if nothing else it makes it easier to clean the rails without rubbing and destroying the road surface!
 

riderdan

Registered
30 Dec 2013
52
21
Kansas
Best answers
0
Nice idea. So what is the thickness of the top foam layer. Imperial measurement system okay.....:cool:
The top foam is also 1/4". But it's not the stiff styrofoam insulating sheets, it's more the kind of thing you put under a sleeping bag when camping, or like anti-fatigue mats for standing on.
 
  • Like
Reactions: 1 users

Andrew B. Middleton

Registered
22 Jun 2016
164
23
71
Beechworth VIC 3747
Best answers
0
The only road surface I have made in the past was for 1:48/1/4" USA 0 scale. I used a kind of moulding plaster (or molding plaster) called "Agnew's Water Putty". It dried the colour of slightly dirty concrete. Of course I then painted it a light grey for clean concrete, and dark grey for a bitumen surface. Sections that were ballasted received H0 scale ballast. Be careful that you use only ballast where the colour is NOT water soluable! Happened only once, and the hobby shop owner was most apologetic and gave me a replacement bag from another supplier without cost. A late tramway modeller friend in Sydney (Graham Maynard) used Corn Flakes packet cardboard for road surfaces on his S scale/ 3/16" / 1:64 electric tramway layout. He also had the overhead fully powered, and made his own fittings!
 

dunnyrail

DOGS, Garden Railways, Steam Trains, Jive Dancing,
Staff member
GSC Moderator
25 Oct 2009
26,176
4,994
75
St.Neots Cambridgeshire UK
Best answers
0
Country flag
I have used differing methods both inside and out with varying degrees of success. My predominant use is to create Low Continental type Platform Surfaces but also Tram Type Track in Goods Yards.

Below I have used 5mm Black HIPS, cut and scored to represent Cracked Concrete. Problem outside as can be seen is the expansion that the heat creates. I also had to chamfer the edges so that it would meet the railedges over the chairs but does sit nicely on sleepers as can be seen in the second brutal close up.
image.jpg
image.jpg
Here outside I have used clear 3 or 4 mm Plastic Sheet from BnQ, works nicely on straights but probably more problematical on Curves and Points as it is best cut with a Squawker. Sits nicely on the Chairs but a bit high for my liking, sprayed Grey with some black to reoresent oil leaks between tracks.
image.jpg
Inside I have used some 2mm plastic sheeting again from BnQ, this is much better as it sits nicely below the Peco when sat on the Chair heads. A little lower between the rails of course. I Spray this with a wettish cheepo Matt Black then cover in Kiln Dried Silica Sand, giving another spray to seal the very fine Sand in place. I rather like this effect.
image.jpg
I have had problems with uploading more than 5 files when taking with the iPad so may need to do another post for the LGB Track solutions that I have used.


Doh dur brain, was trying to use iPad take pic now option in the Shed where the WiFi does not reach to. Must invest in a WiFi extender, recent offer by BT looked promising.

Here is my LGB option, at the front I have used a bit of 10mm Hips between the rails with Plasticard Squared glued on to represent Cobbles. Between the tracks I think I used the same method mounted on Square Wood just under the depth of the Rail between the sleepers then cut the plasticard to go to the Rail Edge, this method worked well for points as can be seen just behind the Tank Wagin where the LGB Tram Platform ends before a point. The LGB Tram Platform or whatever is rather good, but lacks Point Sections and is horribly expensive. I picked up a few sections cheep on Ebay some years back before I moved to the nits.
image.jpeg
JonD
 
Last edited:
  • Like
Reactions: 1 user

Andrew B. Middleton

Registered
22 Jun 2016
164
23
71
Beechworth VIC 3747
Best answers
0
I am not sure why you would have used steel brads or small nails to keep the material in your outdoor photo, Dunnyrail ? Also what are Hips ? The indoor section definitely looked much better as a road surface. It would be good if you could find another method of keeping the surface down for the outdoor section of the paved track.
 

Nodrog1826

Professional Idiot
21 Nov 2013
8,990
2,731
United Kingdom
Best answers
0
Country flag
Hips.

That's what hurt when you bend up and down to get to your railway, also add back and knees as well...;)

or...

High Impact Polystyrene Sheet...:D
 

dunnyrail

DOGS, Garden Railways, Steam Trains, Jive Dancing,
Staff member
GSC Moderator
25 Oct 2009
26,176
4,994
75
St.Neots Cambridgeshire UK
Best answers
0
Country flag
I am not sure why you would have used steel brads or small nails to keep the material in your outdoor photo, Dunnyrail ? Also what are Hips ? The indoor section definitely looked much better as a road surface. It would be good if you could find another method of keeping the surface down for the outdoor section of the paved track.
Steel Nails - onlybones I can get of right size with flat head. Plus rust looks natural but more importantly do not tend to work out of wood brass ones do due to expansion and contraction pressing on the point and lifting them.

HIPS - High Impact PolyStyrene plastic sheet.
JonD
 

No72

Registered
21 Dec 2014
221
199
Melobourne Australia
Best answers
0
Because I have too much time on my hands I did mine the hard way. I laid individual stone setts between the track then as a road surface I spread a sloppy mix of Acrylic exterior render down. then over the top of that while still wet and sticky I sifted gravel dust that is finer than sand ( I got it from a landscape supplier by asking nicely if I could sieve some "scalpings" to get the dust) I'm really chuffed with the final outcome, even the texture looks reasonably scale and the colour looks ok for a sealed road.
 

Attachments

  • DSCF2037 (Medium).JPG
    DSCF2037 (Medium).JPG
    187 KB · Views: 0
  • DSCF2047 (Medium).JPG
    DSCF2047 (Medium).JPG
    204 KB · Views: 0
  • DSCF2049 (Medium).JPG
    DSCF2049 (Medium).JPG
    204.8 KB · Views: 0
  • DSCF2051 (Medium).JPG
    DSCF2051 (Medium).JPG
    208.3 KB · Views: 0
  • DSCF2060 (Medium).JPG
    DSCF2060 (Medium).JPG
    215 KB · Views: 0
  • DSCF2061 (Medium).JPG
    DSCF2061 (Medium).JPG
    217.7 KB · Views: 0
  • Like
Reactions: 2 users