Track making/making tracks: the good, the bad and the ugly, advice and thoughts wanted, explanation is giving(incl mistakes)

justme igor

Registered
17 Apr 2020
682
64
Netherlands Westwoud
Country
Netherlands
Best answers
0
Country flag
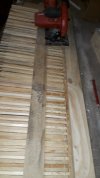
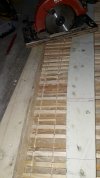
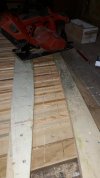
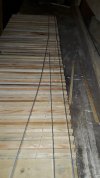
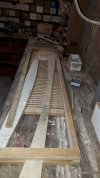
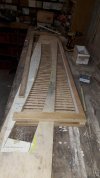
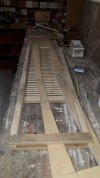
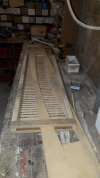
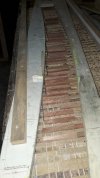
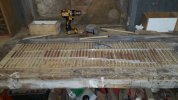
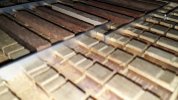
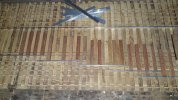
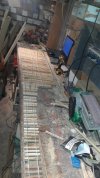
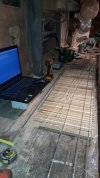
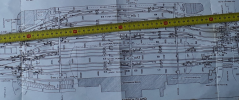
There is a lot more than it meats the eye.
Even some serious measurements occur once in a while..

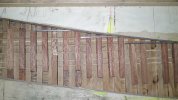
20211222_174619.jpg
20211222_174625.jpg
 

justme igor

Registered
17 Apr 2020
682
64
Netherlands Westwoud
Country
Netherlands
Best answers
0
Country flag
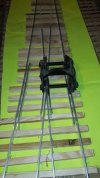
20211222_190514.jpg
20211222_190949.jpg
20211222_190958.jpg
20211222_193442.jpg
hmmmm it starts to work and look like turnout?!?!????
With those jigs i can make all i want, if they will work to my satisfaction, probably must sand the curve a bit (yes i did keep this the jig wider...i know what i am doing!)(before some people start to cry again, it is a experiment!!).

With best regards Igor
 
8 Mar 2014
7,806
972
San Diego
Country
Armenia
www.elmassian.com
Best answers
0
Country flag
No one is crying, why do you say stuff like this? It's confrontive and somewhat rude. If you want comments, but then say stuff like that, people will stop commenting.

Of course if you don't want any input, then let us know. I will honor your request.

Greg
 

justme igor

Registered
17 Apr 2020
682
64
Netherlands Westwoud
Country
Netherlands
Best answers
0
Country flag
Things are getting a bit more serious.
Thinking about this for over one year on how to do it, planning for the last six months on how to execute.
The first couple experiments where promising and encouraging.
Now with some time extra spend on those jigs, here are the results, i am not there YET, but i will get there.
20211223_143017.jpg
20211223_143029.jpg
20211223_143118.jpg
20211223_143056.jpg
With the curves, in this case (middle panel)5 meter/196 inch/16 foot in radii, would be in real= 160 meter/524 foot/7,95chain aka for dutch standards 80 kmh/50 mph(if i remember correctly).
As you can see it will be a very small trick to make a new inside panel with a different radii.
(I am still NOT pleased with the inside panel!)
As you can see also i can flip it around to my liking for a left turn or a right turnout, even get it more upfront for a three way or what ever, i can even turn it around a full 180 rotation(no picuters) for a crossover or ......
 

justme igor

Registered
17 Apr 2020
682
64
Netherlands Westwoud
Country
Netherlands
Best answers
0
Country flag
With the strait piece jig i can go 3 way's:
20211223_144821.jpg
20211223_145013.jpg
20211223_144942.jpg

So a crossover can be made, even with a curve in it :cool: :cool:
 

justme igor

Registered
17 Apr 2020
682
64
Netherlands Westwoud
Country
Netherlands
Best answers
0
Country flag
Are we there yet.....NO not even by long shot, here comes number three:
 

justme igor

Registered
17 Apr 2020
682
64
Netherlands Westwoud
Country
Netherlands
Best answers
0
Country flag
Now the most tricky part, to lock up the ties/sleepers and keep them secure also to cut them on length on forehand, to reduce a minimum of waste and effort to make ties/sleepers.
(i will update my signature with some links)

Sorry i did not make a picture of the completed jig "mother" board, i simply forgot, but i think you will see it in the pictures.

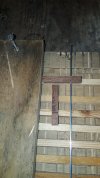
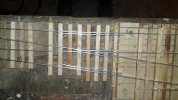
20211223_170610.jpg
20211223_170429.jpg
20211223_170504.jpg
20211223_170439.jpg
20211223_170633.jpg

I still must make a "tool/device" to establish the right settings for the alu strip that will dictate the length of the sleepers/ties.
And a jig for the sleepers to cut them off at various lengths, those are all fixed lengths(20 or more of them), now this jig is in my mind but to execute it will take a full day.

For the first initial test run????? i hope tomorrow, to check the gauge, again i hope tomorrow.
I dont suspect that the gauge will be "pure/accurate" in the first test run.

I hope the picture's speak for themselves.

Time my friends...TIME...you can spend it once, and it is running low and out, can not buy.
Groceries with my better half tomorrow and some quality time together...
Oh yes.... something with Christmas and family, incl in law ect, and my roof....sorry this saga will continue next week.


With best regards Igor K.
 

justme igor

Registered
17 Apr 2020
682
64
Netherlands Westwoud
Country
Netherlands
Best answers
0
Country flag
Preparation for a simple turnout:
20211225_161304.jpg
20211225_164343.jpg
20211225_170210.jpg
 

justme igor

Registered
17 Apr 2020
682
64
Netherlands Westwoud
Country
Netherlands
Best answers
0
Country flag
With those jigs it is really easy, that easy it can be almost commercial...
20211225_182937.jpg
The test boogie was very happy, me also: all the measurements where accurate, exactly 45mm as gauge.
For between the safety rail and the stock rail and for the frog "gaps" i did a 3mm spacing.
P32 scale is very nice but with flanges and those bigger locomotives, i think it is more clever to widen up a bit.
Would 4 mm be embarrassing for the real big ones(like the AA20, big boy, red devil and such)?

20211227_163626.jpg
Anyway spacers are a big help.

20211227_185355.jpg
It still needs heel blocks, it is in the process as last, this will follow before applying glue/putty
When surging the internet for pictures, i am going to stay with the frogs this way, with a bold or two added, after 1940-50 most railroad companies used complete(cast/one piece) frogs instead of assembled frogs.
All i build will be pre ww2.

20211227_185217.jpg
20211227_185322.jpg
That will be a double slip cross over, i will finish it without the points/toe becous they are a lot of work, i will make one or two, it is just a experiment.

But everything is going this good i regret i did not used hard wood, this one is going to be a keeper, if it was hard wood(azobe).
I dont think this experiment is something to be ashamed for?
I am pretty pleased with this experiments end result, quality and time that is.

With best regards Igor
 
8 Mar 2014
7,806
972
San Diego
Country
Armenia
www.elmassian.com
Best answers
0
Country flag
Yeah with all that work, you would want to preserve it and use it.

A little confused, you are going to NOT make the points, so your experiment was basically the jig?

I agree, using this jig and method for turnouts is interesting, and seems pretty fast for "bar type" rail.

The frog looks to be about a #5 or #6.

Grg
 

Paul M

Registered
25 Oct 2016
11,921
1,700
61
Royston
Best answers
0
Country flag
Things are looking good Igor. If the jigs work as well as they seem to, you could be on a definite winner :clap: :clap:
One small consideration though, are you going to mount the sleepers (ties) on a base board? If not, it won't be easy to pick up with out it bending
 

ge_rik

British narrow gauge (esp. Southwold and W&LLR)
24 Oct 2009
10,702
1,244
Cheshire
www.riksrailway.blogspot.com
Best answers
0
Country flag
A really fascinating thread, Igor. I like the way you seem to have no fear of trying out new ideas and learning by experimentation. It looks like your station is going to be a work of art!

Rik
 

justme igor

Registered
17 Apr 2020
682
64
Netherlands Westwoud
Country
Netherlands
Best answers
0
Country flag
Yes the putty is strong enough after curing to lift and to keep the whole complex together without deformation.

Only by means of trail and error you can figure things out, learning step by step.
If i wanted to create 1 turnout or a few meters of track i would be done a long time ago with not very satisfying results.

a small update on the 3d printed 5 way switch printed with abs.
It will work perfect, but:
When the temperature is dropping with just(in this country) 15C (from 20C to 5C) the shrink will be that big it will bulge and work the strips out, leading to a disaster and a rebuild when temperatures getting back to comfortable level.
Further more the amount of alu strip is just to much to keep a tight fit into the sleepers, it will bulge also.
To redo this project, i decline/ i wont do it:
If making the slots just 0.1mm/0.004 bigger i am afraid it will be a bit to wide when the temps are getting higher.
For normal tracks this would not be a problem, for double slips, 3 way switches the amount of aluminium is just to much in conjunction with the temperature scale.

Now we are at it, if you where following this thread closely:
I bought several in thickness variance saw blades(cutting line width?).
I can state this for the use of a TWO mm thick alu strip.:
#1 For the use of SOFT woods it will be no problem to use 1.8mm cutting width saw blade up to 2.2mm cutting width before it is getting ugly and the putty is poring all over(thinner than 2.0 you will not need putty btw).
#2 For the use of HARD woods it is NOT recommended to use blades with a cutting width smaller than 2.0mm.
#3 Even for some really hard woods like palisander mahogany and azobe is 2.1mm recommend and not smaller, this is due to the expansion of when the wood is getting wet.
#4 If using a cutting width of 2.0mm and thinner with very hard wood(#3) the track will look if it was salvaged from a earthquake.
In #2 and #3 cases the sleepers will crack open, pop off the side where the alu strip is in the slot, i hope this jibberjat will make any sense?
More than 10% of the sleepers will "crack" open at the slot, pushing the side off.

In all cases it is not recommend for good looking unless you want to cut of excesses putty to use a saw blade wider than 2.2mm.

I also found out the usefulness of those heel blocks, it will maintain gauge better when gluing it all together and it will give as a bonus a better more realistic look.
As stated before i will let go of the prototypical scaling if i want to have bigger loco's running on my railroad.
For the smaller ones (max 3 driving axles, the flying Scotsman will be at the max) it would be no problem to maintain the p-32 scale.

With the heel blocks and with the frogs ect the inner gauge can be 39mm if 3mm heel block are going to be used, this will give me room for the really big ones on all my tracks except for the radii of course.
But i am still puzzling if i am going to use a 2mm thick or a 3mm thick heel block,
I need 41mm minimum on a 5 meter radii turnout.

I can smell the finishing line, but it is still dark outside.
Apparently the tracks i would like to recreate (soviet pre ww2) does look better with a wider gap between the rails and the safety rails incl frogs.
But i need to dive into this more thoroughly.

Btw i changed the sawing jigs to more of a conductor ruler, they are more easy to make and more accurate(keeping in mind for different radii)
The "motherboard" will have a extension of 240cm.
Expanded in size= 1 time 120cm plus 1x 240cm makes 360cm by 60cm slotted motherboard.
I also changed the way how i am going to work with it, you will see when i have time for this one.

With best regards Igor
 

dunnyrail

DOGS, Garden Railways, Steam Trains, Jive Dancing,
Staff member
GSC Moderator
25 Oct 2009
26,218
4,998
75
St.Neots Cambridgeshire UK
Best answers
0
Country flag
The test boogie was very happy, me also: all the measurements where accurate, exactly 45mm as gauge.
For between the safety rail and the stock rail and for the frog "gaps" i did a 3mm spacing.
P32 scale is very nice but with flanges and those bigger locomotives, i think it is more clever to widen up a bit.
Would 4 mm be embarrassing for the real big ones(like the AA20, big boy, red devil and such)?


With best regards Igor
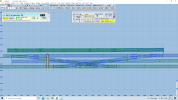
Igor,
I have measured the gaps on my Peco, TrainLine45 and LGB points. The results surprised me a little, all Check Rails (safety rail) were the same at 3mm gap. However Frog (Switch to US) gaps were 4mm on both Peco and TrainLine but 4.5mm on LGB points. I used my German made Vernier Calipers that I tend to trust. This may appear odd, it does to me and may suggest if you did both at 4mm you may have issues with your rolling stock perhaps bashing the pointy bit of the frog. However it looks like the LGB option may suit you but that may cause difficulties on the curved side safety rail with you big locs.
 
  • Like
Reactions: 1 user

justme igor

Registered
17 Apr 2020
682
64
Netherlands Westwoud
Country
Netherlands
Best answers
0
Country flag
Some body said "station"??
The thick green tracks are for measurement, also the "standing" white one.
Centre to centre i need 12.5 cm, total length of this one: 360cm from points to points.
Platform to platform 35 cm.
piece of the station.png
4 turnouts, 2 double slips and 1 cross over all in a 5 meter radii as smallest curve
piece of station 2.png
From 45cm to 94 cm on the tape it translates to rufly 20 meters in the garden.
The line at 72cm is the overhead signal post.
I am not going to construct this station in his whole...yet, but i will make certain parts of it to implement in the garden.
Btw this is the original drawing/diagram of the station in 1936, they did not chance much in between the platforms sins that time, except adding some platforms, outside this piece? a lot more changed.
 

justme igor

Registered
17 Apr 2020
682
64
Netherlands Westwoud
Country
Netherlands
Best answers
0
Country flag
all Check Rails (safety rail) were the same at 3mm gap. However Frog (Switch to US) gaps were 4mm on both Peco and TrainLine but 4.5mm on LGB points.
WOW o_O o_O
That sound very big to me, but it makes sense, if you give it a thought or two.
A lot of different manufacturers want to roll on different tracks.
I think i will settle with 3mm instead of 4mm, i would like to get away with 2mm, but with the big ones? i dont think 2 mm gap wiil stand a chance.

Even on your biggest turnout? i dont know what your biggest is? 1:6?
Or does this not matter on what size turnout you have?
It would be logical for me that when the turnouts are getting bigger the gaps are getting smaller?

Thanks for this information, i am very happy with it.

With best regards Igor
 

justme igor

Registered
17 Apr 2020
682
64
Netherlands Westwoud
Country
Netherlands
Best answers
0
Country flag
I used my German made Vernier Calipers that I tend to trust. This may appear odd
No this is not odd, i have for over 25 years a ruler, caliper and some gauging scales that won't leave my shed. i use those for calibrating my machinery and when things are getting serious.
 
8 Mar 2014
7,806
972
San Diego
Country
Armenia
www.elmassian.com
Best answers
0
Country flag
The interactions between manufacturing tolerances, check gauge, back to back gauge, and the flangeway widths on the frogs and the stock rails all work hand in hand.

When I started, I did not understand all of this, and many people advised to change just the wheels or just the turnouts/switches.

When I finally understood how all of this works together, then a lot of things made sense.

LGB and the others that copied them here in the US (Bachmann, USA Trains, Aristo) had the same wide tolerances, under spec back to back and wide flangeways, and huge throats on the frogs.

You cannot "tighten" one without the other.

Now I follow a synthesis of G1MRA and NMRA standards, and I have gone from derailing 7 car trains to running 50 car trains. It can be done to get closer to the prototype, but it needs improvement from "off the shelf" in both track and wheels.

LGB is really fun since they make flange-bearing frogs, an added wrinkle.

Greg
 
  • Like
Reactions: 1 user