Soldering Guns

I use a Weller 80 watt, though this can struggle
 
I use a Weller 80 watt, though this can struggle


The only soldering to brass rail that I've needed to do was attaching the power feeds at three points round my circuit... for that I bought a cheap 100W iron from Rapid - about twenty squid - and it did the job admirably....

Jon.
 
I've never used a soldering gun - having relied entirely on soldering irons :mask:
 
Many decades ago I did have a 100W Weller gun, used (not always successfully, I would add) for soldering up packs of NiCad batteries during my R/C Boat modelling phase.

Jon.
 
Does anyone use a 150/400 watt Wall-Lenk soldering gun?

What is your soldering gun of choice for soldering brass rail and brass repair?
John:
I have used these successfully to solder rail bond wires and can attest to their strength and durability. The tip is a bit bulky to make optimal contact with the rail web, and the tip and barrel retain heat long after the trigger is released. I have shifted to Weller D 550/650 which, to me, seem to apply heat more effectively, albeit with limitations as to the duration of use cycles.
 
If you are in the market for something new would a Resistance Soldering Set up work well for track?
 
I use a small gas blow torch (Burnz-o-matic brand) ST2200T - Detail Torch for Hobby and Household Use.

It heats the rail real quick and I usually take less than 2 minutes per joint.

Mechanically clean the area till it is bright (I use a small file) then apply flux (not soldering fluid) heat joint & add solder (which is electrical grade 60/40 as opposed to plumbing grade 50/50). I take advantage of solders natural trend to wick into narrow spaces to get a good solid joint.

The last 2 joints I did a week ago are in the middle of a curve and there is no sign of kinking yet nor do I expect it will as the joiner/rail joint is full of solder.
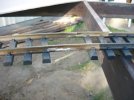
Solder Joint.JPG

To reduce sleeper damage I use heat sink clips which are actually stationery fold back/bulldog clips, but I try to solder with the sleepers at least 100mm away from the joint I then slide them into position after the joint has cooled.
 
If you use a really hot iron that heats quickly and high in wattage, you can solder without moving the sleepers away.

Also, I have had many people have issues with soldering the joiners, reporting that that the solder fractures over time due to the stresses of expansion and contraction.

An alternative method is leave the joiners there for mechanical alignment, but solder a copper jumper between the sections with some loop in it so motion will not flex the soldered joints.

Greg

The temperatures I get my rail to, the sleepers would melt no matter how fast I was.

I'm not soldering for electrical conductivity I am using it for a mechanical joint, the "joiners" are really only there to align the track pieces and provide lateral mechanical strength, what I am doing is similar to what plumbers do when joining copper water pipe using silver solder.

Not having ready access to rail clamps I have resorted to this method and it is working for me, I only use it on lengths of rail that form a curve with a join in the middle.

I have used the method for nearly 15 years in both a climate where the winters were cold (4C) and summers hot (42C) and in my present climate, winter (10C) and summer (35C), without any fracturing issues.
Fracturing may be an issue in colder climes that I have no experience with low temps except in my freezer.

I anchor the sleepers either side of the joint for added mechanical support and use non soldered joiners, with a 1mm gap between rail ends, at either end of the total length as expansion/contraction joints (if I was looking for conductivity I would use flexible jumper across the joint).
 
Soldering joiners can be a bit of an issue, ok to do one on each rail bit like the alternatives of LGB fishplates as on the settrack. Bit if you do both then you have issues of un soldering you need to lift for changes or move. One rail with some wire for bonding when together to the non soldered side then soldering the wire is possibly a better bet. If you do that BLACK WIRE PLEASE,
 
Ha ha but for that last visible bit brass works so much better, goes black rather than green and weathers well. However yes rule 1, just live to see red, pink and even yellow wires ( or even more colour horrors) sticking out in pictures.
Can you solder BLACK wire, all mine is copper :) :)
 
Back
Top Bottom