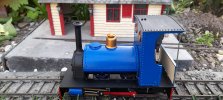
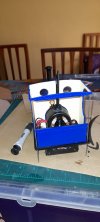
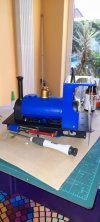
Not happy at all! I thought I'd give another test run before sticking the cab on place. But....when I tried it before fitting the boiler etc, it worked perfectly, but tonight it jammed solid 
 . I found that something had moved and mucked up the quartering. So to cut it short, the loco is now back in pieces, hopefully to be reassembled tomorrow. Not impressed with the nylon gears either everything keeps flexing. An upgrade will be needed before long
You are using an out of date browser. It may not display this or other websites correctly.
You should upgrade or use an alternative browser.
You should upgrade or use an alternative browser.
PDF Ruby Build
- Thread starter Paul M
- Start date
Rhinochugger
Retired Oik
I think the first thing you need to do is to cover that table before you take any more photos 


Quartering should be fairly easy with a 4w loco - try opening out the holes in the con rods just a smidgen, or even just elongating them a touch

Quartering should be fairly easy with a 4w loco - try opening out the holes in the con rods just a smidgen, or even just elongating them a touch
I had it all set perfectly, but something must have changed. I seem to have sorted it now, but I've a feeling that I may have to invest in a different motor/gearbox. One of those axle mounted jobs looks like a good ideaI think the first thing you need to do is to cover that table before you take any more photos
Quartering should be fairly easy with a 4w loco - try opening out the holes in the con rods just a smidgen, or even just elongating them a touch
Rhinochugger
Retired Oik
They're quite lightweight - good enough for a single car tram, but the tram builders are saying to use two if the tram pulls a trailer.I had it all set perfectly, but something must have changed. I seem to have sorted it now, but I've a feeling that I may have to invest in a different motor/gearbox. One of those axle mounted jobs looks like a good idea
I'd persevere with the worm drive, and jiggle with the quartering - it could be a number of things:
- Frames binding on the wheel journal
- Con rod bearings too tight - I'd only fiddle with the quartering if the binding is just at one or two points in one revolution.
- Gears binding - you need a bit of play between worm and gear (probably teaching my grandmother to suck eggs now)
- Axle bearings / journals
Rhinochugger
Retired Oik
Probably the safest lube is dry graphite, if you can get any. There is an Eze-e-lube one.I've not lubricated it yet, mainly because I'm worried about the problem you had. I've adjusted everything andi truns soothly across the table, I'll put on the rails again tomorrow and see what happens.
Right, totally hacked off now! Touch of lub and a proper test run, which lasted 5 minutes before the nylon gear stripped. Fortunately a quick moaning email to PDF resulted in a promise of a new gearbox, and the advice to use steam oil as a lubricant, not clock oil, which i thought would be plastic friendly.
So......I will have to completely disassemble the loco and rebuild it. Which I suppose COULD be looked as having 2 kits for the price of 1, but bl**dy annoying all the same.
So......I will have to completely disassemble the loco and rebuild it. Which I suppose COULD be looked as having 2 kits for the price of 1, but bl**dy annoying all the same.
Rhinochugger
Retired Oik
The best set of model lube ever was the Eze-e-lube 6 pack. I'm coming to the end of my second pack, and am not sure where to get anotherRight, totally hacked off now! Touch of lub and a proper test run, which lasted 5 minutes before the nylon gear stripped. Fortunately a quick moaning email to PDF resulted in a promise of a new gearbox, and the advice to use steam oil as a lubricant, not clock oil, which i thought would be plastic friendly.
So......I will have to completely disassemble the loco and rebuild it. Which I suppose COULD be looked as having 2 kits for the price of 1, but bl**dy annoying all the same.
Another trial run yesterday, and it was almost a success! Unfortunately removing some wheels when replacing the gearbox compromised their tightness on the axle, I'm hoping a dab of glue will work. Not really recommended but needs must. It actually runs quite well, but needs a bit more weight somewhere, its easily knocked of the rails by encroaching flora

At last, after lots of bad language, head banging etc, etc it is finished, albeit with a temporary driver. It actually works very well now, it obviously not for lling long trains, but as something to trundround the garden with a wagon or two, it seems fine.
Although I had problems, PDF, were always extremely helpful and very quick in supplying the missing parts.
Things I have learnt
1) Superglue sticks anything, as long as you want "the anything" to stick to you.
2) I can now rob a bank without leaving fingerprints (see above)
3) My fingers are sore
Rhinochugger
Retired Oik
It's a good looking little locoView attachment 284406
At last, after lots of bad language, head banging etc, etc it is finished, albeit with a temporary driver. It actually works very well now, it obviously not for lling long trains, but as something to trundround the garden with a wagon or two, it seems fine.
Although I had problems, PDF, were always extremely helpful and very quick in supplying the missing parts.
Things I have learnt
1) Superglue sticks anything, as long as you want "the anything" to stick to you.
2) I can now rob a bank without leaving fingerprints (see above)
3) My fingers are sore
Thank you. It is a nice model, the worry i had about lines on the 3D printed parts were pretty much unfounded, the use of filler spray and wet and dry was all that was needed. Sticking the bits was problematic, glue doesn't really stick to paint, which creates difficulties if you've sprayed the separate parts. Something to remember next time.It's a good looking little loco
Rhinochugger
Retired Oik
There's all sorts of issues with glue, largely dependant on the type of glue you're using.Thank you. It is a nice model, the worry i had about lines on the 3D printed parts were pretty much unfounded, the use of filler spray and wet and dry was all that was needed. Sticking the bits was problematic, glue doesn't really stick to paint, which creates difficulties if you've sprayed the separate parts. Something to remember next time.
Standard UHU is good on painted parts because it eats through the paint - the problem is when it gets on somewhere visible.
It's probably safest to do a bit of paint removal from the surfaces to be glued.
UHU solvent-free is pretty OK but takes ages to set - but then, if you've glued a painted surface, the bond is only as good as the bond between paint and background.
Having said all that, I rarely paint before assembly.
maxi-model
UK/US/ROW steam narrow gauge railways 1:1
I find a fair bit of carefull planning is required when building any loco or rolling stock kit. I try to build up sub assemblies for like coloured components, carefully masking or cleaning off any areas where any type of bonding agent is used to attach these sub assemblies together. Choice of adhesives used is important, if one is not working with metals and soldering. While I will use a PVA type with wood I also use cyanoacrylate (CA) types for some types of jointing with those types of material - that or miniature wood screws. Certainly CA type adhesives work very well with polyurathane/polyester resins and can be used with some plastics. My preference with styrene and ABS plastics is to use a solvent based adhesive. In all cases there is little point in trying to attach paint to paint, so keep the join free of anything that will interfere with the bonding process.
One exception is where I am attaching details, like figures, with a large contact area. My go to for these purposes are silicon based adhesives - Evode's "Seriously strong glue" is one of the best. Although contact adhesives will do too but are a sod to separate when positioning or separating a part at a later date. All these are good where one needs a little "give" in a joint to absorb shocks.
While I have built kits with 3D printed part content I am still not totally convinced of their benefits. Yes, if the maker thinks the market is that limited for a product that producing a limited run of resin parts will never sell through. But the problem with 3D printed parts is most are produced at a lower resolution, possibly for cost purposes, with those stratification lines that can only really be overcome with a solvent or filler primer - in both instances that means you cannot incorporate fine detail effectivly. I have noticed now that some pioneers of 3D printed kits have realised this and are now making greater use of resin moulded components as a result. Max
JimmyB
Now retired - trains and fishing
Have to agree about painted parts, often the dilemma, paint first or glue first, normally (for me) a bit of both.Thank you. It is a nice model, the worry i had about lines on the 3D printed parts were pretty much unfounded, the use of filler spray and wet and dry was all that was needed. Sticking the bits was problematic, glue doesn't really stick to paint, which creates difficulties if you've sprayed the separate parts. Something to remember next time.
I used a solvent plastic weld liquid, some parts it stuck without any trouble, but the cab was a pain, even after scraping off any paint in the area, it was still reluctant to stick, and released after a day or 2, in the end I backed up with Gorilla Superglue. Next time I'll do the glueing first!
As I said, the actual 3D printed parts were very good in this kit, not a lot of effort needed to make a smooth finish.
I would recommend one, on the condition that you use the upgraded gears, the original ones were awful, and didn't work at all, just stripped.
As I said, the actual 3D printed parts were very good in this kit, not a lot of effort needed to make a smooth finish.
I would recommend one, on the condition that you use the upgraded gears, the original ones were awful, and didn't work at all, just stripped.
3 minutes of fame
3d printing, electronics and trams
3d printing relies on 3 requirements to reduce visible lines. Although resolution is important - particularly where curves are involved, accuracy - the ability to print each layer perfectly on top of the last and layer height - the amount of "squish" or deformation the extruded filament undergoes all contribute to reducing visible lines.
The typical 3D nozzle is round, so the extruded filament is equally round. By adjusting the layer height slightly, the filament will deform slightly and the roundness reduced somewhat.
Very few model kits are printed on commercial filament printers, but I did get some carbon fibre parts printed on a Markforged printer and the line effect was virtually none existent.
Shapeways use selective laser sintering and this reduces the line effect to almost nothing, as does resin printing. The downside of both these processes is the cost of material and the printer itself. Resin is over twice the price per kg of filament and wastage tends to be higher. An SLS printer is probably in the region of £50k+, so well out of reach small niche manufacturers.
Rhinochugger
Retired Oik
I would not have expected to use solvent weld on 3D printed parts 


