Questions on getting into these railcars crop up about once a year so I though I'd provide some insights gained from opening my Bernina ABe 4/4 I multiple times.
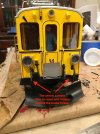
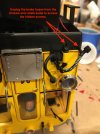
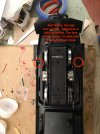
The first two pics show the 4 small screws that outwit everyone on their first attempt!
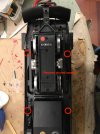
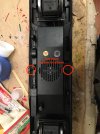
Next the location of the other 8 screws that fix the body to the chassis.
Next up - the sliding doors - you can tape them to the body now or later. If you try to re-assemble the railcar without doing this... well all I can say is good luck!
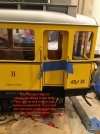
With the railcar resting on its roof and the 12 screws removed the chassis can be lifted free of the body. Watch out for the headlight wires on both ends as you separate the chassis.
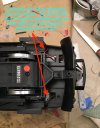
Don't forget to add some more passengers now that you've got the loco open!
I found it easiest to lower the body onto the chassis when re-assembling the railcar. You will need to fiddle with it a bit to get it lowered over the seats. Don't force it all the way down! There will undoubtably be some pinched wires! Carefully turn the railcar over so it is resting on its roof again. Then tease the headlight wires out so they are free. I used a pair of tweezers to do this. Also beware of the wires that pass through the bathroom compartment. Finally, make sure no wires get pinched between the 1st/2nd class compartment divider and chassis floor. You may need to raise the body slightly in order to tuck some wires away with your tweezers.
Now, before you put the screws back in, put the railcar on a test track and make sure everything is working to you satisfaction.
I did not want to needlessly open my railcar for these disassembly / re-assembly hints. If someone wants to add more pics and hints or observations to this thread please feel free. My ABe 4/4 I has been apart for various reasons 4 times in the twenty years I've had it. But, I did this post from memory and may have left out something important.
Edited to correct title from 2x37x to 2x39x!
The first two pics show the 4 small screws that outwit everyone on their first attempt!


Next the location of the other 8 screws that fix the body to the chassis.


Next up - the sliding doors - you can tape them to the body now or later. If you try to re-assemble the railcar without doing this... well all I can say is good luck!

With the railcar resting on its roof and the 12 screws removed the chassis can be lifted free of the body. Watch out for the headlight wires on both ends as you separate the chassis.

Don't forget to add some more passengers now that you've got the loco open!
I found it easiest to lower the body onto the chassis when re-assembling the railcar. You will need to fiddle with it a bit to get it lowered over the seats. Don't force it all the way down! There will undoubtably be some pinched wires! Carefully turn the railcar over so it is resting on its roof again. Then tease the headlight wires out so they are free. I used a pair of tweezers to do this. Also beware of the wires that pass through the bathroom compartment. Finally, make sure no wires get pinched between the 1st/2nd class compartment divider and chassis floor. You may need to raise the body slightly in order to tuck some wires away with your tweezers.
Now, before you put the screws back in, put the railcar on a test track and make sure everything is working to you satisfaction.
I did not want to needlessly open my railcar for these disassembly / re-assembly hints. If someone wants to add more pics and hints or observations to this thread please feel free. My ABe 4/4 I has been apart for various reasons 4 times in the twenty years I've had it. But, I did this post from memory
Edited to correct title from 2x37x to 2x39x!
Last edited:
-
6
-
2
- Show all


