So the latest project in my quest for a complete Battey World of Power. In truth the little LGB Railbuses are one of the best runners on Track Power due to their ability to keep all 4 Wheels on tha Track. But as I am going all Battery and had this in stock plus having a few others already up and running in DCC well battery it was.
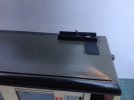
Here is the donor Railcar. It is a very old one, quite likely originaly from a 2 car set and has had some dodgy reworking in the past which included soldered Wires from the Lower Circuit Board to the motor and many other bodgy electrics to it. Just as well it was being fixed!

A quick test showed that the motor ran ok so no wories in that department other than a major clean up,of the excess oil on wheels, slidy bogie area's and gear boxes. Some people really do like to splash the wrong type of oil everywhere!
For those that have never pulled one of these to bits there is a bit of an order as in all things LGB. First to get the roof off a good push underneath through the door removes it leaving a circuit board in place which sits on the 4 wires that provide power from the lower circuit board through the 4 metal handrails to the top circuit board. Clever atuff LGB. Turning the beast over reveals the lower picture view.
To remove the cover over the motor the 4 Yellow Marked screws are removed. This reveals the motor that can be unplugged form the circuit board. Remember how it goes back, take a picture! The red marked screws remove the sideframe assembly and the green marked ones allow the ends with sub rood to be removed.

Here you can see the underbely after the Yellow Screws and cover have been removed. Below is another (Piggy Nosed ine) that has been chipped with a Dentz Chip showing where it is possible to mount things.

Below you can see Test Fitting Battery and all the other kit to make this work, all to be mounted under the roof. At this stage the poles to the roof board have not yet been clipped short. They have been to allow all this kit to sit without those poles trashing it all!
I have used a Fosworks Receiver (Rx-2H), Transmitter (Tx-2.1), Wiring Loom, Battery Pack (NiMh 3 long by 4 wide), (EDIT SORRY OF I HAVE MISLED YOU BATTERY PACK 4 WIDE BY 2 LONG) Cobra ESC-165 Speed Controller and a My Loco Sound Diesel Sound Unit with a small speaker. All seen above before fully and safely mounting below the roof.
Here is the donor Railcar. It is a very old one, quite likely originaly from a 2 car set and has had some dodgy reworking in the past which included soldered Wires from the Lower Circuit Board to the motor and many other bodgy electrics to it. Just as well it was being fixed!
A quick test showed that the motor ran ok so no wories in that department other than a major clean up,of the excess oil on wheels, slidy bogie area's and gear boxes. Some people really do like to splash the wrong type of oil everywhere!
For those that have never pulled one of these to bits there is a bit of an order as in all things LGB. First to get the roof off a good push underneath through the door removes it leaving a circuit board in place which sits on the 4 wires that provide power from the lower circuit board through the 4 metal handrails to the top circuit board. Clever atuff LGB. Turning the beast over reveals the lower picture view.
To remove the cover over the motor the 4 Yellow Marked screws are removed. This reveals the motor that can be unplugged form the circuit board. Remember how it goes back, take a picture! The red marked screws remove the sideframe assembly and the green marked ones allow the ends with sub rood to be removed.
Here you can see the underbely after the Yellow Screws and cover have been removed. Below is another (Piggy Nosed ine) that has been chipped with a Dentz Chip showing where it is possible to mount things.
Below you can see Test Fitting Battery and all the other kit to make this work, all to be mounted under the roof. At this stage the poles to the roof board have not yet been clipped short. They have been to allow all this kit to sit without those poles trashing it all!
I have used a Fosworks Receiver (Rx-2H), Transmitter (Tx-2.1), Wiring Loom, Battery Pack (NiMh 3 long by 4 wide), (EDIT SORRY OF I HAVE MISLED YOU BATTERY PACK 4 WIDE BY 2 LONG) Cobra ESC-165 Speed Controller and a My Loco Sound Diesel Sound Unit with a small speaker. All seen above before fully and safely mounting below the roof.
Last edited:


 Good job iy isn't a double-decker!


