DGE-Railroad
The Orchard Line
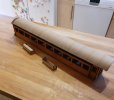
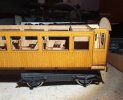
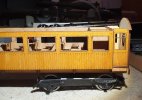
I've had the opportunity to build a Ken West Barnum Open Third coach kit. So thought I'd post a short progress log in case it's hekpful to anyone else thinking of buying or about to build one.
It's good practice for me too as I have a rather more detailed Hartford Products J&S coach to tackle at some point, so need all the practice i can get
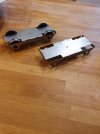
The kit came with optional bogies and Slaters wheels. The kit is well produced with no errors, nice clean cuts and everything already pinched out and bagged by category.
I used Titebond Original glue for the assembly. Some was squirted into a littlw glass ramekin and applied to the pieces with a small brush.
The instructuons are basic but sufficient to understand what to do. They are ordered and take you through the various sections with a diagram to show the pieces to be used for each section. It would be nice to have some assembly photos but what there is, explains what to do adequately.
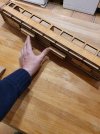
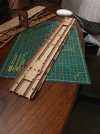
I dry-fitted the parts for each section before reassembling with glue. The fit tolerances are very close and it's worth checking the assembly process once first. A couple of times i needed to very lightly sand a few tabs on the chassis. Parts seemed slightly easier to assemble if the cut faces (the sides with the laser scorching) were put together, than the back faces.
The chassis:
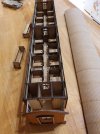
The interior
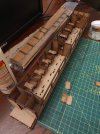
It's worth mentioning that the furniture has a 'detail' and a 'plain' side. Care should be taken to orient the pieces so the detailed side faces towards the middle, so that it can be seen.
It's good practice for me too as I have a rather more detailed Hartford Products J&S coach to tackle at some point, so need all the practice i can get
The kit came with optional bogies and Slaters wheels. The kit is well produced with no errors, nice clean cuts and everything already pinched out and bagged by category.
I used Titebond Original glue for the assembly. Some was squirted into a littlw glass ramekin and applied to the pieces with a small brush.
The instructuons are basic but sufficient to understand what to do. They are ordered and take you through the various sections with a diagram to show the pieces to be used for each section. It would be nice to have some assembly photos but what there is, explains what to do adequately.
I dry-fitted the parts for each section before reassembling with glue. The fit tolerances are very close and it's worth checking the assembly process once first. A couple of times i needed to very lightly sand a few tabs on the chassis. Parts seemed slightly easier to assemble if the cut faces (the sides with the laser scorching) were put together, than the back faces.
The chassis:

The interior

It's worth mentioning that the furniture has a 'detail' and a 'plain' side. Care should be taken to orient the pieces so the detailed side faces towards the middle, so that it can be seen.

