idlemarvel
Neither idle nor a marvel
I have a couple of U class locos, both models with LGB decoders factory fitted. I had fitted a Massoth S sound card to this one (22711) but CV programming is difficult when you have two decoders on the same address. You can turn the power to the motor decoder off by moving the 4-way switch in the cab to position 0, but you can't turn the power off to the S decoder. I have now fitted a switch so that I can turn the S decoder off when I want to program the motor decoder. While the loco was open I also fitted a manual volume control and painted a few details on the cab interior. Here's how I did it.
First to open the loco. With all LGB U-class it's the same procedure, undo 6 screws and lift the body off, being careful not the pull the wires. The first three pictures show where the screws are.
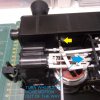
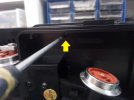
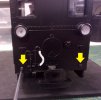
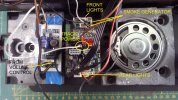
Unplug the front and rear light connections (black leads) and the rear multi-purpose socket connection (blue socket) and the smoke generator (black and white wires). My S decoder was connected by white and brown power cables to the track power pins on the LGB decoder. My plan was to put a switch online with the brown cable. I soldered a brown cable on one of the outer pins. The brown cable from the S decoder would now plug onto the middle pin and the switch would make or break the circuit.
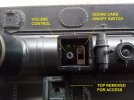
I used a glue-gun to fix the Massoth volume control, then a switch, into the square sand box, first having removed the top.
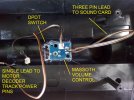
From above it looks like this. I trimmed a bit off the sand box cover lugs so that it came off more easily. Bit hard to get fingers around the volume control but there is a slot for e.g. a screwdriver blade in the knob.
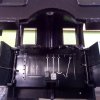
While the inside of the cab was accessible I painted a few details - pipes, handles, water gauge, etc.
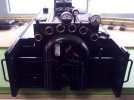
Now put the wires back as shown below.
Fit the body back on, being careful not to trap any wires. Be careful with the cab, make sure the doors are closed and the window frame properly positioned. Then refit the 6 screws removed earlier.
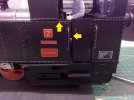
Job done. To program the sound card, turn the 4 way switch inside the cab to 0. To program the motor decoder set the 4 way switch back to 3 and turn the switch in the sand box off.
To enable the manual volume control you need to set the master volume on the S decoder (CV 200) to 255.
If you want to program the sound card on the main track, you can set a "private" POM (program on main) address using CV 107 and 108. I usually set it to the address of the loco + 200, so in this case loco is address 2 and the sound card only POM is 202. This is very useful so that any in-flight adjustments to the sound card don't inadvertently change a setting on the motor decoder.
First to open the loco. With all LGB U-class it's the same procedure, undo 6 screws and lift the body off, being careful not the pull the wires. The first three pictures show where the screws are.


Unplug the front and rear light connections (black leads) and the rear multi-purpose socket connection (blue socket) and the smoke generator (black and white wires). My S decoder was connected by white and brown power cables to the track power pins on the LGB decoder. My plan was to put a switch online with the brown cable. I soldered a brown cable on one of the outer pins. The brown cable from the S decoder would now plug onto the middle pin and the switch would make or break the circuit.
I used a glue-gun to fix the Massoth volume control, then a switch, into the square sand box, first having removed the top.

From above it looks like this. I trimmed a bit off the sand box cover lugs so that it came off more easily. Bit hard to get fingers around the volume control but there is a slot for e.g. a screwdriver blade in the knob.

While the inside of the cab was accessible I painted a few details - pipes, handles, water gauge, etc.


Now put the wires back as shown below.

Fit the body back on, being careful not to trap any wires. Be careful with the cab, make sure the doors are closed and the window frame properly positioned. Then refit the 6 screws removed earlier.

Job done. To program the sound card, turn the 4 way switch inside the cab to 0. To program the motor decoder set the 4 way switch back to 3 and turn the switch in the sand box off.
To enable the manual volume control you need to set the master volume on the S decoder (CV 200) to 255.
If you want to program the sound card on the main track, you can set a "private" POM (program on main) address using CV 107 and 108. I usually set it to the address of the loco + 200, so in this case loco is address 2 and the sound card only POM is 202. This is very useful so that any in-flight adjustments to the sound card don't inadvertently change a setting on the motor decoder.
