How to paint over a gap in materials?

FurkaSOCal

Registered
Country flag
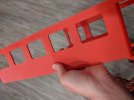
I am working on my first large 3D print project and it involves gluing a few sections together. In order to make it look like once seamless piece what is the best way to go about this? My plan is to use an aerosol primer/filler, sand that down to create a smooth surface over the imperfections of the 3D printed parts. Then I'm planning on spraying on a nice coat of matte automotive paint. I'm worried though that the initial filler layer wont be enough to hide the joint between the two pieces of 3D printed plastic. In woodworking I would use some sort of filler putty and then sand that down before painting. What is the best way to achieve this with plastic?
 

Attachments

  • IMG_20200411_194759.jpg
    IMG_20200411_194759.jpg
    227.7 KB · Views: 0
There are a lot of fine fillers availible out there. I use one called Milliput which comes as two sticks, one filler and one hardener. I think there are a couple of different grades availible. Another popular one is called Squadron. I think there are a couple of colours, as far as I've been able to figure out the different colours only exist to make it easier to spot on different backgrounds.

The filler primer will work well for the general surface finish on the 3D printed panels. Where I've butt jointed two flat panels I have chamfered the top edge of each panel slightly so there is more of a gap to fill and the filler is more likely to stick to the surface.
 
Great so basically what it sounds like is that I should treat it like a car and follow basically the same process. Thank you!
 

I would not use that, it makes no mention of use on plastics on the can.
If you can find it at an auto parts store look for the filler that is used for repairing plastic body panels, I have used it and it works very well.
I also use Miliput with great results.
 
Source a fine filler putty for modeling purposes. In the UK one of the better known is Squadron brand green putty. I do not know if it is available in the US or what the equivalent there would be. Automotive "skim" fillers are not dissimilar in application and texture. I used to use a Max Mayer product known as "Krylon", it is an acrylic filler. Max Mayer are a PPG big US (auto refinisher product) owned company. Max
 
A filled structural crack is prone to opening up under the relatively thin paint cover. I would create a recess for filler to sit in. Like a wide shallow V where the join is. The filler has more surface area to adhere to and is thicker where the join is.
 
I've found milliput to be somewhat brittle in places where there's stress or tension, especially where it's not thick, though others have not encountered that problem. You may be able to adjust the hardness/brittleness of any 2 part epoxy putty by the changing the ratio of the two parts it's made of, or maybe by adding a bit of plasticine to the mix(or so I've heard). I've preferred something called "procreate putty", which has more elasticity; it can endure some bending and return to it's shape unlike milliput, but is not as easy to sand.
 
Just a thought. If you are creating the files for these parts to be 3D printed could you instead of using butt joint, if that is what you are doing, re-engineer using lapp joints between the parts where possible. This will provide extra support for the joint and minimising risk of flexing and breakage. It will also provide a larger area that can be bonded resulting in less risk of any filler used cracking due to flexing in the jointed area. It may even result in residue plastic being formed at the joints surface, if you are using a solvent to join the parts, that will act as the "filler" that can be sanded back once it has cured. Max
 
Yep, I was going to say that, having filled a joint you are faced with the question of rubbing it down.

Fine ('scuse the pun) in theory, but you need the joint to be accessible, and make sure that you are not rubbing away detail features.

All easier said than done ;);)
 
Family forum etc!
Obviously. it's mostly used for reproduction of parts:
NEW-ProCreate-Putty-Sticks-Photo-Web-Res.jpg

Kraftmark Company
 
Just a thought. If you are creating the files for these parts to be 3D printed could you instead of using butt joint, if that is what you are doing, re-engineer using lapp joints between the parts where possible. This will provide extra support for the joint and minimising risk of flexing and breakage. It will also provide a larger area that can be bonded resulting in less risk of any filler used cracking due to flexing in the jointed area. It may even result in residue plastic being formed at the joints surface, if you are using a solvent to join the parts, that will act as the "filler" that can be sanded back once it has cured. Max
Yes there is a lap joint, additionally the entire length of the car will be spanned with a Plexiglas sheet that is recessed into the plastic which strengthens the car as a single unit and of course forms as the window panes. So the seam between each printed car section will be quite small. Thanks to everyone's suggestions I think it will be seamless once sanded down.
 
Back
Top Bottom