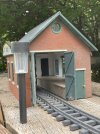
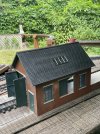
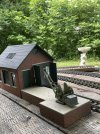
Fallowfield Road goods shed

Chris Vernell

Tortoise
24 Oct 2009
9,055
1,821
77
Nepean, ON
Country
Canada
Best answers
0
Country flag
I put the Thorley Miniatures goods shed aside for months while I attended to other things, but I have taken it up again in hope of having it ready for 2023 train season :blush:.

100_4321.JPG
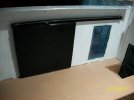
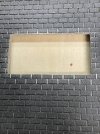
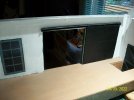
I decided I wanted to make the truck loading door a slider rather than the kit's hinged doors ...
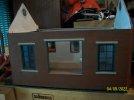
100_4323.JPG
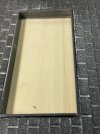
... which I had to trim to fit the opening and overdid it :oops: -- and I had to use the hinges for the crossing gates because I lost the hinges in the TM gate kit :oops: ...

100_4320.JPG
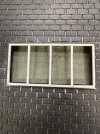
... so I found a 3D sliding door file online, made the door a bit wider and taller and the rail longer, and printed it.
100_4322.JPG
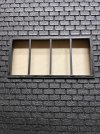
I've a few more guides and such to cut and place, and paint to spray on our next dry day, but I think it will work.
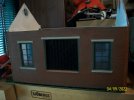
I plan to make an awning to go over the door as another part of making my shed look a bit different to the standard kit.
Once I have finished with the interior, I can fit the roof joists and the roof itself.
 

Chris Vernell

Tortoise
24 Oct 2009
9,055
1,821
77
Nepean, ON
Country
Canada
Best answers
0
Country flag
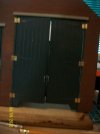
I also screwed up my courage to hinge the track doors -- although I see my hands were still shaking when I took the pic o_O

100_4324.JPG
I bought 1/8" 00-90 hexhead screws to replace the pins supplied in the kit, along with appropriate digital drill bits (you twist them with your fingers). To my surprise, I think I managed to get it right.

100_4326.JPG
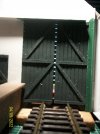
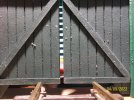
And then I realized that the doors as supplied won't clear LGB track :oops:

100_4327.JPG
A clearer view.

So, either I leave the doors open, or employ the Dremel cutting disc to trim the bottom of the doors. Option #2 is more likely. When my hands aren't shaking.
And yes, I shall paint the hinges.
 

dunnyrail

DOGS, Garden Railways, Steam Trains, Jive Dancing,
Staff member
GSC Moderator
25 Oct 2009
26,211
4,998
75
St.Neots Cambridgeshire UK
Best answers
0
Country flag
I also screwed up my courage to hinge the track doors -- although I see my hands were still shaking when I took the pic o_O

View attachment 303771
I bought 1/8" 00-90 hexhead screws to replace the pins supplied in the kit, along with appropriate digital drill bits (you twist them with your fingers). To my surprise, I think I managed to get it right.

View attachment 303772
And then I realized that the doors as supplied won't clear LGB track :oops:

View attachment 303773
A clearer view.

So, either I leave the doors open, or employ the Dremel cutting disc to trim the bottom of the doors. Option #2 is more likely. When my hands aren't shaking.
And yes, I shall paint the hinges.
Or you could put a base on the shed using perhaps Plastic Covered Foam board and paint to match the sides, look like a base of some sort.
 

JimmyB

Now retired - trains and fishing
23 Feb 2018
6,960
925
69
Weston-super-Mare
www.tumble-down-falls.co.uk
Best answers
0
Country flag
Or you could put a base on the shed using perhaps Plastic Covered Foam board and paint to match the sides, look like a base of some sort.
Yes, or as a concrete or brick base just under the walls expanding outwards should do the job.
 

Chris Vernell

Tortoise
24 Oct 2009
9,055
1,821
77
Nepean, ON
Country
Canada
Best answers
0
Country flag
Or you could put a base on the shed using perhaps Plastic Covered Foam board and paint to match the sides, look like a base of some sort.
Yes, I did think of that, but it would raise the loading dock too high for the wagons :worried:
 

PhilP

G Scale, 7/8th's, Electronics
5 Jun 2013
33,599
3,525
Nottingham
Best answers
0
Country flag
I reckon a railway would just hack a rectangular lump out of each door?
Perhaps, with a crude hinged flap, they could drop down, to keep the worst of the weather out?

PhilP
 

Chris Vernell

Tortoise
24 Oct 2009
9,055
1,821
77
Nepean, ON
Country
Canada
Best answers
0
Country flag
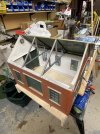
While the washing machine was doing the work, I cut a skylight opening in the goods she roof over the loading dock. Now I have to find clear material to fill it; I know I have it somewhere.

IMG_0115.jpeg
 

Chris Vernell

Tortoise
24 Oct 2009
9,055
1,821
77
Nepean, ON
Country
Canada
Best answers
0
Country flag
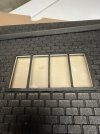
Framed in the skylight. Will rattle-can it before installing “glass”.

IMG_0134.jpegIMG_0138.jpeg
Messrs Rhino and Madman will probably be professionally appalled, but my clumsy fingers don’t do fine motor skills.
 

Paul M

Registered
25 Oct 2016
11,912
1,699
61
Royston
Best answers
0
Country flag
Looks good to me
 

Chris Vernell

Tortoise
24 Oct 2009
9,055
1,821
77
Nepean, ON
Country
Canada
Best answers
0
Country flag
Spritzed, will need touchups later
IMG_0139.jpeg
 

Chris Vernell

Tortoise
24 Oct 2009
9,055
1,821
77
Nepean, ON
Country
Canada
Best answers
0
Country flag
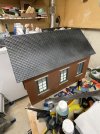
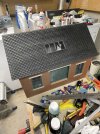
Half the roof in place:

IMG_0141.jpegIMG_0140.jpeg
I will wait for the adhesive to cure before installing the other half.
Which has had the skylight “glazed”:
IMG_0142.jpeg
 

Chris Vernell

Tortoise
24 Oct 2009
9,055
1,821
77
Nepean, ON
Country
Canada
Best answers
0
Country flag
Second slab of roof glued in place.

IMG_0143.jpeg
Skylight nice and clear — until the pigeons land.
 

Chris Vernell

Tortoise
24 Oct 2009
9,055
1,821
77
Nepean, ON
Country
Canada
Best answers
0
Country flag
She’s finally in place:

IMG_0151.jpeg
After the trouble I took to cut out the bottom edge of the doors to clear the track, I found that what works on a nice flat workbench is not enough outdoors where the siding is raised on the edge of a cupped plank. :banghead:
IMG_0153.jpegIMG_0154.jpeg
Oh well, I can raise the whole thing about 4 mm, or I can simply leave the doors open
 
  • Like
Reactions: 1 users