TheGlenhillsRailway
Registered
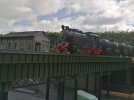
Is this a good print as was going to get one ?
Mike's had some success with his - look at his green girder bridge on Lazy Grange BayIs this a good print as was going to get one ?

Thank you,Mike's had some success with his - look at his green girder bridge on Lazy Grange Bay

Thalooks good
I guess it depends on your skill levels, this really was a test piece to see how difficult it was to use a CAD program, as I had not done so before. I agree, you have to 'plan' what you want to create but then you do with plasicard the same.Thanks!
I had not realised it was that deep?
Of course, you had to create the drawings / files first.. But I guess using Slaters letters and Plasticard, would have taken a similar time to that it took to print?
I'll have to think about thatOne question, is using 3d printed parts still considered 'scratch building'?
Dave


Well, it's OK for a scratchbuilder to use a lathe, for example, so a 3-D printer is just another tool in the box n'est-ce-pas?One question, is using 3d printed parts still considered 'scratch building'?
Dave
One question, is using 3d printed parts still considered 'scratch building'?
Dave
")
in a way yes as you have to design the part you want from scratchI guess it depends on your skill levels, this really was a test piece to see how difficult it was to use a CAD program, as I had not done so before. I agree, you have to 'plan' what you want to create but then you do with plasicard the same.
I think that once you have your printer set up, I have printed a few mods, download from 'thingiverse' to improve it. For me , one big improvement was to print the side extension bracket and move the filament real down to the side. I did ruin a big print when the filament jammed , the machine still followed the program but there was no filament to print, when I released the trapped filament, it did not bond to what was below and so the print was spoiled. I have also printed the roller spindle, which relies on 2 x 6 mm roller bearings so the spool rolls , before it did a 'bunny hop' as the filament was drawn in, I really think this has improved the finished article. I have also marked the front of the levelling wheels as occasionally they can move while cleaning the plate and spoil the print, simple things but worth the effort.
Your slicer program is your best friend, time spent with that can make a much better print, then the printer is just ready to go.
Will post some of the other bits I have printed, later
One question, is using 3d printed parts still considered 'scratch building'?
Dave