David1226
Registered
Part 1 of 3
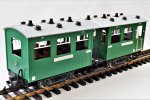
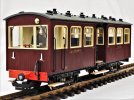
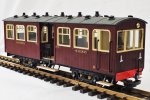
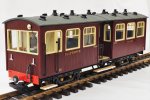
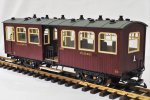
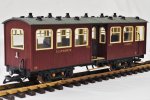
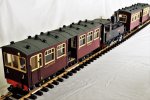
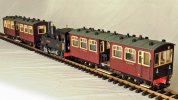
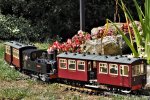
When creating the passenger coaches for the Claptowte Railway I tried to vary the appearance of the coaches, as far as possible, in a typical small narrow gauge railway style. Having created various bogie coaches, some by joining two LGB Toy Train 4-wheel vehicles back to back, I decided with the last coach that I built, to mount the bodies nose to nose, to create a centre balcony, to further ring the changes in style/appearance. That was coach No 15, the First Class Observation Coach. It had been intended that coach No15 was to be the last coach to be built for the line, but you know what they say about ‘never say never again’.
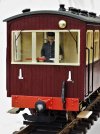
Having completed coach No 15, with its open style interior and panoramic windows, I thought it would be nice to do a conventional centre balcony Third class and/or First/Third class coach, with framed windows and ordinary seating, to again ring the changes. While my heart said ‘yes’, my head said ‘no’, as I did not need and could not justify the extra stock. Having mused on this for some time, it eventually occurred to me that with the centre balcony, I could create a driving cab at one end of the coach and turn it into an auto-trailer, moreover if I built two, an all Third and a First/Third, I could end up with two new designs and, run at either end of a locomotive, would create a short, self contained, push/pull train. That was an idea that appealed. With that in mind, two pairs of LGB Toy Train 4-wheel coaches and two pairs of LGB Jackson Sharp bogies were acquired. Plans were then put on hold for a long time while I got on with and completed other projects. The day eventually arrived when the auto-trailers came to the top of the ‘to do list’.
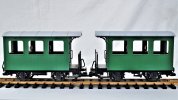
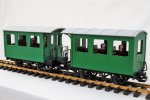
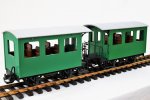
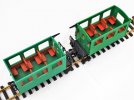
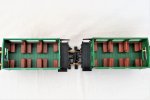
The first stage is to dismantle the two 4-wheel coaches. Having done that the new underframe is constructed using the frames of the two 4-wheelers. First the balcony ends are prepared for modification by removing the railings, brake stands, brake hoses and footsteps. The centres of the frames are then modified as below
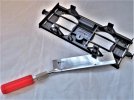
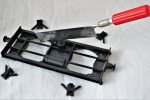
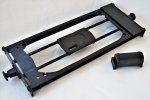
The ends are then prepared as shown below.
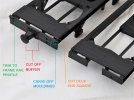
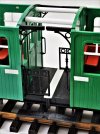
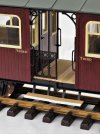
The buffer beams are drilled to accept bolts, each side, so that once the two ends are glued together, nuts and bolts can be added to add strength to the join. A strip of plasticard, of appropriate thickness, is then glued into the gap in the top decking. This is then scribed to match the planking/grain of the decking. The balcony steps are then screwed back on. An off-cut of plasticard is glued below the steps to span the gap. An off-cut of a spare step is then glued into the gap, fitting over the top of the plasticard to make one long step.
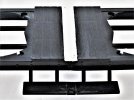
A spare set of steps (left over from previous conversions) were fitted at the cab end, below where the driver’s door will be.
Plasticard mounts were created, together with tube pivot, to mount the bogies. The bogies were fitted with Al Kramer bright nickel plated solid turned brass wheels, imported from the US. These give a very low centre of gravity. The brake hoses are refitted to the buffer beams at each end of the new bogie underframe.
One last addition to the undergear was to add a plasticard guard iron to the cab end bogie. I had to do it this way as there would have been insufficient clearance if I had attempted to fit something to the buffer beam.
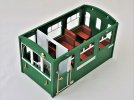
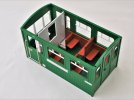
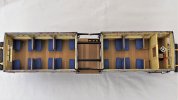
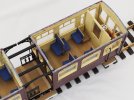
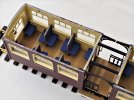
The next thing to tackle is the modifications to the two 4-wheel bodies that will form the front and rear compartments of the coach. First the seat units are removed to be modified. For the rear compartment the only modification to the seats is to reduce the height of the back rests in the centre pair.
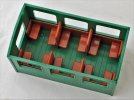
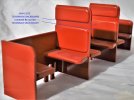
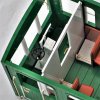
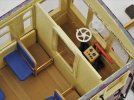
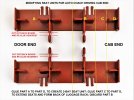
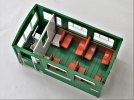
For the front compartment, the seat unit needs to be reduced in length to accommodate the driver’s cab. To fill in the gap between the front seats and the driver’s cab, a luggage rack is created on each side of the compartment, as shown below.
David
When creating the passenger coaches for the Claptowte Railway I tried to vary the appearance of the coaches, as far as possible, in a typical small narrow gauge railway style. Having created various bogie coaches, some by joining two LGB Toy Train 4-wheel vehicles back to back, I decided with the last coach that I built, to mount the bodies nose to nose, to create a centre balcony, to further ring the changes in style/appearance. That was coach No 15, the First Class Observation Coach. It had been intended that coach No15 was to be the last coach to be built for the line, but you know what they say about ‘never say never again’.
Having completed coach No 15, with its open style interior and panoramic windows, I thought it would be nice to do a conventional centre balcony Third class and/or First/Third class coach, with framed windows and ordinary seating, to again ring the changes. While my heart said ‘yes’, my head said ‘no’, as I did not need and could not justify the extra stock. Having mused on this for some time, it eventually occurred to me that with the centre balcony, I could create a driving cab at one end of the coach and turn it into an auto-trailer, moreover if I built two, an all Third and a First/Third, I could end up with two new designs and, run at either end of a locomotive, would create a short, self contained, push/pull train. That was an idea that appealed. With that in mind, two pairs of LGB Toy Train 4-wheel coaches and two pairs of LGB Jackson Sharp bogies were acquired. Plans were then put on hold for a long time while I got on with and completed other projects. The day eventually arrived when the auto-trailers came to the top of the ‘to do list’.


The first stage is to dismantle the two 4-wheel coaches. Having done that the new underframe is constructed using the frames of the two 4-wheelers. First the balcony ends are prepared for modification by removing the railings, brake stands, brake hoses and footsteps. The centres of the frames are then modified as below


The ends are then prepared as shown below.

The buffer beams are drilled to accept bolts, each side, so that once the two ends are glued together, nuts and bolts can be added to add strength to the join. A strip of plasticard, of appropriate thickness, is then glued into the gap in the top decking. This is then scribed to match the planking/grain of the decking. The balcony steps are then screwed back on. An off-cut of plasticard is glued below the steps to span the gap. An off-cut of a spare step is then glued into the gap, fitting over the top of the plasticard to make one long step.

A spare set of steps (left over from previous conversions) were fitted at the cab end, below where the driver’s door will be.
Plasticard mounts were created, together with tube pivot, to mount the bogies. The bogies were fitted with Al Kramer bright nickel plated solid turned brass wheels, imported from the US. These give a very low centre of gravity. The brake hoses are refitted to the buffer beams at each end of the new bogie underframe.
One last addition to the undergear was to add a plasticard guard iron to the cab end bogie. I had to do it this way as there would have been insufficient clearance if I had attempted to fit something to the buffer beam.
The next thing to tackle is the modifications to the two 4-wheel bodies that will form the front and rear compartments of the coach. First the seat units are removed to be modified. For the rear compartment the only modification to the seats is to reduce the height of the back rests in the centre pair.


For the front compartment, the seat unit needs to be reduced in length to accommodate the driver’s cab. To fill in the gap between the front seats and the driver’s cab, a luggage rack is created on each side of the compartment, as shown below.


David

