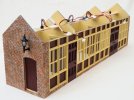
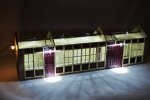
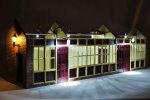
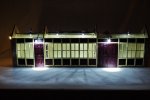
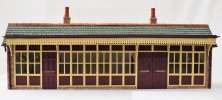
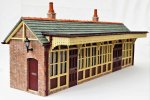
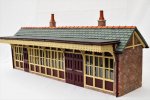
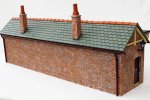
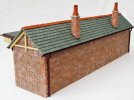
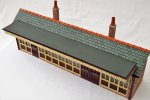
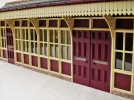
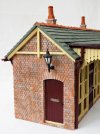
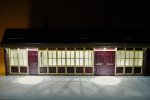
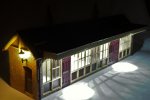
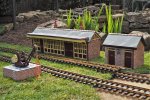
Claptowte Railway - Gernise End Station Building

David1226

Registered
24 Oct 2009
7,889
7,897
74
Abingdon, Oxfordshire
Country
United-States
Best answers
0
Country flag
Part 1

Christmas 2020, Father Christmas was kind enough to deliver a number of cast resin buildings for the Claptowte Railway, including a Kippo Models Station Building and Toilet Block. I had not previously had any experience of putting together resin building kits, so it was logical that I start with the smallest and simplest, this being the Toilet Block. As this was the first resin cast building that I had assembled, it was to be my test piece. Having gained some knowledge and experience from that kit, I decided to tackle the much larger and more complex station building.

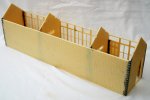
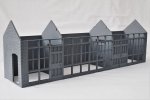
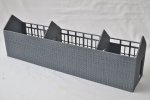
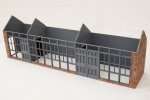
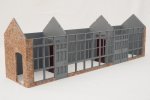
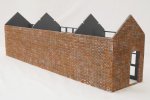
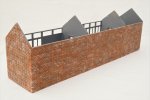
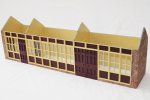
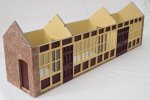
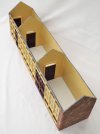
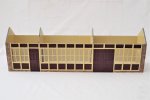
As with the Toilet Block, the first task was to clean up the various component parts to remove any flash from the resin casting process, I set about them with files and abrasive paper then everything was given a good wash in soapy water to clean off any mould release agent. I had to give some thought to how much assembly could be undertaken without the need to paint various parts first. I decided that I would start by assembling the bare shell of the building first, comprising the front, rear, two end and two partition walls. Copying the instructions and advice from the Toilet block construction, the parts were glued together using Gorilla Superglue. I then worked some Unibond repair metal into the brickwork interlocking corner joints which were scribed and filed to match. I also ran some Unibond down the inside corners, including the partition walls, in order to reinforce the bonds.

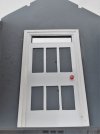
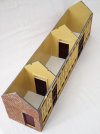
Even at this early stage, I worked in a couple of alterations to suit my needs. The three doors at the front and the two doors in the partition walls of the building were without doorknobs. I made some up out of some 2.5mm mains cable and insulation and added them at this stage. My other modification was to file two slots in the top of each of the top edges of the partition walls in anticipation of adding internal lighting at some stage and therefore the need to facilitate the wiring.
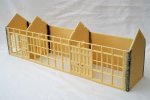
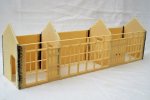
dig 210116001.JPG

dig 210116002.JPG

dig 210116003.JPG


The bare skeleton of the building primed ready for painting
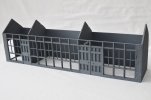
dig 210117001.JPG

dig 210117002.JPG

dig 210117003.JPG

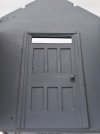
Having primed the bare walls of my Kippo Station Building for the Claptowte Railway I had decided that the next step would be to paint it. Although I do not necessarily intend to add much in the way of interior detail, at least not in the short term, one glaring omission stood out to me, and that was the fact that the interior walls had a door moulding on one side only. I decided that they needed the depiction of a doorway on both sides to make any sense of the interior. I set about creating doors on 'the other side' of the walls, using thin plasticard sheet. The doors /frames did not need to be as detailed as the original moulding as they would be largely obscured once the building is complete, so a simple representation of a panelled door would suffice. The door knobs were represented by the same 2.5mm wire/insulation as mentioned previously.

The original moulded door and frame.
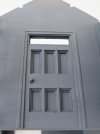
dig 210118001.JPG

The reverse side of the wall before adding the other side of the door.
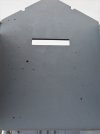
dig 210118002.JPG

The plasticard door added.

dig 210118003.JPG

The plasticard door added and primed

dig 210118004.JPG

The interior with the new doors fitted
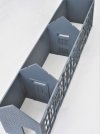
dig 210119001.JPG

The remainder of the building components, cleaned up and primed, ready for painting.
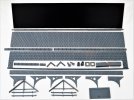
dig 210119002.JPG


David
 
  • Like
Reactions: 1 user

David1226

Registered
24 Oct 2009
7,889
7,897
74
Abingdon, Oxfordshire
Country
United-States
Best answers
0
Country flag
Part 2

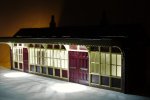
With regard to painting the brickwork, my intention was to attempt to replicate the appearance of the brick paper that I used on the scratch built items for the Claptowte Railway. This was the second resin kit that I had attempted to paint. The method that I used was to treat the overall spray grey plastic primer as the mortar colour. The raised texture of the bricks was painted by means of a sponge wiped across the raised textured surface of the bricks using different colours and gently dabbing and blending. The odd bit of detail colour was applied with a paintbrush. I bought some white sponge wedges used for applying and blending makeup, £6 for forty from Amazon. I cut a wedge in half as half a wedge was big enough, and I only used three wedges to paint all four buildings. For first attempts at painting brickwork I was pleased with the outcome, I feel that I managed to capture the feel of the brick paper, even thought the paint came out a little darker.
dig 210211005.JPG

dig 210211006.JPG

dig 210211007.JPG

dig 210211008.JPG

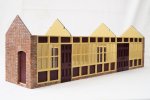
The shell of the building has been completed with both the inside and outside having been painted and the glazing installed. To recap, internal doors have been added where none were present. The only other addition, so far, has been to substitute the thin clear glazing material, supplied with the Kippo Models kit, with 1.5mm polycarbonate sheet for extra strength and rigidity. The clear sheet comes with protective film on both surfaces. I cut across the film on the side that I wanted to paint and removed the protective film where the paint was to be applied. I sprayed the area with grey plastic primer before brush painting the colour. When dry, the remaining protective film was removed from both sides. The glazed and painted panels were thus installed in one go.

dig 210216001.JPG

dig 210216002.JPG

dig 210216003.JPG

dig 210216004.JPG

dig 210216005.JPG

dig 210216006.JPG

David
 
  • Like
Reactions: 1 user

David1226

Registered
24 Oct 2009
7,889
7,897
74
Abingdon, Oxfordshire
Country
United-States
Best answers
0
Country flag
Part 3

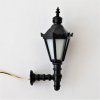
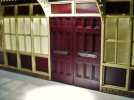
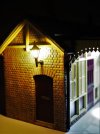
Before adding the roof and platform canopy I decided to add some internal and external lights to the building. I added an outside lamp to the end wall above the door. This was the same as the lamp used on the front of the Toilet Block, a 3 Volt LED lamp purchased from China, via eBay.
dig 210220001.JPG


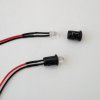
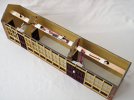
For the internal lighting I used 5mm clear white 3 Volt LED bulbs, again sourced from China, via eBay. The lights came with connecting wires attached and supplied with bulb holders to secure them.

dig 210220002.JPG


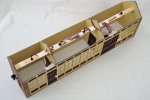
I glued in 3mm plywood struts, along the centre line of the building, and drilled them to take the bulb holders, one in each end room and two in the larger centre room. The wiring for the lights was also taped to these struts.

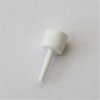
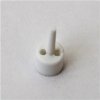
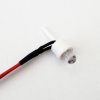
I was looking for a means of locating some lamps on the outside of the building located to shine down from the underside of the platform canopy. I was concerned that the bulb holders supplied with the LEDs might be too deep. A couple of days after my Birthday I noticed a Birthday Cake Candle Holder on a kitchen worktop. It proved to be ideal for my needs. I drilled two holes in the base, to take the bulb wires. The LED was a perfect fit. The spigot on the candle holder can then be trimmed to an appropriate length to be glued into a hole on the underside of the canopy roof.

dig 210220003.JPG

dig 210220004.JPG

dig 210220005.JPG

dig 210220006.JPG

dig 210220007.JPG

dig 210220008.JPG


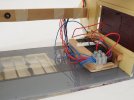
The wires for all seven lamps were wired to a switchable 2 x AA battery holder, held in a cradle with a movable securing arm, to facilitate battery changes.
dig 210220009.JPG

dig 210220010.JPG

dig 210220011.JPG

dig 210220013.JPG

dig 210220014.JPG


David
 
  • Like
Reactions: 1 user

David1226

Registered
24 Oct 2009
7,889
7,897
74
Abingdon, Oxfordshire
Country
United-States
Best answers
0
Country flag
Part 4

Having installed the lighting, the remainder of the kit was assembled as per the instructions, although not necessarily in the same order. The chimney stacks, chimney, guttering, downpipes and facia boards were all painted before assembly. The ends of the canopy and front valance had holes delineated as part of the ornamentation. To improve the appearance, I drilled out all of the holes, a bit of a labour of love, before the parts were painted. The larger holes in the canopy support brackets were similarly cleaned up to remove any flash from casting.
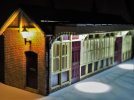
The next parts to actually be assembled were the roof, including the ridge tiles. This was then painted. Before priming the roof sections, I had attacked some of the tiles with a scalpel and file to give the appearance of a few cracked or broken tiles. When the roof was dry the canopy was assembled, comprising the pre-painted canopy ends, support brackets and front valance. The canopy roof has to be cut to size from a piece of Foamex Board supplied with the kit. Once the canopy roof was glued in the top surface was painted.

When the canopy roof was dry, the remainder of the pre-painted fittings were glued on, the various sections of guttering, down pipes and facia ends. One apparent omission in the kit was the lack of a downpipe from the canopy roof guttering down to the guttering on the eaves of the building roof. I rectified this by fabricating two short sections of downpipe from some plastic tube. The two LED lights over the doorways were glued to the underside of the canopy roof.

Having assembled the chimney sacks and pots, these were glued to the roof. To cover the noticeable join, where the brick stack meets the tiles, I cut and attached some narrow strips of masking tape to represent lead flashing. Before painting the tape, I applied a couple of coats of white PVA glue, to seal it.

The last addition to the kit was to glue on some Pendle Valley Workshops brass signs to the doors, to complete the model.

dig 210224005 - Copy.JPG

dig 210224001.JPG

dig 210224002.JPG

dig 210224003.JPG

dig 210224004.JPG

dig 210224006.JPG

dig 210224007.JPG

dig 210224008.JPG

dig 210224009.JPG

dig 210224010.JPG

dig 210224011.JPG

dig 210224012.JPG

dig 210224013.JPG

dig 210224014.JPG


David
 
  • Like
Reactions: 1 user

DGE-Railroad

The Orchard Line
26 Jan 2020
607
89
52
United Kingdom
Best answers
0
Country flag
Absolutely beautiful work David.. You've managed to lift Eddy's fabulous model to new heights with your skill and attention to detail.

Could I ask whether you would mind outlining the paints/colours you chose for your build here, if you have a chance? It'd be incredibly useful to know as they look perfect
Darren
 

David1226

Registered
24 Oct 2009
7,889
7,897
74
Abingdon, Oxfordshire
Country
United-States
Best answers
0
Country flag
Absolutely beautiful work David.. You've managed to lift Eddy's fabulous model to new heights with your skill and attention to detail.

Could I ask whether you would mind outlining the paints/colours you chose for your build here, if you have a chance? It'd be incredibly useful to know as they look perfect
Darren
Darren

All of the paints used are enamels. The interior walls, all of the window frames, the facia boards and canopy where all done in the Claptowte Railway corporate colour of BR Coach Cream (Custard) P117 (Satin) by Phoenix Precision Paints. The internal and external doors, guttering and panelling are all in the Claptowte Railway corporate colour of BR Maroon P108 (Satin) by Phoenix Precision Paints. Obviously there are other manufacturers who do these colours. The roof was done with Humbrol 31 Matt Slate Grey. Individual tiles picked out in the same shade but darkened slightly with a touch of Matt Black. For the chimney pots and ridge tiles I used an old colour that I have had around for about 35 years, Humbrol Matt Facings Orange MV11, from their military uniform range. I do not know if they still produce that range. I did order some Humbrol 46 Matt Orange, but that was much too light, don't use it. I am guessing, if buying new, you would have to use something like Terracotta from the Phoenix range or something similar. For the canopy roof, I used another Claptowte Railway corporate colour that I use on all rolling stock, passenger and freight, Phoenix Precision Paints BR Roof Grey P131 (matt), really only because I had it to hand, any shade of dark grey would do.

For the brickwork, I used a mixture of the orange mentioned above, with another old Humbrol shade from their military range, British Grey MC4. Here again I ordered some Humbrol Matt Light Grey 147, but that was also too light for my needs. Both of these colours were mixed with a touch of matt black or matt white, here and there, to vary the shades. Obviously brickwork colour is subjective as it comes in all sorts of colours and degrees of weathering, so it comes down to a matter of personal choice. I was aiming to try and replicate the colour and texture of the 1/24 scale embossed textured brick paper that I had used in the construction of the Yard Crane, Goods Loading Dock and the Cattle Loading Dock that I had previously scratch built, again for continuity of appearance. With the Kippo Models Station and Toilet Block I am happy that I managed to attain a fairly close match, albeit slightly darker than the brick paper. As this was my first ever attempt at painting brickwork, I am over the moon with the result. I would refer you to the second YouTube video in my thread on building and painting the Kippo Models Toilet Block, in which Eddie Williams specifies some of the colours that he uses to paint his models. Here is is link to the Toilet Block
Claptowte Railway - Gernise End Toilet Block

For painting brickwork, I suggest you have a look though the thread by mike on the construction of Lazy Grange Bay III, it's a long thread but littered with some brilliant examples of brickwork.

I hope this helps.

David
 
  • Like
Reactions: 1 user

DGE-Railroad

The Orchard Line
26 Jan 2020
607
89
52
United Kingdom
Best answers
0
Country flag
Thanks very much indeed David - more than I could have wished for. Thanks for taking the time to share this. It certainly helps someone like me just starting out :)
 

David1226

Registered
24 Oct 2009
7,889
7,897
74
Abingdon, Oxfordshire
Country
United-States
Best answers
0
Country flag
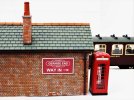
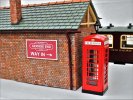
A small new embellishment, a sign on the otherwise blank rear wall of the building. I drew the sign using Microsoft Paint and printed it on card. The backing and frame are white plasticard which I did not bother to paint as there is so little of it showing. I did not worry about waterproofing the sign as the station is intended for indoor use only. I did stick the card on using silicone glue so, in theory, it should be possible to peel off a faded/damaged sign and replace it in the future.

dig 210310001.JPG

dig 210310002.JPG
 
  • Like
Reactions: 1 user

David1226

Registered
24 Oct 2009
7,889
7,897
74
Abingdon, Oxfordshire
Country
United-States
Best answers
0
Country flag
The Gernise End Station building and toilet block have some fresh air in the garden, 18.4.2021

P4180008.JPG

David