David1226
Registered
Part 1
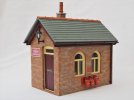
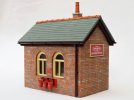
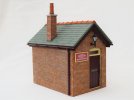
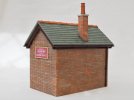
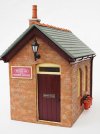
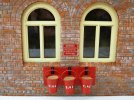
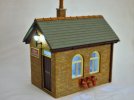
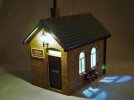
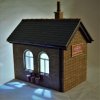
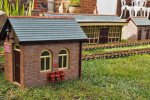
Having previously built a couple of Kippo Models G Scale cast resin buildings, I have been impressed by their quality and simplicity of construction and the amount of detail that goes into the kits. Several of the parts are modular and appear in more than one kit. There are several versions of a basic line side building and I opted for the version with double arched windows in one wall and a door in the gable end wall. I decided to obtain one of these and build it as a Goods Office for Gernise End Station, to complement the various goods handling facilities.
As with similar kits I had to start by cleaning up the component parts to remove any moulding flash. This was achieved by scalpel, files and wet or dry paper. All the parts were then given a good wash to remove any dust or mould release agent.
The wall mouldings are designed so that the courses of bricks interlock where they meet at the corners of the building. A little bit of additional filing can be required to achieve a near perfect fit. I say near perfect as there will still be gaps here and there. Having used superglue to assemble the walls, Kippo Models suggest the use of car body filler pushed into the joins, which can then be sanded and scribed. This is the method that I used on the two previous Kippo models that I have built, the Station Building and the Toilet Block. The car body filler is very smelly to use and I always have difficulty judging the correct amount of hardener to use, thus it takes a long time to set.
For this model I searched for an alternative. Having superglued the walls together and filed down any overhanging or protruding bricks flush with the surface of the wall (most of them actually), I used DIY grab adhesive, the type that I have previously used to glue skirting boards to walls. A small amount on the end of a finger can be rubbed into any gaps to obtain a smooth joint. Grab adhesive does shrink slightly as it dries, so you may need a couple of applications in places. Before the filler was completely set, I used a point (an old dart) to re-scribe the mortar joints on the corners. I also ran some grab adhesive along the internal corners for extra strength. It does the job with no mixing and no smell but do remember to wipe your finger before you pick your nose.
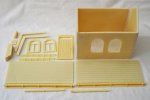
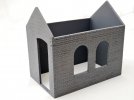
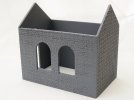
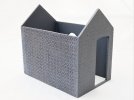
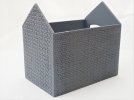
The assembled walls with corner joints filed and filed, ready for a coat of primer.
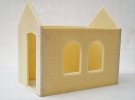
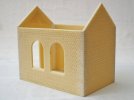
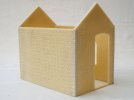
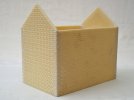
The shell of the building, primed and ready for painting.
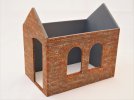
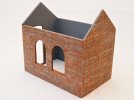
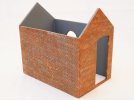
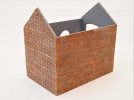
The painting of the brickwork was carried out in the same way that I had painted previous resin kit buildings. The method that I used was to treat the overall grey plastic primer as the mortar colour. The raised texture of the bricks was painted by means of a sponge wiped across the raised textured surface of the bricks using different colours and gently dabbing and blending. I used some white sponge wedges, intended for applying and blending makeup, £6 for forty from Amazon. I cut a wedge in half as half a wedge was big enough. The odd bit of detail colour was picked out with a paintbrush.
David
Having previously built a couple of Kippo Models G Scale cast resin buildings, I have been impressed by their quality and simplicity of construction and the amount of detail that goes into the kits. Several of the parts are modular and appear in more than one kit. There are several versions of a basic line side building and I opted for the version with double arched windows in one wall and a door in the gable end wall. I decided to obtain one of these and build it as a Goods Office for Gernise End Station, to complement the various goods handling facilities.
As with similar kits I had to start by cleaning up the component parts to remove any moulding flash. This was achieved by scalpel, files and wet or dry paper. All the parts were then given a good wash to remove any dust or mould release agent.
The wall mouldings are designed so that the courses of bricks interlock where they meet at the corners of the building. A little bit of additional filing can be required to achieve a near perfect fit. I say near perfect as there will still be gaps here and there. Having used superglue to assemble the walls, Kippo Models suggest the use of car body filler pushed into the joins, which can then be sanded and scribed. This is the method that I used on the two previous Kippo models that I have built, the Station Building and the Toilet Block. The car body filler is very smelly to use and I always have difficulty judging the correct amount of hardener to use, thus it takes a long time to set.
For this model I searched for an alternative. Having superglued the walls together and filed down any overhanging or protruding bricks flush with the surface of the wall (most of them actually), I used DIY grab adhesive, the type that I have previously used to glue skirting boards to walls. A small amount on the end of a finger can be rubbed into any gaps to obtain a smooth joint. Grab adhesive does shrink slightly as it dries, so you may need a couple of applications in places. Before the filler was completely set, I used a point (an old dart) to re-scribe the mortar joints on the corners. I also ran some grab adhesive along the internal corners for extra strength. It does the job with no mixing and no smell but do remember to wipe your finger before you pick your nose.

The assembled walls with corner joints filed and filed, ready for a coat of primer.


The shell of the building, primed and ready for painting.


The painting of the brickwork was carried out in the same way that I had painted previous resin kit buildings. The method that I used was to treat the overall grey plastic primer as the mortar colour. The raised texture of the bricks was painted by means of a sponge wiped across the raised textured surface of the bricks using different colours and gently dabbing and blending. I used some white sponge wedges, intended for applying and blending makeup, £6 for forty from Amazon. I cut a wedge in half as half a wedge was big enough. The odd bit of detail colour was picked out with a paintbrush.


David

